Showing posts with label silhouette. Show all posts

Tuesday, 5 October 2021

Wildlife By The River Of Creativity


     I'm trying something different for this month's River Of Creativity, we may be a multi craft challenge but that doesn't mean you can't enter with a card project. So if you are making your Christmas cards you can join us as long as it has a wild animal on it.
     This trio started as a splodge background using Distress Oxides. I like making a few of these splodge backgrounds in a nice long, messy play session, no two are ever the same, even when using the same colours.
     To add a little sparkle to the background I used pearl mica water instead of just water when spritzing the inks, I have found that this means I can tip the stamp platform around mixing up the inks with no need for a brayer. You do need a heavy weight card so it doesn't buckle when wet or better still watercolour card, although that can be harder to stamp on than smooth.

     Tartan seems to be popular this year so I searched through my stash and found one that picked out the ink colours perfectly, more by luck than judgement. 
      I stamped with Versafine Black using Lavinia Stamps deer and trees, the beauty of a stamp platform is silhouettes are no longer hit and miss, these images were stamped three times to get a nice dark coverage.
      When I cut mat layers I am very frugal, why use a complete layer when a wide border will do, I can keep the inners for another project.

     Although each card has a similar background I wanted them to be noticeably different. The first one was cut as a stitch dot square, mounted on a thin black mat, then on top of the tartan layer using foam tape, with the tartan flush to the card. To finish off I used a white gel pen to add highlights, mixed results with this, then a few tiny silver peel off stars.
     The second one I cut with a stitch dot circle, matted on a black layer with foam onto the tartan layer that was die cut in the corners with a snowflake pattern. To keep the curve element I used a corner punch on both the tartan and the card blank.
     I have been admiring the eclipse cards popping up in blogland so decided to give it a try. The main panel was again cut with the stitch dot square but then die cut with a bauble die. I then cut four plain card layers with the same bauble and stuck them together to make a thick mat. I wanted to add a little sparkle so I coloured the edge of this thick mat with a silver Sharpie, followed by a silver glitter gel pen, then I stuck the top layer on.
      As the bauble was raised I chose to mat and layer all the other pieces without any foam tape. This image has a small Father Christmas and reindeer stamped in the sky and to finish it off I used a white Posca pen to add the snowfall.
      All three cards are 7x7 inches so will either be a large letter or hand delivered. It was challenging to make them all appear different while using the same stash and it adds three cards to the box ready for December.
      Please come and join us at River of Creativity with anything you have made, including cards, that features wildlife. 

I would like to enter these cards in the following challenges:
Christmas Crafts All Year 'Round - Something beginning with S or T
Sparkles Christmas - #129 Flora / Fauna
CraftyHazelnut's Christmas - #152 Anything Christmas
The Holly and Ivy - #102 Anything Christmas
Merry Little Christmas - #39 Anything Christmas
Peace On Earth Christmas - #1 Anything Christmas


Wednesday, 1 September 2021

Autumn Hare


     The new challenge has started over at The Paper Funday, this month it's an Autumn theme.
     This started life as an experiment with a mixed media plate and some dye inks, I can't remember which inks as it was a few months ago. I make several of these pieces and keep them handy for backgrounds on future projects.
     The Lavinia Stamps silhouettes really make a great picture on this type of background, especially for me as my colouring in isn't all that good. I stamped the branch, fairy and hare in Versafine black ink a few days ago and left it to one side. After looking at it again I realised all it needed was a few autumnal falling leaves, these were stamped in Distress Oxides.
     The hardest part was then to find mat layers that would pick out the colour of the leaves. I found a pearl orange, a mid brown and an antique gold to use before finally putting it on a kraft card blank. It has no greeting so it can be used for a nice little 'hello, how are you?' card.
     The Paper Funday accept any project that fits the theme as long as it's made with card or paper, it doesn't have to be a greeting card, it could be a gift box or a scrap layout, whatever it is we'd love to see it.

I would like to enter this card in the following challenges:
Sweet Stampin' - Lots Of Layers
Gem Of A Craft - #18 Anything Goes
Use Your Stuff - #430 Anything Goes
Crafting Happiness - #111 Anything Goes

Saturday, 5 June 2021

Learning To Fly


     It's our second challenge at River Of Creativity, this month our theme is Parent and Child. We accept any hand crafted project as long as we can see how our theme has inspired you.
     I have been watching some very inspiring videos online by Eileen Godwin, her use of stencils to give just a hint of colour to the background really caught my attention.
     To begin this card I stamped the mushroom by Lavinia Stamps in Versafine black. Before getting a stamp press silhouettes were a bit problematic, but now it's so easy, if you miss a bit then stamp it again.
      To make sure my moon was kept perfectly clean I die cut a circle of Stix2 masking sheet and placed it so it would appear to be behind the mushroom.
     With the mask in place I used a stencil, some Distress Oxide in Lilac and a blending brush to colour my background.
     I only coloured part of the area through the stencil, I kept lifting it up to peek underneath and check it was where I wanted it to be.
     Once the Distress Oxide had dried off I stamped the large dragon in the air and the baby dragon sitting on top of the mushroom, looking at his Mum.
     The mushroom was grounded by adding a small shadowy area at it's base with a coloured pencil. The sentiment is also a Lavinia stamp, stamped in Versafine black.

      The image panel was trimmed to fit a 6x6 black card blank but it needed a tiny splash of colour to bring it all together, this was when I started searching my stash for the right piece of card or paper. After what felt like hours I gave up and used a purple pearl marker to colour the edge of a white card mat, once under the image panel it looked perfect, just a hint of purple to match the background.
      River Of Creativity is not just for cards or mixed media, we would like to see any hand crafted project that fits your interpretation of our theme, please come and join us.


I would like to enter this card in the following challenges:
Shopping Our Stash - #446 Gnomes / Mythical Creatures
2 Crafty Critter Crazies - Anything Goes With A Critter
A Bit More Time To Craft - #141 Anything Goes

Wednesday, 19 May 2021

Sunshine and Showers


      The theme at River Of Creativity this month is sunshine, this challenge blog is not just for mixed media and cards, it is for ANY craft. If you have made it and it fits our theme we would love to see it.

     Both of these card started with I-Zink pigment inks and some acetate. The ink was dropped onto one piece of acetate, then covered with another piece of acetate and squished together.
     Before the ink could dry the two pieces were pulled apart, this is what gave it the steaky patterns. It was then set aside to dry, which didn't take very long. I made several different sheets using other colours and put them in my stash box, after all if you're going to get all the products out you may as well turn it into a full creative session.

     The best way I have found to stick these panels down is to put the decorated acetate on to a sheet of double sided sticky film, then you get no glue marks because it's sticky all over.
     These acetate panels were die cut after the sticky was added, using Tonic nesting ovals. I also discovered it was best to stick down one end of the panel and gently peel off the backing, smoothing it down as I went. It helped keep it aligned and made sure I got no air bubbles under the acetate. If you do get an air bubble you can pierce the card from behind with a pin, just make sure you don't go all the way through the acetate aswell.

      For the rain man the acetate was stuck onto a sheet of white card, then decorated with Distress Ink and spritzed to get the rain drops. 
      For the sunshine lady I used a stencil and Distress Ink to create the rays of the sun before sticking down the acetate. The stencil wasn't quite large enough to cover the card completely so I inked the main part and then moved the stencil around to enlarge the area.
      A mixture of Scattered Straw and a dash of Fossilised Amber created the desired effect. For each card the character was going to need to be grounded, this was done by using a piece of torn paper and the same Distress Inks used for the backgrounds.

      The two characters are cut using metal rule dies, one Sizzix and one unknown. The rain man was cut in very dark blue and the lady was cut in a pearly dark brown, each image panel has been matted on the same card as the character.
      The sayings were found on line, typed out and printed off. I don't know who Rain Man's saying comes from but the Sunshine Lady is by Helen Keller. Both sayings were die cut oval to match the acetate panel and ink blended to match the backgrounds. Both characters and sayings are mounted on foam, sayings on 1mm thick and characters on 2mm thick.
      The two cards were made several months apart as it took me a while to find a suitable lady for the sunshine card. Now they're complete I rather like them as a set, they may just end up being framed and kept rather than gifted as cards, although each acetate panel has a double so maybe it's a good reason to make some more.


      Don't forget that River Of Creativity is a new challenge that accepts ALL forms of craft, as long as we can see how the theme has inspired you any project is welcome.


I would like to enter these cards in the following challenges:
Path To Positivity - #91 optional - change your environment (frame as pictures)
Use Your Stuff - #422 Use A Stencil
Crafty Calendar - Masculine
The Creative Crafters - #40 Anything Goes
Love To Craft - #58 Anything Goes
Let's Craft and Create - #171 Anything Goes + No Patterned Paper
Happy Little Stampers - Anything Goes With Dies
Dies R Us - #169 Anything Goes using stock a die
A Bit More Time To Craft - #140 Anything Goes
613 Avenue Create - #5 Anything Goes / optional mood board

Saturday, 24 April 2021

Who Let The Dogs Out?


     This is a group of cards made and sent to some of my crafting friends, we were due to meet up but like most things Covid put a stop to that.
     The backgrounds were made with Distress Inks and a Splatter stamp from Inkylicious, I've made lots of these as every time you make one it's different and so easy too.
     The silhouettes are all Lavinia stamps, I've not got a lot of the fairies, just a few small ones, but I do have lots of animals. These are actually wolves not dogs, but I don't think that matters very much. Having a stamp platform has made using silhouette stamps SO much easier, at least now when I miss a bit I can go back and stamp it again in exactly the same place!
     The greeting is an old Woodware stamp, I love the font, then layered with a black mat to pick out the silhouettes and the cards were finished. 
     During this pandemic I have watched many more craft videos on Facebook and Youtube than I would normally have done, I am grateful to those people for keeping us entertained and enthused at such a stressful time. I have learned quite a lot too, making a batch of backgrounds when the mood takes you and keeping the run off/tidy up bits for die cutting to name but a few.


I would like to enter these cards in the following challenges:
The Fairy and The Unicorn - Anything Fantasy
Crafty Catz - Anything Goes
Pearly Sparkles - Animals/Birds/Insects
TGIF - Cats and Dogs

Thursday, 21 January 2021

Mandala Media Mashup


     Three cards from one use of the media plate makes best use of time and ink. John Next Door has some new dies coming out this week, I have used the mandala die, a media plate and some Craft Artist inks for these.
     To start I die cut a mandala from thin card to use as a stencil, you can cut out the layers of this mandala but I chose to skip the inner solid dies for a 'doily' effect.
     Using the circular media plate I placed the stencil on the plate and added ink using a hard brayer. I closed the stamp press upside down so the stencil didn't fall off, then turned it over and pressed gently over the plate. The first impression was patchy but once stamped again without the stencil in place it fills in the missing areas and looks much better.
    
     I used the media plate twice to make two images, one for this post and one for John to use on Hochanda.
     So then I had two circular images, an inked mandala and a brayer clean off scrap. This is something I probably wouldn't have thought of without both John and Eileen mentioning how useful your run off scraps can be.

    
     For this one I used the same inks and a blending brush to add colour to the edge of the image panel. I then stamped an old Woodware seed head in black, along with a simple birthday greeting.
     To pick out the black and ground the seed heads I matted with a thin black layer before going on a white 6x6 card blank.
     
     This one was a small piece of white card that I pressed the stencil on to to get the ink off, then I cut up the stencil and glued it on to the corners of the white square.
     Just the word 'smile' in black was enough for this one, a thin black mat to frame it and then on to a 4x4 card blank.
     
     The run off card I used was from a small stash of scraps, I cut a 3inch square from it. It looked like a snow scene so I stamped it with some trees and a few deer in black, then flicked a white Posca pen over it for light snowfall.
     Again I have used a black mat layer to frame the image before gluing it to another 4x4 card blank.


     Now I have a birthday card, a general use card and a Christmas card all from one session with the media plate. I also have a whole bundle of run off scraps from the printing plate comparisons made in the previous post, so there will be lots of small cards in my stash this year.


I would like to enter these cards in the following challenges:
AAA Birthday - Use A Stencil
Simon Says Stamp Weds - Make Your Own Background
Happy Little Stampers Stencil - Anything Using A Stencil
Love To Craft - Anything Goes
Sweet Stampers -#52 Snow / Winter
The Holly and Ivy - Anything Christmas     Top 5
A Bit More Time To Craft - Anything Goes

Wednesday, 11 March 2020

Believe In A CAS Christmas


     This month's challenge at Christmas at Sweet Stampin' is CAS, clean and simple means lots of white space and a very simple decoration. This card was inspired by one I saw some time ago made by Karen Dunbrook, I loved it so much I decided to try it myself.
     I die cut a rectangular window in some inexpensive card for a stencil, then I cut a small circle but this time using Masking Sheet from Stix2, it's got a gentle adhesive on the back so it won't move or lift up.
     Using Distress Inks in two shades of blue I coloured the rectangle to shade from light at the top to dark at the bottom. Before removing the stencil I stamped, in black, two pine trees by Lavinia Stamps.
     After removing the stencil I stamped Father Christmas and the wording in the same black ink, I had to stamp Father Christmas a couple of times to get a good image, thank goodness for a stamp press. The word is a little distressed but I think it's alright, I may have to find another one that is a little crisper for next time.
     That's all there was to it, nice and simple, perfect for last minute makes when we get into December. If you come and join us at Christmas At Sweet Stampin' each month you won't have a December panic, as you'll be part way done already.


I would like to enter this card in the following challenges:
ABC Christmas - E, F, G    F is for freebie
Winter Wonderland - Blue Christmas
The 12 Month's Of Christmas - Anything Christmas/option Ice Ice Baby
Merry Little Christmas - Anything Christmas
CraftyHazelnut's Christmas - Anything Christmas/option Vintage

Wednesday, 20 March 2019

Curious March Hare


     Some of you may know my thoughts on rabbits, so it's a good thing this one is a hare! These stamps are gorgeous and being silhouette they are perfect when you've made a special background.
     Another background made with the amazing splodge and Distress Oxides, Picked Raspberry, Shaded Lilac and Broken China on white card.
     I stamped the hare, tree branch and fairy in Versafine black and set it aside for a few days while I had a think about mat layer colours.
     I die cut the image with my largest square die and then used a punch to take off the corners, I was going to cut this one out as a circle but I hadn't used a large enough piece of card.
     A little Broken China around the edge knocked back the white a little before going on a black mat layer. At this point I decided it was a bit too open in the bottom left corner and as I didn't want to add a greeting I went for some flowers instead.
     I found the perfect card to mat the next layer but as I only have a couple of sheets I though it would be good to cut out the centre and keep it for another project, once layered up you can't tell it's missing!
    To stay with the colour theme I die cut some tiny flowers in lilac card, shaped them and added them to the tree branch, with a tiny purple gem in each flower my card was complete.
     This one will sit in my card box until required, only then will a greeting be added inside.


I would like to enter this card in the following challenges:
Cardz 4 Galz - March Hares     (Spotlight winner)
Die Cuttin' Divas - Cherry Blossom or Pink


Saturday, 9 March 2019

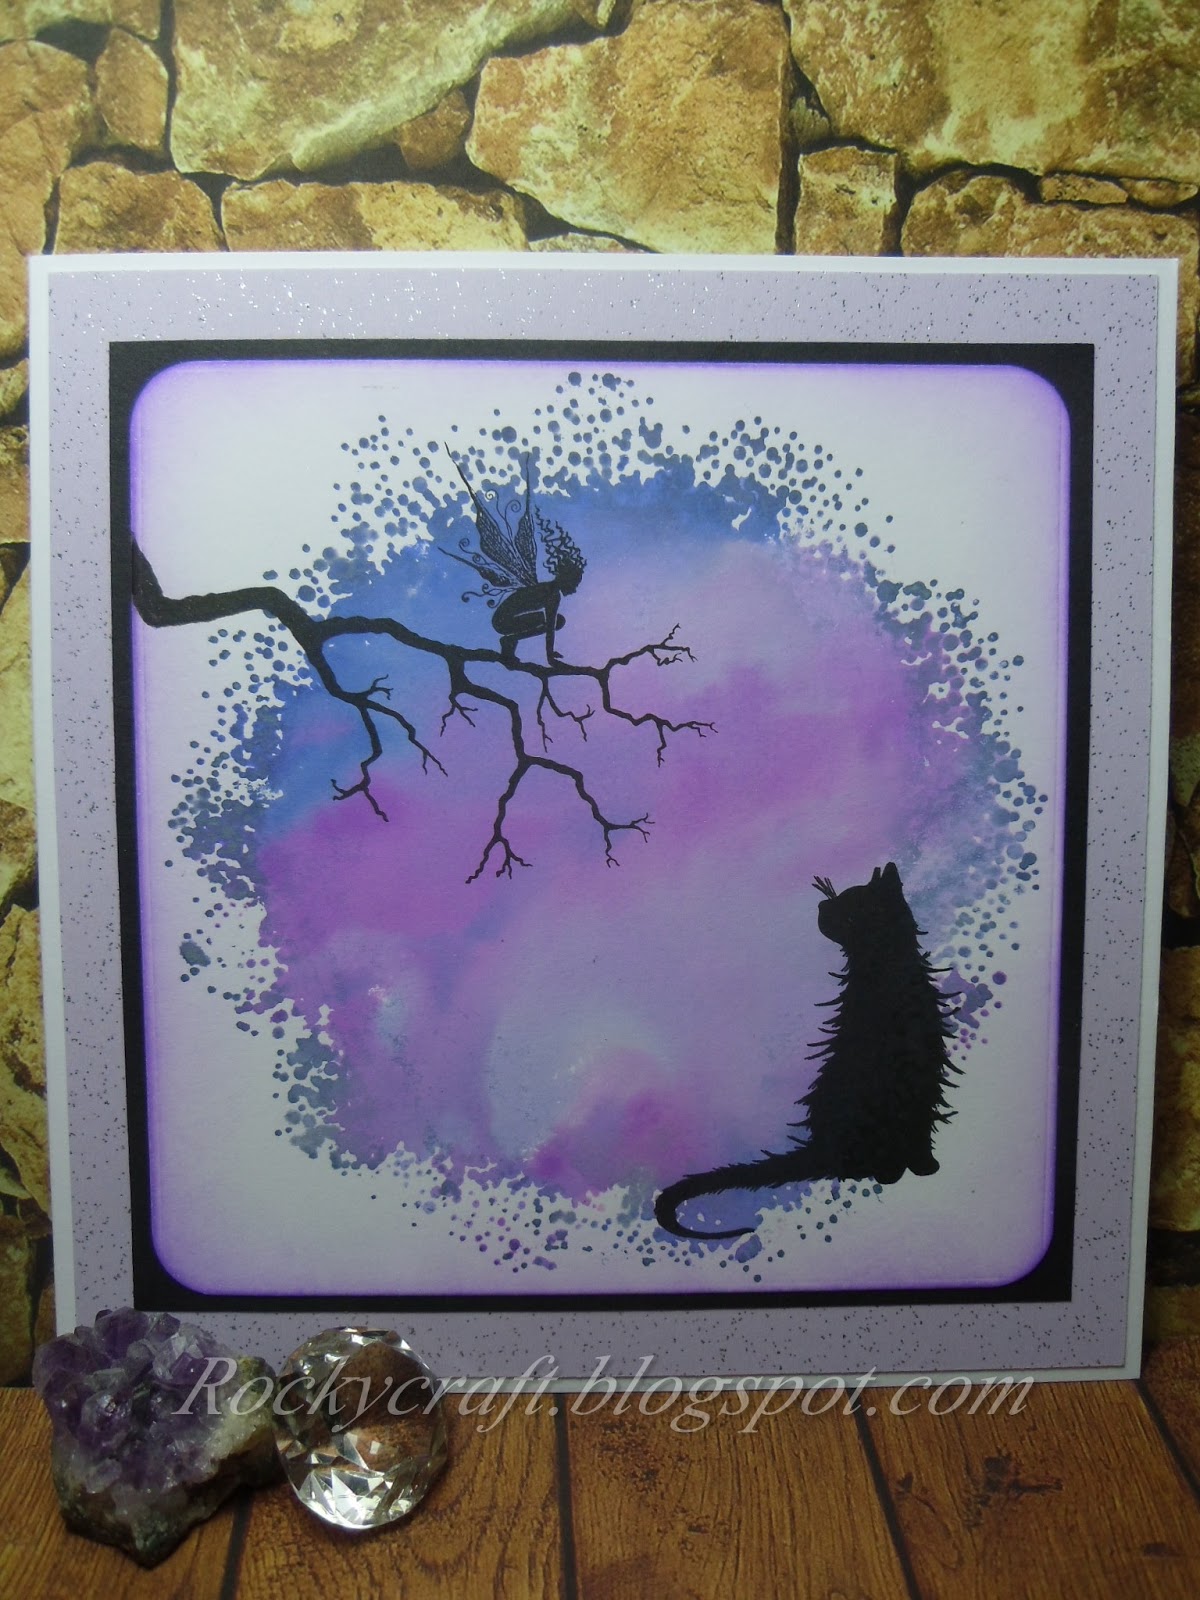
Splat Cat


     I know, another splat card, I can't promise not to post more but I will try and show some other work too....honest. This one is for a friends special birthday, let's just say it's a bit of a Saga and today's the day, it was delivered last night so it's alright to post now.
     Using my stamp platform and my splat stamp I inked up with Distress Oxides, spritzed with water containing pearl mica powder and stamped.
     A lot of my friends are cat lovers, as am I, so it just had to be one of Lavinia's silhouette cats. As he seems to be looking up, a tree branch with a tiny fairy squatting on it completed the picture.
     A little colour added to the edge after rounding the corners knocked back the white and a black mat layer makes the silhouettes stand out.
     A gorgeous lilac Stardust card layer was added before going on to a white card blank to finish off. There is no greeting on the outside as I felt the image was enough on it's own, there is a short message inside but that's staying a secret.


 Another of our group has made the cake so I have made a small needle felted cat to go on top. By the time this is published the cake will be gone, but hopefully the cat will have survived. This little fellow is my third felting project so he's quite basic, if I progress with felting I hope to make another cat or two.


I would like to enter this card in the following challenges:
Show Us Your Pussycats - Anything Goes/St.Catricks Day
   Little Red Wagon - Animals
Dream Valley - 4 Legged Friends

Wednesday, 13 February 2019

Twinkle, Twinkle Little Star


     I am pleased to say that I am now a member of the Design Team for Christmas At sweet Stampin', which means that at least once per month I can bring you a festive project. Please don't groan, I know it's only February, but if you start now you'll have everything sorted by December!
      I have used the splodge stamp quite a few times recently but that's because it's such a great stamp for backgrounds, especially with Distress Oxide Inks,it's from Inkylicious.
      The inks were dabbed direct from the pad across the stamp, then spritzed with water to make it all run and blend a little before being stamped on to good quality card. The card needs to be quite thick as the moisture will make it buckle a little.
      Once dry I used a white paint pen and tapped it hard while holding it over the image, this made lots of tiny white stars. The large star was stamped and embossed in silver.
      The stag is a Lavinia Stamps image stamped in Versafine black, using a stamp press really helps with silhouette images as you can go over them several times to get a perfectly solid black image.
      I haven't added a greeting to the outside of the card as I feel it doesn't need it, plus I have some friends who like to frame their cards and adding a seasonal greeting would limit when they could display it.
      Please pop over to CASS to see all the lovely DT inspiration, I'm so happy to be part of this team and looking forward to having lots of Christmas cards and decorations made before we reach December.


I would like to enter this card in the following challenges:
Christmas Crafts All Year 'Round - Carols and Songs
Winter Wonderland - Anything Christmas for Eileen
The 12 Months of Christmas - Anything Christmas, optional penguins
CraftyHazelnut's Christmas - Anything Christmas, optional cute
The Holly and Ivy - Anything Christmas

Wednesday, 26 September 2018

The Male Room Goes Outdoors


     The Male Room is going for The Great Outdoors as it's theme this fortnight. I was working on something else for this but it wasn't quite right so I have gone for a winter outdoors card.
     The coloured circle is made using Izink droppers on acetate, I dropped on a few spots of blue, purple and turquoise and squashed it with another sheet of acetate, then pulled them apart to get this amazing pattern.
     The trees are stamped in black on to a white card square and the edge coloured with Distress ink. Sticking acetate can be really tricky so I put double sided sticky over the whole sheet and then die cut the circle, it stuck down perfectly with no sign of how it was attached.
     Using a stencil and some Izink texture paste I added the snowflakes, once the stencil was removed I sprinkled iridescent glitter over the white paste.
     All that was left was to mount the panel on purple card and then on a white card blank. It has no greeting on the outside but I rather like it like that, I will just have to make sure the one inside is rather grand.
     Please pop over to The Male Room and have a look at all the DT inspiration, there are some great ideas to get your creativity going.


I would like to enter this card in the following challenges:
A Snowflakes Promise - Anything Christmas Goes
Addicted To Stamps - Christmas Comes Early
The Holly and Ivy - Anything Christmas

Wednesday, 20 December 2017

Have A Very Jelly Christmas


     Now that these gifts have been delivered I can share the pictures. Handmade gifts in handcrafted packaging for three very keen cooks.
      It all started with the Redcurrant jelly, after a bumper crop over the last few years the poor old bush decided to die this year, it will be sadly missed.
     Several of my close friends are very keen cooks so I thought it would be a good idea to give them all a jar of Redcurrant Jelly with a recipe tag for a port sauce.
     Then the quince tree decided to provide so much fruit that I made jelly, jam, lots of crumbles and gave some away too. The fruit is very hard, it has to be cooked to be eaten but is well worth the effort.
     The labels have been made using a digital stamp from MHK Designs, inked and die cut with a double sided sticky backing from Stix2.
     So now I had two jars with pretty die cut paper tops over the traditional cellophane one, both with recipe tags on, to wrap.
     A Kraft gift bag was the perfect solution, but a plain brown bag doesn't look very festive does it. A good reason to break out the Christmas dies and set to.
     All the dies used for the bag front are Sizzix but the tag dies are from other suppliers. Each tag has been edged with brown ink, as well as the cut out stags head and the little splash of red finished them off.
     I just hope the recipients get as much pleasure from the contents as I did  when making them.

I would like to enter my handcrafted gifts and packaging in the following challenges:
Creates and Makes - Anything Goes   (M)
Paper Minutes - Gifts   (W)
Merry Monday - Tic, Tac, Toe (Die cut, Twine, a little Green)   (W)
CraftyHazelnut's Christmas Challenge - Anything Christmas Goes   (M)
The Holly and The Ivy - Anything Christmas Goes   (M)
The Merry Christmas Challenge - Anything Christmas    (W)

Wednesday, 1 November 2017

Stag Night At The House Of Cards

     
      A new challenge at the House Of Cards begins today, as we're fast approaching Christmas our colour palette is quite seasonal but you don't have to make a Christmas card.
      I'm really enjoying playing around with the media plates and my stamp press so I have used them to make this card.
     Using two shades of green to ink up the plate I then smoothed it out with a brayer and stamped the oval on cream card. I went back around the edges of the oval with the two inks to create a darkened edge, then I stamped the trees in dark green onto the plate and pressed it onto the card.
     Once dry I used a white pen to add snowflakes and a little snow on the trees. The deer is stamped in Versafine black, as he's a silhouette it was tricky to get a good even coverage but that's the beauty of a stamp press, I inked him again and stamped again in exactly the same place making him a perfect solid black silhouette. If you have ever struggled with stamping I would highly recommend one of these tools, with several brands now available the price has come down to a more reasonable rate.
     The greeting was stamped and gold embossed after gently drying off all the inking. To compliment the oval I used a punch on opposite corners to round them off before matting the cream panel on to a dark red layer. To finish off the panel has been stuck to a dark green card blank to compliment the trees and bring the whole colour scheme together.
     You have a month to create your card following our prompt so please come and join us at the House Of Cards, we'd love to see what you make.

November - House Of Cards

I would like to enter this card in the following challenges:
Christmas At Sweet Stampin' - Anything Christmas   (M)
A Snowflakes Promise - Anything Christmas   (M)

Wednesday, 25 October 2017

Dark figures in The Male Room


   We have a new challenge at The Male Room and four new DT members to bring you even more inspiration. My card has a Halloween style but as us Brits don't really celebrate this festival I've tweaked it slightly.
   
     Recently I attended a workshop using the mini mixed media plates by John Nextdoor, Margaret showed us some basic techniques and lots of great effects. I came away full of inspiration and covered in ink!
     This circle is the result of building up layers of colour with a gorgeous effect made using bubble wrap. As it's all done on a stamp press it was easy to keep over stamping the same area, safe in the knowledge it would always be in the same place.
     The cat and mouse are Lavinia stamps, stamped twice in Versafine Black. Being able to stamp the cat twice meant I got a great coverage over the coloured circle, it's barely visible through him.
     Not having much use for a pure Halloween card I chose to stamp it with a Happy Birthday greeting by Woodware. This month there are several family birthdays so this is already on it's way.
     Please pop over and see the inspiration we have for you at The Male Room, including our four new team members.


I would like to enter this card in the following challenges:
Deep Ocean - Halloween   (F)
Show Us Your Pussies-Cats Only - Meow-loween   (M)
Try It On Tuesday - Circles   (F)

Wednesday, 30 March 2016

Magical Male Room


     For this fortnights challenge at The Male Room we would like to see anything masculine that falls into the Magical/Fantasy theme.
     This project was fun to make, so much so that I didn't take any pictures during the creation process. I started with a piece of white card and coloured it with Distress Inks Scattered Straw, Wild Honey, Spiced Marmalade and Rusty Hinge then spritzed it with a pearl mister.
     The craggy mountains are made using D.I. Black Soot and a piece of torn paper as a mask. Both the dragon and the castle are stamps from Encaustic artist Michael Bossom stamped with Black Soot, the castle has a few 'lights' on made with a gold gel pen.
     It's a very simple card to make that owes it's impact to the gorgeous dragon silhouette against a blazing sky. All that was left to do was mount it on to a black card blank, it's unmarked so could be used for any occasion.
     Please come and join us at The Male Room, I'm sure you have some amazing ideas for this theme and we would love to see them.


I would like to fly this card into the following challenges:
Crafting From The Heart - Anything Goes
Craft Your Passion - Anything Goes