Showing posts with label Stix2. Show all posts

Monday, 1 November 2021

Stamping With A Die


      How do you stamp with a die? Use the die to cut a funky foam shape and stamp with that. This card was made using the latest mandala die set from John Next Door - JND243 Belgravia Mandala.
     
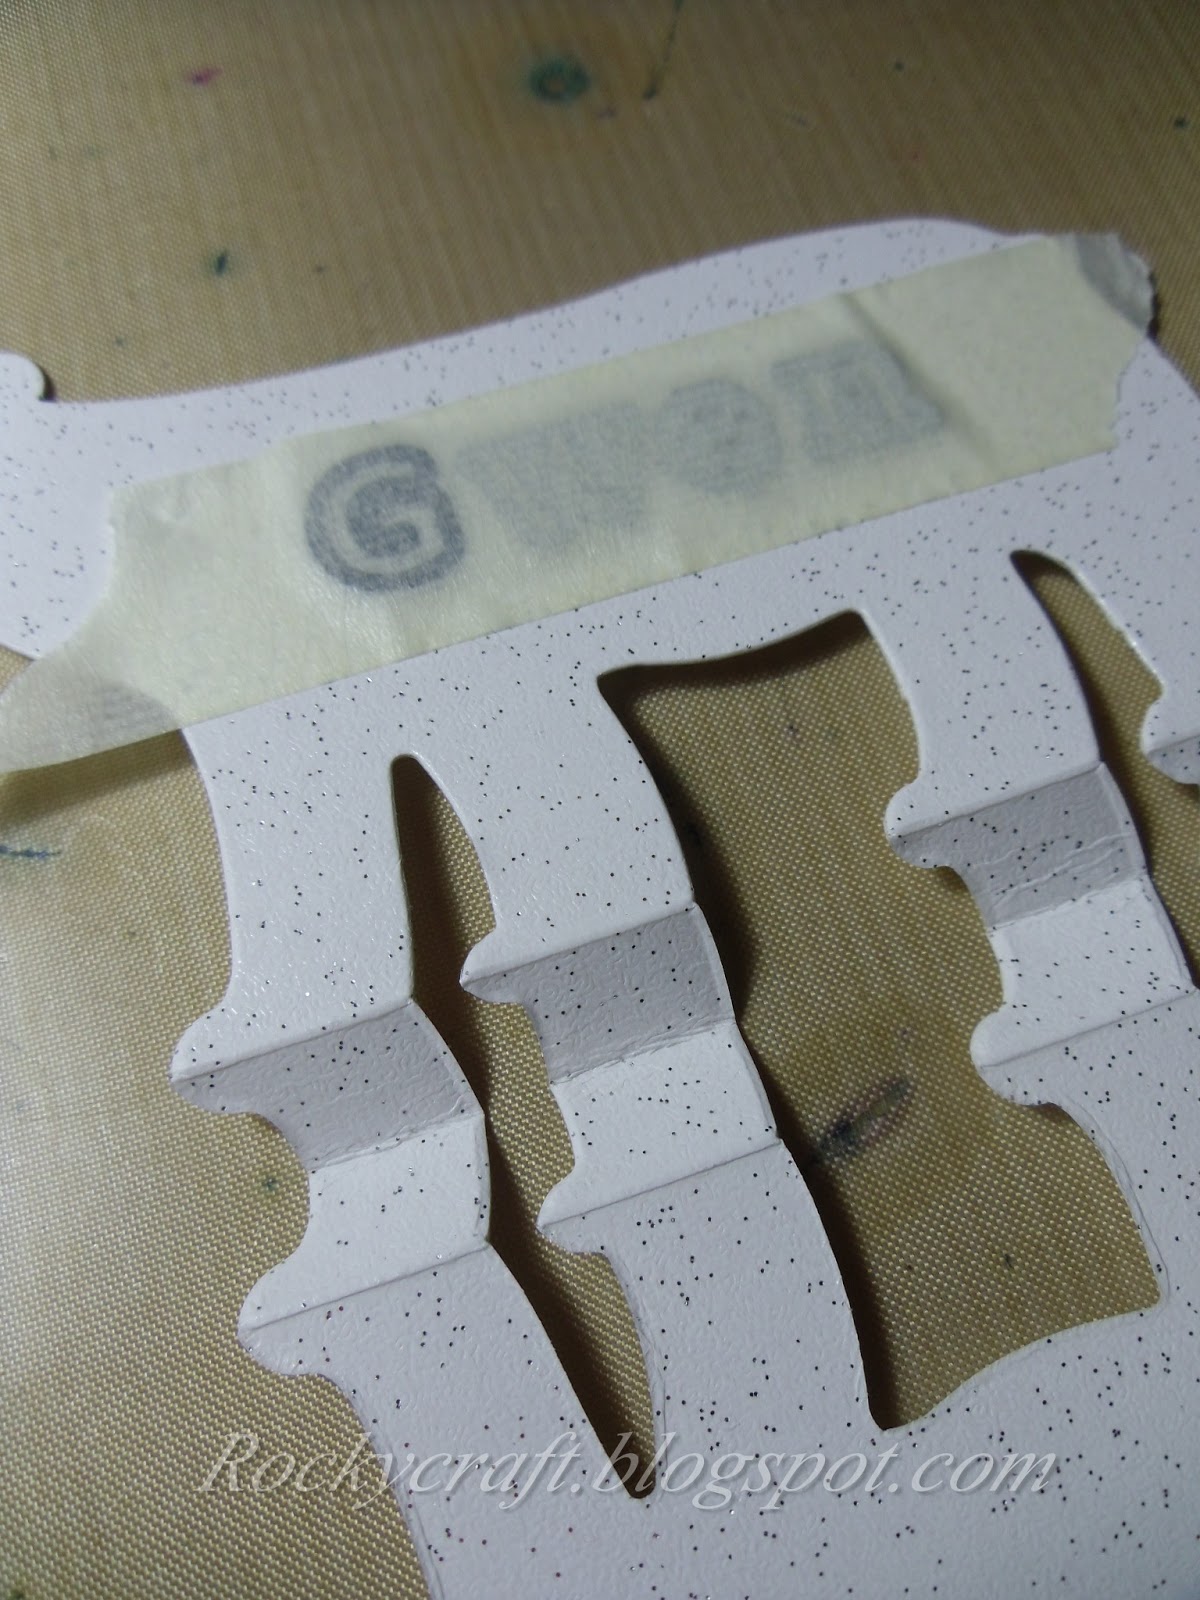
     Using the die as a complete set I cut some funky foam, it's around 1mm thick so it cuts very well.
     Once cut and all the tiny bits were removed I covered the back with strips of double sided tape and mounted it on a circle of Stix2 Non Slip Grip. This grip was originally sold for putting on your rule to stop it slipping when measuring, but it has a fantastic 'cling' ability. There is no adhesive on this product, it just clings to a smooth surface, which means it clings to the stamp press perfectly.


     For the first stamping I used Distress Oxides, the ink sits on the foam quite happily without the need to prime the foam first.
     Watercolour card was best for this as the next step was to spritz it with water and allow the colours to run.
     

     To encourage the flow of colour across the card I used a hand operated air brush type gadget, it's sold for use with marker pens but without a pen it's a great way of puffing air where you want it.
     

     After the first layer was dry I selected the same colours but in Distress Ink this time. I dabbed the foam with a paper towel to remove any excess Oxide before adding the Ink to avoid any possible issues.
     The beauty of using a stamp press is having the ability to stamp in exactly the same place again, so that is just what I did, having made sure to add the colours in the same places on the foam stamp.


     With the Ink stamped over the Oxide it now looked like the one image had bled but without loosing any definition.
     The next step, once dry, was to cut the image out with a large square die. With another slightly larger square die I cut an outer layer to be used in the mat and layer process.

     With the die set still taped together from cutting the foam I cut the stamped panel to get all those lovely little gaps to drop out.
     I had to be careful to keep the various pieces of the mandala together and the right way around in the square while poking out the tiny bits.
     I taped the layers together on the back to make it easier to stick down over a gold pearl circle, this gave me a warm shimmer of gold through all those beautiful gaps, it reminded me of a peacock tail.
     I wanted a mat layer but nothing I had was just right, so out came the Oxides and Inks again, this time to go around the edge of a white mat layer to tone it in with the image panel. This layer was just large enough to cover the whole left in the big square, then all I had to do was match up the colours and stick this on top of the large square. It all sounds complicated but it really wasn't, if it had been it would probably have ended up in the recycle box!
     A few small gold pearls added around the mandala lifted the image panel and the addition of four corners cut from the same gold pearl card finished it off. With the pattern and the gold I didn't feel it needed a greeting on the front, that will have to go inside when required.


I would like to enter this card in the following challenges:
Lil Patch of Crafty Friends - #168 Anything Goes
A Bit More Time To Craft - #146 Anything Goes
Creative Fingers - #218 Anything Goes
Love To Craft - #64 Anything Goes
Crafts Galore Encore - #93 Anything Goes
A Perfect Time To Craft - #11 Anything Goes
The Creative Crafters - #45 Anything Goes
The Crafters Cafe - #277 Anything Goes


Monday, 15 February 2021

Mica Magic on MDF


     This weekends project was to use Mica Magic from Craft Artist, it's mica in a soft cake form, not a powder, a bit like eye shadow but definitely NOT for eyes.
     John has said this product was developed for colouring flower foam but has turned out to be very useful on other materials aswell. 
     With this in mind I die cut a foam Cornflower and then coloured it with the Mica Magic Basic Brights set. I coloured front and back, then pulled and twisted the petals to give them some shape.
      The best thing for sticking the foam together seems to be Glue Glaze, again from Craft Artist, although I'm sure there are other glues that will work, it just needs to be thick and strong.

     Once the flower was assembled I moved on to an MDF tag from Stix2. I have seen Mica Magic used on MDF with no need for a primer, I wanted to see if this was easy and what it would look like.
     Not wishing to stick much to the tag once the mica was applied I chose to glue down some spare die cuts I had lying in my stash. These were bits left over from previous projects so they were a mix of colours, this would show me just what the micas would look like over a coloured base. All the bits were cut from card so reasonably sturdy but not too thick.

     Once all the bits were dry I began to apply the Mica Magic with my finger, you can apply it with a dauber or a sponge if you wish. I started with a mix of greens at the bottom and blended it into blues with a touch of  mauve at the top.
     The coverage was very good, it blended very well and took to the die cuts well. It does make a difference what colour the substrate is, dark colours really show of the mica, while paler colours give the mica a more muted look.
     There is a halo around the die cuts were the mica didn't reach the very edge but I quite like this look. If you don't want that then maybe the die cuts should be stuck on after colouring the background.
     The corner die cut was black which mixed with the brown MDF underneath and the bronze mica gives the look of aged metal.
     Once all the mica had been applied I gave the whole tag a buff with a cotton cloth to make it shine and to remove any stray bits, this is when you find out if you stuck all the die cuts down well!
     The butterfly looked a little dull so I decided to try some Pebeo wax, it worked well, I wasn't sure if the two mediums would mix well but they get along very nicely. The wax is a great medium but only available in a limited colour pallet, the Mica Magic comes in a wide range of colours so now it's possible to get that great shine in greens, blues, purples and more.
     The last thing to do after buffing the tag was to add the flower, this was stuck on with Glue Glaze. I like just the one flower, less is more on this tag as it's meant to show off the Mica Magic and it's great coverage of the MDF. A small length of seam binding coloured with inks added the finishing touch.

     Conclusions on Mica Magic - great coverage on MDF, no primer needed. Easy to apply.  An amazing shine once buffed.  The ability to colour almost anything porous - so does not work on glass, plastic or metal.

Materials used 
Craft Artist Mica Magic - Basic Brights
Craft Artist Glue Glaze
Flower Foam - cream
Cornflower Die - retired
S57447 MDF Tag x4 - Stix2
S57262 - 3D PVA glue


I would like to enter this tag in the following challenges:
Creative Fingers - #201 Anything Goes
C.R.A.F.T. - #586 Not A Card
Creative Moments - #208 Anything Goes
Crafty Creations - #418 Anything Goes

Friday, 5 February 2021

Dipped Wire Flowers


     It started as a comparison between inks, paints and varnish to colour PVA dipped wire flowers, but what do you do with them once you've made them?.....  I made a card. I enjoy the challenge of the experiment but there should be an end use for the ones that work and the ones that don't.....recycle.
     I remember making these with my Mum when I was younger, I think the dipping medium we used was called something like 'Fantasy Film'. This method uses Stix2 Anything 3D PVA glue, it's a good strong glue with the consistency of double cream. I made a set of five small loops with jewellery wire, I'm sorry I don't know what gauge, you can bend it easily with your fingers and it will hold the shape.
     Five small loops makes for a nice size flower, I did find that if the loops went beyond approximately one inch the glue had trouble forming a film, best to keep them under an inch at their widest point.
     I bent the flowers into shape before dipping, if you try it afterwards you run the risk of splitting the film.     
     I decanted some of the 3D PVA into a tiny jam jar so I could dip the flowers into the glue easily. Dipping it in and lifting it out slowly seamed to work well. If the film breaks just dip it back in the jar and try again.
     I only gave each flower one dip but you can dip again once the first is dry to thicken the film. Each flower was left overnight to dry out, the glue goes clear when dry so it's easy to tell when it's done but overnight makes sure it's set completely. I also made some leaves but I wasn't very happy with the shapes, something I need to try again I think.


     I used four different mediums to colour the flowers and leaves:
  1) Leaves - Cactus green pearlescent Izink pigment ink dropper - painted on with a brush. Covers the wire as well as the film, great pearly sheen, no odour.
  2) Blue Flower - Stratosphere blue Izink pigment ink - has it's own brush in the lid. Covers both wire and film, dries matt, no odour.
  3) Pink Flower - Nail varnish - has it's own brush in the lid. Covers both wire and film, nice shine but rather smelly while working.
  4) Yellow Flower - Yellow Fabric Spray Paint - painted on with a brush. Covers well, more of a satin sheen and takes longer to dry completely, no odour.

     So a good strong PVA works well, keep the loops small and try whatever you have in your stash. I really like the Izink bottle inks because they dry matt and most flowers are matt not glossy, plus there is a great range of colours and a little goes a long way. Thank you to Keep On Crafting for asking me to experiment with the Izink pigment bottles, it's been interesting and it's not finished yet.


I would like to enter this card in the following challenges:
Creative Fingers - #201 Anything Goes
Seize The Birthday - #207 Anything Birthday / option Hearts
Watercooler Wednesday - #307 Anything Goes with a Feminine Twist
Unicorn  - #62 Use Flowers

Wednesday, 3 February 2021

Love Is In The Air at The Paper Funday


     I am pleased to say that I have joined the lovely DT at The Paper Funday and this is for their new challenge this month, it's anything goes with an optional twist, the twist this month is 'Love Is In The Air'. 
     
     Cute is not something you'll see here very often but I just love this Stampendous image.
     The hedgehogs were stamped in brown ink onto white card, then with the remaining ink on the stamp I made another image on masking sheet and cut it out. I didn't mask the balloons as they were going to be covered.
      Once the image was masked I used a blending brush and coloured the card with Distress Oxide Victorian Velvet, leaving the area around the hogs  paler than the outside edges.
      
     Using Distress Ink in the same Velvet colour I stamped script across the card.
      The mask was removed from the image and I coloured the hedgehogs with watercolour pencils.
      The balloons were stamped on to a piece of pearl card from Stix2, Misty Rose, it's a perfect match for the Distress Inks. These balloons were cut out and shaped slightly with a ball tool before having pink and white twine added to them.
     The balloons were then stuck on foam pads and put over the original image.
     To get the hogs to hold the balloons I stamped them again and cut out their hands and feet, coloured them to match the original image and mounted them on foam pads, making sure to catch the twine under the hands.
     I chose to mat the image panel with a Bronze pearl card, also from Stix2, because it matched the colours used for hogs spines.
     The whole panel was finally mounted on a white 7x5 card blank. There is no greeting on the outside because I felt there were enough words in the script, it will probably be used as an anniversary card.
     The Paper Funday is an anything goes challenge with an optional twist, so please come and join us with your creations, just remember they MUST be made with paper/card.


I would like to enter this card in the following challenges:
Creations In Pink - #30 Anything Goes In Pink
Send A Smile 4 Kids - Valentine/Love
Shopping Our Stash - Love Is In The Air
Try It On Tuesday - Falling In Love

Monday, 1 February 2021

A Little Jar Of Spring Sunshine


     When I was asked if I would like to make some samples for Keep On Crafting using the Seth Apter I-Zink pigment inks how could I refuse, they are amazing inks. Why amazing? because they are water based, thickish inks in a bottle, with their own little brush that will paint on almost everything you can think of. Now for a water based ink that is amazing, they don't bead up on metal, glass or plastic, they just paint straight on without using gesso first!
     For this little project I used a small glass jar about 3 inches in height. I gave it a wash to make sure it was perfectly clean and dried it thoroughly.
     I wanted some tiny flowers all over the jar so I dug out a JND die and some Stix2 masking sheet. The masking sheet is like a very low tack masking tape that rests on a thin plastic film, so die cutting it might be tricky. Not if you put a sheet of copy paper under the plastic side, it seems to help the die force it's way through the plastic and even cut the copy paper.
     Using tweezers I stuck lots of the tiny mask flowers all over the jar and pressed them down firmly.
     For the colour I used one of the older version inks in the dropper bottle - Cactus and one of the newer flat colours - Olive Drab, more Olive than Cactus in the mix.
     I dropped some of the ink onto my craft mat and picked it up with a sponge, dabbing the ink all over the jars sides. I left this to dry for a couple of hours, it does dry quite quickly even on a non porous surface, but I wanted to be sure it was hard. I applied a second coat of the same colours, making sure I had a speckled effect all over. Again I left it to dry for a while as I didn't want the ink to peel off when I lifted the flowers.
     To lift the flowers I used my pointed tweezers and pushed each petal from the end to the middle, to my delight they all lifted perfectly.
     I tried a set of lights inside the jar but it didn't look quite right, too bright. Using a strip of vellum cut to wrap around inside the jar I was able to achieve a slightly more opaque effect. The top needed to be covered and this jar had no lid, so I cut a circle of hessian to go over the top but with battery lights you need to be able to get at the switch which was inside. A small length of copper coloured elastic left over from a jar of jam was just right, now I could get in and out of the jar to operate the lights.
     A few of these little jars dotted about the room help lift the spirits on these dark winter afternoons. I'm really looking forward to being able to craft together at workshops again.


Materials used 
Old glass jar
I-Zink Pigment Ink - Cactus (pearlescent)
JND174 - Small Flowers die
S57268 - Masking Sheet - Stix2
Small string of LED battery lights
Strip of vellum
Small circle of hessian and some fancy elastic


I would like to enter this project in the following challenges:
A Bit More Time To Craft - Anything Goes
Crafts Galore Encore - Anything Goes
Creative Fingers - Anything Goes
The Creative Crafters - Anything Goes

Wednesday, 11 November 2020

Lolly Stick Sledge


      With just a few weeks to Christmas my thought are moving from cards to decorations and with limited access to new stash I have been taking a much closer look at what I already have. This is my project for Not Just Cards, a challenge where cards are welcome along with any other hand crafted project.
     I have some wooden lolly sticks in a pot on my desk and after a quick look at Pinterest this is what I decided to do with some of them. I didn't think to colour the sticks before I stuck them together, so had to do it carefully after the glue had set, this left me with a rustic look. With the addition of a short length of string my sledge was complete. I set this aside while I started on my MDF tag.
     The tag was painted with white acrylic, then dry brushed with some blue paint, making sure to work in one direction only.

     Once the paint was dry I added some True Snow paste with a palette knife to add a little texture, while still wet I sprinkled some white bio-degradable glitter on it for a dash of sparkle.
     The sledge was stuck on with 3D PVA, it's a great strong glue that dries clear and seems to stick almost everything porous. I found some very small polystyrene balls in my stash so I stuck some next to the sledge.
     The words were die cut using some Tim Holt dies and stuck on with the 3D PVA. To finish off the rather messy back of the tag I stuck on a piece of patterned paper, then sanded the edges off once dry. With the addition of some ribbon and a twine loop to hang by the MDF tag was complete.

Materials List   (available from your local craft shop)
S57447 - MDF Tag set of 3
S57433 - Bio-degradable Glitter - White
S57262 - 3D PVA Glue from Stix2


I would like to enter this project in the following challenges:
Fezziwigs Festive Frolics - Anything BUT A Card
The Holly & Ivy - Anything Christmas Goes
Crimbo Crackers - Anything Christmas Goes
Dragonfly Dreams - Christmas/Winter
Craft Rocket - Christmas/Winter

Saturday, 7 November 2020

Gnomemade Christmas Tree


     This card was inspired by two friends, it was Jenny's idea to make a tree with these stamps and Val's amazing hand sewn gnome that really set the colour scheme, thank you ladies.
     I started by stamping each of the six gnomes on to Stix2 masking sheet and cutting them out. Then I stamped the centre gnome, masked him and stamped his two friends beside him.
     The piece of card I stamped on was quite large so I had plenty of room to play around with the images. I continued to stamp and mask until all six gnomes had been used and my tree shape was formed.
     I left the card for a while to make sure that all the ink was completely dry before I removed the masks, I knew it was likely that anything was still wet I would smudge it and have to start all over again.
     There were a few tiny gaps in the stamping where I hadn't got the mask exactly right, this was put right with a black micron pen.     
     To colour the image I used alcohol markers, with having spare card around the image I was able to try out the pens to make sure I was happy with the shade I'd chosen.
     I added a tiny bell to the top of each hat by sewing through the card. This did make matting and layering a little tricky because of the lumps, but it all worked out and meant my thread was all hidden.
     To add the greeting I die cut various phrases and chopped them about until I got 'gnomemas', I wanted something a bit different for this card.
     I shall have a play and make some variations using these cute little gnomes, as they can be any colour a gnome is not just for Christmas.


Materials List   (available from your local craft shop)
CTJJ143 - Gnomes by Two Jays
S57268 - Masking sheet
S57262 - 3D PVA Glue from Stix2


I would like to enter this card in the following challenges:
CraftyHazelnut's Christmas - Anything Christmas
Send a Smile For Kids - Happy Holidays/Anything Goes
Colour Crazy Craft - Anything Coloured
Craft Rocket - Christmas/Winter
Christmas Crafts All Year Round - Family and Friends
The 12 Months of Christmas - #71 For The Boys
Merry Little Christmas - Anything Christmas 

Friday, 3 April 2020

Shades of Grey


      This weeks tag challenge from Albright of Diss is monochrome greyscale, monochrome is shades of one colour so it could be blues or greens, etc. this one has to be black, white and greys only.
      It took a while to decide what to make, then I remembered an old Woodware stamp of a flower that looks like it's been zentangled.
      I stamped in Versafine black on to a white tag, then covered that flower with Stix2 masking sheet. The amazing part about this is the last time I remember using the mask with this stamp was July of 2017, the mask was stored on the back of the laminated stamp packaging, it still worked! It took a little time to gently peel it off the packaging but it was perfectly alright to use, now that has to be value for money when it lasts that long, thank you Stix2.
      I stamped the second flower and covered that with another stored mask, then I stamped a few separate leaves to fill in some of the blank spaces.
      With all masks removed I had to decide the best way to colour this. It is recommended that you stamp in Memento when using alcohol markers, oops, I had used Versafine. I left the tag to dry thoroughly and then started with my markers, it didn't run, phew! I have a full set of Graph It pens so I chose the Natural Grey set numbers 0-7, there are numbers 8 & 9 but they're very dark and as this was stamped in black I thought it would be dark enough without them.
      My colouring is pretty basic, I am not very confident with these pens but I have tried to get some shading in there and as I'm bashing my stash then I at least have to try. The small background areas have been coloured with the palest grey so that any white areas on the flowers stand out more.
      I know it's meant to be shades of grey only but I had to sneak a tiny hint of silver in there to lift it a little, this I did with a Stix2 2in1 glue pen and some cold foil. The ribbons are both organza, one silver and the other coloured black with another alcohol pen. It actually looks better than I had hoped, imagine putting that on a red card blank for a striking greeting card.


I would like to enter this in the following challenges:
Crafty Gals Corner - Flowers
Lemon Shortbread - Anything Goes
International Art & Soul - No Focal Image
The Artistic Stamper - In The Garden

Sunday, 29 December 2019

New Year Party Treats


     Going to a dinner party this holiday? How about taking some after dinner sweet treats in a champagne bottle box. This is made using the large bottle die from John Next Door, it stands around the same height a real bottle would.
      With the bottle die there are dies for the labels, cork, glass and bubbles. I wanted to have bubbly in the glasses so I die cut the wine with bubbles from cream card, over vellum and laminated it, then cut the glass from the laminate. This made them strong enough to stand up when attached to the box.
      The acetate box is two pieces of fancy zigzag patterned acetate cut to form two sides each, they are then stuck into a green card tray that measures the width of the bottle die cuts.
      I cut two bottles from dark green card, the same card as the base tray, then decorated them with the labels shapes cut in white and gold.
     The stamp is from my stash, make unknown but it was perfect for this box. Using my stamp platform I worked out where on the card to stamp by laying the die down and lining it up. The little stars are die cut with dies from the bottle set, they allow the gold mirri mat to shine through.
     The cork is cut from Stix2 cork sheet and stuck on with redline tape, which is what I used for making the whole box, nice and strong.
     If you don't stick the bottles together at the top you can put a real bottle in the holder, but I preferred to keep it for after dinner treats.
     There is also a small bottle die set available, that would make cute individual little boxes, ideal for wedding favours.
     Whatever you are doing this holiday I hope you enjoy it, have a very Crafty New Year.


I would like to enter this project in the following challenges:
International Art & Soul - Anything But a Card
ABC Christmas - Y-Yuletide, Z-Zigzags   
The Holly and Ivy - Anything Christmas Goes
Merry Little Christmas - Anything Christmas Goes

Sunday, 11 August 2019

Polar Bear Place Card


     A new project for Not Just Cards today, place cards for Christmas Dinner, I have a friend who loves bears so this will be perfect for her.
     Both the tree and the bear were cut using a Sizzix Bigz die, these are steel rule dies that will cut through mountboard and leather so a piece of folded card is no problem at all. You can't do this with thin dies, it will not cut and may ruin your die.
      The card needed to be just over twice the height of the shape I wanted to cut, I then folded it in half, right sides together and creased it. From this centre fold I measured 3/8 of an inch out and scored, doing this on both sides. Once scored I folded the card back to show the right side again, this forms a 'W' shape at the bottom of your card.
   
     When placing the card on the die I had to make sure that the 'W' was just above the base of the cut area so it wasn't chopped off, this made the bears feet a little shallower but at least he will now stand up by himself.
      Before sticking the sided together I die cut the name in the bears body and then backed it with some blue Stardust card, I have kept the cut out letters for another project.
      I have only glued the very top of the bears head and ears together and a tiny spot of glue on his tail too. This leaves a slot in his body that could house a tag listing the menu.

   
      Hopefully you can see in this picture the 'W' in action, it makes your Bigz dies even more useful. They do fold flat for storage until required.
      Both bear and tree have been cut from Stix2 Stardust card as it adds that little sparkle to your table dressing.
     Please pop over to Not Just Cards and take a look at all the inspiration on offer, then come and join us with your creation.


I would like to enter this bear in the following challenges:
C.R.A.F.T. - Christmas
The 12 Months Of Christmas - Sparkle, Glitter & Bling
Crafty Hazelnut's Christmas - Anything Christmas / optional no stamp or digi


Monday, 1 April 2019

Hot Glue Flower


     This canvas was inspired by a photograph I saw on line, texture paste had been used to create the petals of a flower. Hot glue can be used for creating texture, so I set about using it to make my flower for Altered Eclectics.
     As the canvas was going to be painted I was able to draw a rough flower shape to guide my glue application. Working one petal at a time I put down a string of glue around the outside edge of the petal, with a silicone finger protector firmly placed on my hand I used it to smudge the glue into the centre to create a veined petal, this could not be done without the protector!
      Working at diagonals around the flower I created all the petals and let them set, hot glue sets quite quickly so you need to work fast. Some petals look better than others but then real flowers are never completely perfect.
 
     To get a textured centre I used some seed beads, a large pool of hot glue completely smothered with beads and left to set. Once the glue had set I very gently rubbed a finger across the beads to disturb any loose ones to get ready for painting.
     The paint I planned to use needed a layer of gesso first, some better quality paints may not need this preparation, it's an idea to try a small patch first if it doesn't give any information on the label.
     I painted the canvas with gesso and then a layer of white acrylic too. The purple metallic paint I used was then put all over the entire canvas, including the edges.
     I wanted the flower paler than the background so I used the same paint and added a little white acrylic to it, it lost it's metallic quality but that didn't matter as I was going to add foil.
     Once dry and touched up where necessary, I added a little glue from a Stix2 glue stick (other glue sticks may work) on each petal with my finger. After a few minutes I placed transfer foil over the petals and gently rubbed to get the silver in place.
     The beaded centre of the flower was painted with white pearl but it didn't look right, so I went over it with a thin layer of gold pearl with gave it some warmth.
     Butterfly or bee?....It had to be a bee. I die cut a bee in black card, then die cut in cork, I had hoped the cork one would be complete but his legs fell off as I took him out of the die, just a little bit too delicate. All was not lost as I used the little bits of cork that the die cut out of his body to go where the yellow bits might bee.
     The card bee was stuck on to acetate so I could get the translucent wings and also to give him some support. The wings looked OK but not quite good enough so I added a little iridescent glitter to them to make them sparkle.
     The bee is stuck on to the flower with two layers of clear foam pad, so if you look at it sideways the bee is hovering.
     A little trip around the edge of the canvas with a two in one glue pen, this is put on and it's blue, you smudge it with your finger to make a random distressed type edge and once it has changed to clear it is super tacky and ready for some foil, this canvas has a mix of silver and purple.
     The whole canvas is only 6x6 so it's easy to find somewhere to hang it, in sunlight it shows just how shiny it is.
     Altered Eclectics is a challenge blog for mixed media and altered art so if you have made anything like that please come over and show us, we would love to see your artwork.


I would like to enter this canvas in the following challenges:
Cut It Up - Flowers - must use a die cut
Simon Says Wednesday - Anything Goes
Love To Create - Anything Creative Mixed Media Goes