Wednesday 27 April 2016

Shakespeare or not Shakespeare


     It wasn't until I had made my card that I discovered the quote is not by Shakespeare atall, sorry, I thought it was. It is attributed to George Santayana, although that appears to be in some dispute too, the more I read about it the more confused I got. My apologies, but I have at least learnt something from it all.
      It all started when I found 'that quote' and loved the words, the font and the colours. First to be printed was a very pale music sheet digi, then the words were printed over the top of that. The sheet was cut to fit a 5x7 card blank with room for a mat layer and I have darkened the edges with Distress inks.
     I have stamped a clump of trees in Crushed Olive DI in the bottom right corner and then stamped the guitarist in dark brown in the opposite bottom corner.
     All the colours are drawn from the colouring of the quote, including using an alcohol marker to colour the edge of the mat layer. There are some tiny copper peel off corners added to give it a little lift, these also match the quote colouring, it's just a shame that William Shakespeare didn't write it!
     Please pop over to The Male Room and take a look at the DT inspiration, I'm sure you will find something to spark your imagination, we also have a Design Team Call running.


I would like to enter my card in the following challenges:
Tuesday Throwdown - Anything Goes
Love To Scrap - Anything Goes


Thursday 21 April 2016

MHK Designs Challenge #4


     Welcome to the new challenge at MHK Designs, we have some gorgeous colours for you to use or maybe you are inspired by all those beautiful berries. You don't have to use MHK Designs products but with five new releases this week you might find something you would like to use.
     This image is from Fruit Borders, new this week, printed on to card suitable for markers. After colouring the image I went around the outside and 'fussy' coloured with a pale blue marker to help the picture stand out a little, it also matches the backing paper quite well. The paper is from Sunflower Sampler, another new set, changed to a pale blue.
     The image panel is mounted on a dark green layer before being put on the blue polka dot paper, it's all on a white large DL card blank. The greeting is from another MHK Designs set, die cut and coloured while still in the die. The little stars have been put back in to the holes after being coloured to match the flowers. It is then mounted on foam pads and put in the corner of the card.
 
Fruit Borders
Sunflower Sampler


Please come and join us at MHK Designs blog, you don't have to use our products but if you do you can enjoy an Anything Goes entry. All entries have the chance to win a stamp set.

April/May challenge at MHK Designs

I would like to enter this card in the following challenges:
Wonderful Wednesday - Anything Goes
Inspiration Destination - Anything Goes

Wednesday 20 April 2016

MHK Designs - Perfect Poppies


        Here is the last set of our new releases here at MHK Designs this month, it's called Perfect Poppies. You still have the chance to win a stamp set over at MHK Designs blog so pop over and take a look at all the DT inspiration too.
     For this card I have printed a stamp in each corner to create a frame, this can be done in using a photo shop package. Check your computer and see if you have anything that will do this, being able to turn images and re-size them makes digi stamps so much more useful.
     The images are coloured with Graph-It markers, with the centres decorated with black glitter. The 'birthday' part of the greeting is also covered with black glitter, I used a glue pen to trace over the word and then covered it with sparkle.
     To make sure that the red mat layer matched the flowers I coloured some white card around the edge with the same marker pen, then mounted that on a white card blank. A very simple card but by adding a little sparkle it's fit for a birthday.
     Don't forget all these new releases can be found on our etsy shop and if you would like to win a set then pop over to MHK Design blog and follow the instructions, good luck.


Perfect Poppies


I would like to enter this card in the following challenges:
Cards In ENVY - Birthday
Love To Scrap - Anything Goes
Sparkle N Sprinkle - Anything Goes


Tuesday 19 April 2016

MHK Designs - With This Ring


      Day four of our new releases at MHK Designs is With This Ring, perfect for the upcoming wedding season. With a set like this you could make your entire wedding stationary package, especially when teamed with the gorgeous digi paper sets on MHK Designs etsy shop.
     For these little favour bags I have used paper set Damsel In Distress altered on the printer functions to change the colour. I have used a die to cut these bags out of an A4 sheet, two bags per sheet makes it affordable too.
     Each bag measures 3 x 2.5 x 1 inches, small but not too small, They could even be used as place markers and favour bags all in one.
     The front is also die cut so remember to print your image small enough to fit the dies. By backing the lace die with co-ordinating coloured paper and colouring the bow on the larger image to match it can all follow your chosen colour scheme. With the addition of some coloured organza ribbon the little bags are complete.
     Tomorrow will see the last release set to be showcased, but it's not too late to hop over to the MHK Designs blog for a chance to win a set of stamps and take a look at all the DT inspiration.

With This Ring
Damsel In Distress


I would like to enter these gift bags in the following challenges:
Southern Girls - Patterned Paper
CraftyHazelnut's Patterned Paper - Anything With Patterned Paper
Decorate To Celebrate - Anything Goes For A Party
Digital Delight - Anything Goes Using A Digi
Julia Spiri - Make A Craft Bag Using A Digi
As You Like It - Favourite Non Crad Project & Why ( love bags & boxes)


Monday 18 April 2016

MHK Designs - Stitched Sunflower


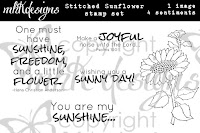
     Welcome to day three of our new releases at MHK Designs. This set is called Stitched Sunflower, there is also a co-ordinating paper set called Sunflower Sampler.
      The flower was printed twice on card suitable for marker pens,both flower heads were coloured the same and one was cut out and stuck on top of the other to give a little dimension. The image panel was die cut and coloured with Distress ink before being removed from the die, this gives a white border and a subtle splash of colour.
     The green paper is from the Sunflower Sampler set, die cut and inked the same way as the image panel. Both layers have been stuck flush to the Kraft card base.
     The sentiment is also die cut and coloured, with the addition of a touch of green ink around the very edge of the shape, this is mounted on thin foam pads making the complete card suitable for standard postage here in the UK.
     We still have another three days of new stamps to show you so don't forget to call in again tomorrow. If you haven't been over to MHK Designs blog yet then pop over now and see how you could win this image set, here's your link and good luck.

Stitched Sunflower
Sunflower Sampler


I would like to enter this card in the following challenges:
Simon Says Stamp - Let's Do The Polka
Alphabet Challenge - D is For Dots
Simply Papercraft - Anything Goes


Sunday 17 April 2016

MHK Designs - Fruit Borders


   Welcome to day two of the new releases at MHK Designs. This set is called Fruit Borders and features lemons and pears, along with some great sentiments.
     Is it too early to be thinking of Christmas gifts? I thought my Mum might like this in her kitchen, there are always candles at hand, just incase the power goes off.
     The image was printed on basic quality copy paper, I didn't try tissue in my printer as it can be temperamental at the best of times. I coloured the image with Graph-It markers and then fussy cut it. I also fussy cut the sentiment ready to go onto the candle.
     The image was added first by laying the paper over the candle and then covering it with a long length of baking parchment. Holding the parchment tightly at the back, to keep the image flush to the candle, I used my heat gun to melt the wax so the image sunk in and the edges of the paper disappeared. Here's the link to a You Tube video tutorial that will guide you through the process, it's really easy and very effective. The sentiment was added in the same way and then all that was left to do was put it on a stand and add some ribbon.
     The fire safety label is still on the bottom of the candle,  I've been told that it should not be sold without one so if you are making these for fund raisers you may want to find out more.
     We have another three days of new releases to show you, you can find lots more inspiration over at the MHK Designs blog, plus the chance to win a set.  If you would like to buy them now you can find them all on Etsy.

   
Fruit Borders

I would like to enter this project in the following challenges:
Craft For The Craic - Anything But A Card
Crafting With Friends - Anything Goes
A Beautiful Mess - Anything Goes


Saturday 16 April 2016

MHK Designs - Eat Your Cake


     Welcome to the first of our new releases at MHK Designs, over the next five days we will showcase April's new images and papers. This set is called Eat Your Cake, you can find all our new sets on Etsy and lots more inspiration on the MHK Designs blog.
     I have used the main image and one of the many sentiments to make this card. Making cards for men can sometimes be a little more challenging than for the ladies, but with an image like this it's easy to adjust your colour choice to suit.
     Both items were printed on card suitable for alcohol markers, I then used my Graph-It pens to colour the cake.
     I had a small piece of backing paper in my stash that had stars on it, I thought it would pick out the stars on the cake and keep it on the masculine side.
     The easel card was die cut from a square using a large circle die, just remember to leave enough of the fold to hinge it. The star paper was stuck onto a complete circle die cut with the same die.
     The cake is die cut with a smaller die from the same set and mounted on thin foam pads. The sentiment is also die cut, mounted on thicker foam pads with a star brad on each end to tie the whole thing together. The inside circle is covered with a blueish paper because white just didn't look right, there is space on the reverse of the front to write on.
     For today and the next four days there will be the chance to win a new release set, with one lucky winner getting the whole release, so if you haven't been over to MHK Designs blog yet then here is the link and good luck. Don't forget to come back tomorrow for the next set.

Eat Your Cake

I would like to enter this card in the following challenges:
Cardz 4 Guyz - Food and Drink
Inky Impressions - All About The Boy's
Star Stampz - Use A Digi
Sasayaki Glitter - Shaped Card

Wednesday 13 April 2016

The Male RoomTriple


      Today is the start of a new challenge at The Male Room, this time we would like you to try Triple Stamping with a masculine theme. There are a couple of tutorial videos on the challenge blog to help get you started.
   
      I decided to start with a single layer image and then cut it, I think it worked out quite well. Last time I made a triple stamp card I had three layers of card stacked up and then stamped, both methods seem to work.
     The shoes were stamped on cream card with black Versafine ink, a mask was also stamped and cut out. After covering up the shoes with the mask I used a brick stencil and taped it in place, the bottom masking strip covers up the toes of the shoes to create the illusion of flat ground at the base of the wall.
     Distress ink Rusty Hinge gave the brick colour I wanted, it is deliberately blotchy and uneven, followed by a crackle stamp using the same ink. The ground is Distress ink Hickory Smoke and again deliberately blotchy.    
     The graffiti was stamped in black over the wall and then coloured with Graph-It markers, the bricks show through a little but I think that helps with the illusion of dimension.
     Graph-It markers were also used to colour the shoes, my shading needs a little improvement but I'm hoping that will come with practice.
     Once the image panel was dry it was die cut with a Spellbinder star set. This took a little planning and thinking in reverse, the medium star is on the top so it had to be cut first, then the large star. The dark brown layer was hand cut after drawing around the outside of the die, the next die size was too much of a border, thank goodness for straight lines!
     The image panel is mounted on a layer of dark brown, then the stars are built up on that layer using thin foam pads. The holes in the bottom layer don't show because the star mat layer covers up the edges perfectly.
     There is no greeting on the outside of this card, I don't think it needs it, plus I've not left a gap for it to fit in. If you wanted to add a small greeting it could be put on top of the smallest star.
     Please come and join us at The Male Room, we have lots of inspiration for you over on the challenge blog, as well as those two tutorials to help you get started.

Stamps used:  Woodware - JGS389 Sneakers & JGS387 Graffiti


I would like to enter this card in the following challenges:
Tuesday Throwdown - Use Die Cuts
613 Avenue Create - Anything Goes + optional twist - Masculine Card
Crafting From The Heart - Anything Goes


Monday 11 April 2016

MHK Designs Gift Box


     Today I have a project for MHK Designs using one of their gorgeous digi paper sets called Damsel In Distress. 
      This set comes in a rather stunning pink but with a little help from my printer functions I have changed the colour to a very nice mauve.
     The origami box was made following a brilliant video by Christina Griffiths, here's the link, Christina's tutorial is very easy to follow.
     It was printed with a different pattern on each side of an A4 120gsm paper. One A4 sheet will make this box bottom and decorate the lid, you will need an A5 of co-ordinating card for the lid base.

      With the addition of some paper lace on the edges, some paper roses and a small length of ribbon for the lid the materials list is quite short.
      From an A4 sheet you can make a finished box that measures 3 1/2 inches square and 2 1/2 inches tall including roses.
     Just imagine making wedding favour boxes this way, if the Etsy shop doesn't have what you're looking for then contact MHK Designs about the possibility of a bespoke set.
     Digi papers are so versatile, you can change colour and size by adjusting your printer and being able to print double sided papers is a real bonus.
     
      Come over to MHK Designs blog and join in our challenge for the chance to win some digi papers and stamps.  You don't have to use MHK Designs products to enter but we would love it if you did.


I would like to enter my gift box in the following challenges:
Brown Sugar - Anything Goes
Craft for the Craic - Anything BUT a Card
Simply Papercraft - Anything Goes
CraftyHazelnut's Patterned Paper - Anything With Patterned Paper
Decorate To Celebrate - Anything Goes
Allsorts - Purple Passion


Friday 8 April 2016

Cork memo board


     This small pin board is made using an 8 inch cork pot stand and some of the new products from Stix2 Anything and Woodware Craft Collection and a few bee pins.

      To work out where I wanted my flowers I stamped everything on a piece of paper the same size as my board. Then I stamped the calico background with Old Letter and Crafter's Inks Aquamarine and Ocean Breeze.
     For the flowers I used Blueberry ink and some floral polycotton fabric with Whimsical Daisy May stamp, to get different shades I used both the right and the wrong side of the fabric. Once stamped the fabric flower was ironed on to the fabric adhesive sheet and then cut out.

 Ironing fixes the inks so it was easy to set the colour and fix the fabric all in one go. The leaves are stamped in Jungle, ironed on to adhesive sheet and then cut out.
     Having cut out all three flowers and leaf sets it was time to iron them on to the calico. I fixed the outside leaf sets first, then the outside flowers, followed by the centre leaf set and flower head.
     The flower centres are made with the delicate fabric adhesive which has a mesh like look to it. For this I cut the adhesive out and fixed it to the flower head, then covered it with transfer foil and parchment sheet and ironed. Foils have to be left to cool down before removing the excess or you may pull the whole lot off.

     The butterfly is die cut using a Sizzix die and the basic fabric adhesive, then it was foiled with a teal sheet part used so bits stayed blank, when cold it was foiled again with a full purple sheet to get the bits filled in giving it a mottled look.
     After all decoration and ironing was done I stapled it to the cork mat, attached a cord for hanging and covered the back with brown felt.
     The inks work very well on card and paper, as do the foils and of course the dies, the iron has many uses so everything is multi purpose making it better value.
   

     Materials list - available from your local craft shop
Woodware Craft Collection - FRS614 Old Letter clear stamp
                                          JGS447 Whimsical Flower Daisy May clear stamp
                                          Colour Box Crafter's Inks
                                          
Stix2 Anything - S57357 Iron On Adhesive Various Materials
                        S57356 Iron On Adhesive Delicate Materials
                        Shiny Transfer foil
                        S57360 Craft and Mixed Media Iron


I would like to enter my pin board in the following challenges:
Crafting From The Heart - Anything Goes
Craft Your Passion - Anything Goes
Crafting With An Attitude - Anything Goes
The Crafty Addicts - Anything Goes / Springtime


Friday 1 April 2016

French Script for House Of Cards


      We have a new challenge over at House Of Cards, our theme this month is to Use Script and/or Colours from our photo prompt.
     I have a lovely SU french script stamp that goes perfectly with an Eiffel Tower stamp and die by Sizzix, so all I had to do was tie in the colours and I was away.
     The script is stamped in brown on to white card, then it's coloured with Distress Ink Bundled Sage and mounted on a dark green layer on to a cream card blank.
     The Eiffel Tower is also stamped in brown but clear embossed and cut with the matching die from the set. This is mounted on foam pads over the layers rather than on them.
     To bring in the pinks I chose to stamp and emboss some Heartfelt Creation flowers, embossed in gold and coloured with Koi watercolour pens. There's a tiny yellow gem in the centre of each flower which was added after they were stuck on to the card.
     The balloons are from a set of tiny stamps I found in a bargain shop, they are stamped in brown, clear embossed and then coloured with the same pens. They have some shape in them after working them on a foam board with a ball tool, each one is stuck on with a tiny foam pad.
     'Paris' is in the same Sizzix stamp set but this time I have used a ticket die to cut it out instead of the matching shape. It's stamped in brown on cream card, clear embossed and aged with DI Old Paper and a crackle stamp, coloured green, them mounted on foam pads. There is a tiny Fleur De Lis die cut in gold satin mirri in the top right corner just to finish it off.
     Please come over to House Of Cards and join in the challenge, we have lots of inspiration to show you aswell.


Use Script and/or Colours


I would like to enter this card in the following challenges:
CCEE Stampers - Eiffel Tower Day
Southern Girls - Anything Goes
Crafty Gals Corner - Anything Goes

Gilded Flower


     My project for Altered Eclectics this month is a painted picture frame. We are a monthly challenge for anything altered as long as it's NOT a card or an ATC.

     I found this white frame in a local bargain shop and thought it might be nice to paint the flowers.
     This gave me two little problems. One, the glass doesn't come out, it's the first frame I've bought with the glass glued in, so I had to cover it with paper. Two, now I've made the frame 'busy' I have to find a simple photograph to go in it.
     I started by painting the flowers with a pale blue chalk finish and added a small amount of a darker blue while still wet so I could blend them together.

     Once the flowers were dry I painted the centre of each one with an opaque pearl paint.
     The leaves are all painted with a darkish green chalk paint. I had to touch up a few areas as I went round, once the paint dried I could see the odd patch I had missed.    
     The Purple effect is added by using gilding wax on the edge of each petal and rubbing it in with a cotton bud, my fingers are too big to do it by hand.
     Left to dry off for a while I then used a baby's toothbrush to buff up the wax and make it shine. I think I have got that Hydrangea look to my flowers which is what I had in mind, now to find that simple photograph, maybe an old portrait of my grandmother.
     If you enjoy altering anything then please bring it over to Altered Eclectics and show us, we love to see you projects and we have a few DT projects to help get you started.


I would like to enter my frame in the following challenges:
613 Avenue Create - Anything Goes
4 Crafty Chicks - Anything Goes
Sisters Of Craft - Anything Goes