Friday 10 June 2022

Living Hinge Pocket Journal


     A simple pocket journal made with envelopes and the new Living Hinge die set from John Next Door. This was a great way to use some of the large stack of 12x12 papers I have in my stash.

    All the envelopes in this journal were made using scrapbook papers but you could easily use ready made envelopes instead, decorating them with stamping or stencils.
     For this journal I made 8 envelopes, joining them together with one length of tape across the middle width on each one, forming a concertina of pockets.
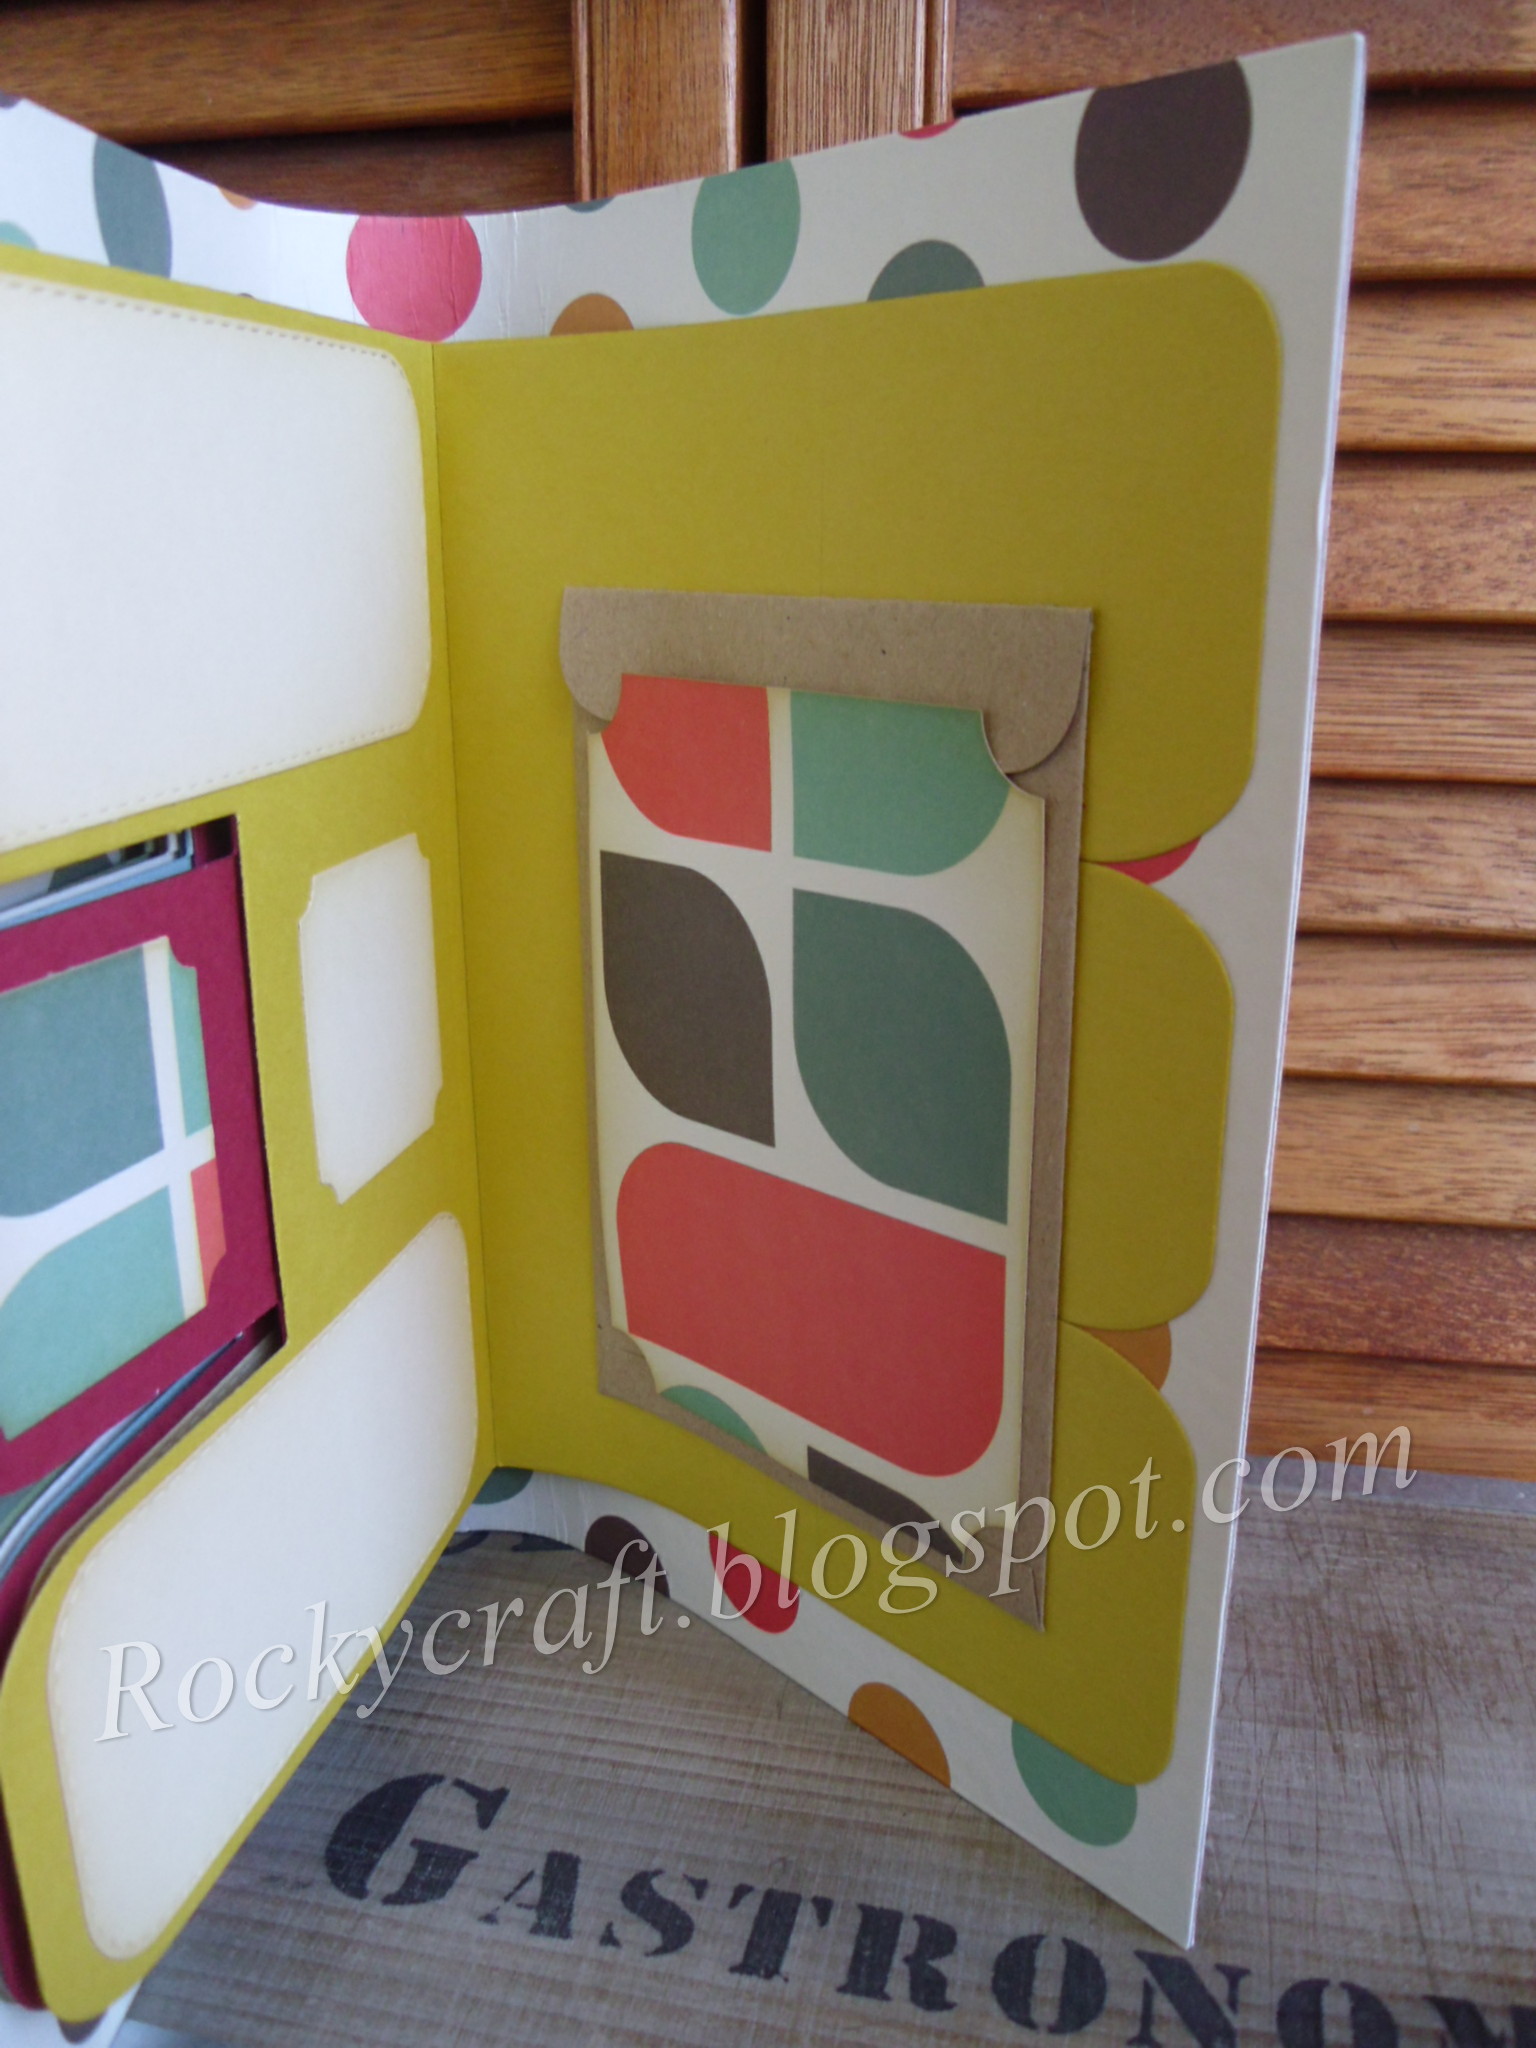
     Each pocket has a white card that slides inside, edged with the bracket die from the set. These could house some favourite photographs from a special occasion making it a tailor made photo album.
     To house these pockets the album was made using 1.5 A4 sheets of 1mm greyboard, covered with scrapbook papers using PVA glue. Once dry the full A4 sheet was die cut down the middle with the Living Hinge, the A5 piece was cut with the Bracket die, then the hinge die allowing enough on the straight side to attach to the large piece. Remember when bending the hinge to use something round as a support underneath so it doesn't fold in the wrong place and leave you with a buckled spine. Both parts were taken outside and given a couple of light coates of spray varnish to seal the paper.
     Using redline tape the bracket flap was attached to the A4 cover to form a wrap round cover, these were then held together with a Velcro type disc under the flap. The Velcro didn't like sticking to the varnished cover very much so I had to add some redline tape to the back of the discs.
     The pockets were placed in the cover and held in place with pegs until I was happy with their placement and the book opened properly, using redline tape they were then stuck in place one side at a time. As the cover is opened the pockets all fan out, you could use more than 8 envelopes to give you a fuller book if you wish.


I would like to enter this project in the following challenges:
Love To Scrap - #155 Anything Goes
Crafty Gals Corner - #232 Anything Goes
Get Creative #112 At Least Two Patterned Papers
Craft Rocket - #93 Girls
Through The Purple Haze - #193 Anything But Square

Monday 6 June 2022

Living Hinge Flip Flap Journal


     This has been made with the new Living Hinge die from John Next Door and his older Tag Card die set. Journals are very popular and so very useful, now with this die it's easy to make your own.
     The die is thicker and the 'cutting' edge is deeper so it will go through thicker materials, all you will need to do is work out the best 'sandwich' for your machine.
     The cover was made using an A4, 1mm thick piece of greyboard and two double sided 12x12 papers. The greyboard was coated with PVA glue, then placed on to the scrapbook paper and smoothed down with a clean brayer, this gives a good even pressure all over to stop any air bubbles appearing, repeat for the inside cover. If you use a directional pattern always double check this second cover is the same way up as the first.
     With the chosen outside facing up the die was fixed with tape across the middle of the sheet and run through the machine carefully. Each machine is slightly different so it's a case of gently trying until the correct 'sandwich' is found for a good clean pass, various layers of thin card can be added or removed to reach this, never force the die through.
      To get the even curve across the spine I gently bent it around a strong cardboard tube from the middle of a tin foil roll, this meant it had support as it curved and didn't buckle and fold. Once curved the cover was taken outside and sprayed with a couple of light coates of varnish, this will protect the paper and keep it clean.
     The inside was made using the Large Tag Card die set from May 2020. Each section was cut in a different colour, one that matched the colours in the cover pattern. Shapes to write on were cut in cream for the coloured pages and taupe for the cream page, all edged with Distress Ink and glued in place. For the small square tabs the offcuts from the cover papers were used to keep the continuity of colour and pattern.
     On the last page there is a small envelope to hold little trinkets like ticket stubs or labels, it's covered with another piece of the cover paper for decoration.
     Working out how to glue the pages in took a few minutes, I pegged it in place to see if the book would open correctly before making the final decision. I found that it was best to leave 1.5inches from the spine edge clear of glue, this left enough of the flip flap pages to glue down but also left a free moving area at the spine for the book to fully open without buckling the pages.
     I can honestly say that this was a joy to make and, like most crafters, I have a stash of papers I can now use to make journals for all manner of things. 
      This was made with 1mm greyboard, covered with two sheets of ds paper, it bent with gentle persuasion, I also tried a 1.25mm mount board that did not like to be bent. I think the composition of the board you are bending will make a difference so take a little time to experiment before you use your favourite papers.


I would like to enter this project in the following challenges:
Crafting Happiness - #124 Anything Goes
Get Creative - #112 At Least Two Patterned Papers
Pammie's Inky Pinkies - #2223 Anything Goes
Gem Of A Craft - #12 Anything Goes
Crafty Calendar - Anything Goes
Mixed Media Lovers - #14 Anything Goes

Wednesday 1 June 2022

Father's Day at The Paper Funday


     The new challenge at The Paper Funday begins today. We are an Anything Goes challenge with an optional twist, this month it's Masculine. I chose to make a Father's Day card.
     Using Kraft card I die cut the words with John next Door's individual letter squares, this gave me the chance to lay it out like scrabble tiles.
     I wasn't sure how well the die cut letters would stand up to a woodgrain embossing folder, so I used a ball tool to score the grain lines and a little green ink to highlight them.
     For decoration I have used die cut ivy touched over with a little white ink, a few punched flowerpots and some stamped and cut garden tools. All of these items have had a little shaping so they aren't completely flat.
     On the back of the main panel there is foam tape all around the outer edge but also in between the letters so it doesn't sag. Some of this tape is visible from the outside at an angle so it has been coloured brown with an alcohol ink pen.
     The main panel was stuck onto a satin gold mat layer on a white DL card blank. All the decorations were then added to the card with a strong PVA glue or tiny foam pads.
     With the addition of acetate this could be made into a shaker card for added interest.


I would like to enter this card in the following challenges:
Shopping Our Stash - #471 Make Mine A Tall One
Try It On Tuesday - For The Man In Your Life