Saturday 14 December 2013

Kusudama snowflake ball


   I would like to take this opportunity to wish you all a Merry Christmas and a Happy New Year and to thank you for your kind comments throughout the year, I do appreciate you taking the time to look, comment and follow.
    I spent a lovely morning with a new crafting buddy this week. Our children are at the same school and through various chats in the playground we discovered we have some mutual interests, so we booked a grown up play date. Jane showed my how to make these amazing flowers.
     We began by making a single Kusudama flower using 6x6 papers, the result was great but me being me I thought 'how small can I go?', so these flowers are made with a 2inch square. That means I can get a complete ball out of two 12x12 sheets, the ball measures 3inches across. There are tutorials available on youtube, I would recommend www.wikihow.com, 'Make a Kusudama flower' and 'Make a Kusudama ball'.
    I do apologise to any 'black belt' origami experts out there, this is not a perfect example by a long shot but it is my first and I like it hanging on my tree. I did discover that a good quality paper is much easier to fold than a thin card, especially when working smaller squares. I do need to practice more and get my folding more accurate as this is the key to it all working out well.
    Each flower has Glamour Dust on the centre veins and a clear gem in the middle which catches the light as it hangs on the tree. It took about six hours in total, I fold a few squares in between cooking duties so I can then spend the evening sticking it all together, which for me was the trickiest part.

I would like to enter this ball in the following challenges:
52 Christmas Card Throwdown - Past Challenge=Snowflakes
Creative Moments - Anything Goes, Winter Wonderland
Here Come The Boys - Anything Goes (my son has claimed this already)
Holly Jolly Christmas Challenge - Anything Goes & Blog Hop
Make My Monday - Frosty Theme
Try It On Tuesday - Handmade Gift or Tag 
CraftyHazelnut's Christmas Challenge - Whatever is urgent to make (I just HAD to try it)
Feeling Crafty - Christmas
Allsorts - Snowflakes

Wednesday 4 December 2013

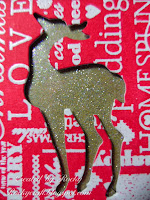
A 'Deer' Little Treat Box for The Male Room

If you are looking for the House Of Cards Blog Hop post then please click HERE


    I know...... my posts are like buses, nothing for a week or two and then three in a row! It's the beginning of a new month and Christmas mayhem too. Just spent a long weekend in Wales with my parents, no mobile phone reception, no computer either and if  it wasn't for freesat  there'd be no TV ......very relaxing!
    This little chap here is for our new challenge over at The Male Room, we would like to see something masculine with a food or drink theme. It doesn't have to be a card, it could be a gift or a scrapbook page, a tag or a decoration as long as it fits our theme and is for a man or boy in your life.
    I was given the template for this deer by my friend Val who is always making something interesting. I have enlarged him as another friend has asked me to make some to hold six truffles for gifts to workmates.
    He is cut from a brown slip folder that you can find in any stationary shop, I had some in the cupboard so I thought I'd use them up. I put Distress Ink on my embossing folder before I ran the body through so I got a darker brown background to my snowflake pattern. The face is drawn on with a brown pen, he has wobbly eyes from my sons craft box and a red nose pompom that was in a Christmas bits box on the shelf , his bell is from a well known chocolate rabbit so I think you could say that he's a complete stash deer. He holds half a dozen or so wrapped sweets and is just the right size to sit on the Christmas table, you could even write a name on him to use as a place marker.
    I hope you find time to join us at The Male Room with your creations.

I would like to enter my deer in the following challenges:
Inkspirational - Anything Goes
Holly Jolly - Anything Goes
Try It On Tuesday - A Handmade Gift or Tag
Sparkles Christmas Challenge - Christmas Feasts and Treats

Tuesday 3 December 2013

Technique Time Tuesday - Pick a Favourite

If you are looking for the House Of Cards Blog Hop post then please click HERE


      This month at Technique Time Tuesday we would like you to choose your favourite technique from the past year. Pop over to the blog and take a look at the list, I'm sure there will be something you will like.
    I chose water stamping which has to be one of my all time favourites. I have given it a little twist for this card though, it just seemed right for Christmas.
    I began by die cutting a snowflake in double sided sticky paper, then I stuck it on to white card. Before removing the top layer I coloured my white card with Distress Inks in Broken China, Faded Jeans and Dusty Concorde. Then I used two snowflake stamps to water stamp with, but before the ink was dry I dusted over the whole card with Cosmic Shimmer Pearlescent Mica Powder to give it a shine. The powder will only stick to the inked areas and not the water stamping.
    Once the powder was dusted off the card I then lifted the top layer on the sticky snowflake and sprinkled it with Glamour Dust to make it sparkle. It didn't look quite as good as I'd hoped so I then made a Tim Holtz Snowflake Rosette in glitter paper and stuck that on top.
    I tried it on a white card blank but it didn't look right, the white made the snowflakes fade so I went for a blue card blank instead.
    To finish off I added some snowflake embellishments that I've been hoarding for years, it took some doing but I was brave and used some treasured stash!, well it is Christmas.
    Please pop over to Technique Time Tuesday and take a look at all the fabulous DT samples, there's lots of inspiration to get you going.

I would like to enter this card in the following challenges:
52 Christmas Card Throwdown - Pick a Previous Theme - Snowflakes
Inkspirational - Anything Goes
Cards For Men - Anything goes
Here Come The Boys - Anything Goes

Sunday 1 December 2013

House Of Cards Term One Blog Hop

Welcome to the House of Cards Term One Blog Hop!  If you've come here from Macarena's  blog, then you are in the right place!  If you have just stumbled here and would like to participate, please hop over to the House of Cards challenge blog to get started!  We've got some fabulous sponsors that are providing prizes, so make sure to leave comments at each stop for a chance to win!


    This beautiful image is available from Stitchy Bear Digital Stamp Outlet and is called 'O Winter Trees'. 
    It has been printed in blue which I managed to do by switching off yellow and magenta in the advanced setting area of my printer, allowing only cyan ink to be used. I have covered the image with double sided sticky sheet and then sprinkled Glamour Dust all over it. I used deckle edge scissors to cut it out and then mounted it on silver mirri card.
    The card blank has been coloured with Distress Inks Iced Spruce and Stormy Sky using a shaving brush to try and match the printed image. There are a few gems in opposite corners and the sentiment is a die cut greeting in silver mirri card coloured with alcohol markers.
     I think these trees are gorgeous, very useful for a male card as well as a non religious greeting card, a versatile digi that you don't have to colour in.
    
    This is the second item made with a fabulous freebie from Eclectic Anthology. They have some wonderful vintage style items, this little chair tag is from a set that includes flowers, a crown and a chandelier. 
    I have printed this tag in shades of grey by setting my printer to use black ink only, then I have coloured it a little with Distress Inks. There is a small gem stuck over where the hole would be and the edges are coloured with a silver glitter gel pen. 
    The place card itself is a copy of our inspirational photo with a silver mirri 'A' die cut and mounted on silicone glue.
    A basic place card but easy to do if you are making a large quantity, ideal for a special dinner or Christmas lunch.
    There are prizes hidden all over the blog hop so make sure you leave a comment on every blog to be in with a chance of winning some fabulous prizes from our amazing sponsors. Don't forget to start at House Of Cards to see the full list off sponsors and blogs to visit.


Thanks for stopping by!  Please join in the fun of our hop and make your way over to Sue B blog!

Friday 29 November 2013

Playing around with a digi stamp

I haven't used a digi stamp before but I have seen some beautiful cards made using them, so when asked to use one I thought I would take the opportunity to play around with it and see just what I could get out of it. It's been fun using my printer to alter the effects, I expect most of you already know how but for anyone who doesn't here is what I've discovered so far.
    There are four variations in this picture. 
    #1 is the image as received from the supplier.
    #2 is the image printed out on the 'draft' setting on my printer, this gives a paler image which can be really useful.
    #3 is the result of reducing the 'magenta' ink input to zero using the advanced settings on my printer. Now I have green trees.
    #4 is the result of reducing 'magenta' and 'yellow' to zero on the printer which left only 'cyan', blue trees.
    I am not a very technical person but I did find this quite easy, so I would encourage you to play around with your digi's to see just what you can do with them, after all we crafters love value for money don't we?!
    If you would like to see what I've done with these images and where the original came from then please join me on Sunday afternoon for the House Of Cards Blog Hop when all will be revealed, there are prizes to be won so pop over to the House Of Cards where the hop begins (Sunday 1st December 12noon GMT) and read all about it.

Wednesday 20 November 2013

Industrious Little Boy


     Today sees the beginning of a new challenge over at The Male Room, this time we are looking for anything for 'Little Boys or Babies'. It doesn't have to be a card, it could be a scrapbook page or an altered art project, as long as it fits the theme and follows our few rules we would love to see it.
     This card has been made with a stamp set from Stampendous  called 'Gears Kiddo', it reminds me of my son sitting on the floor engrossed in making something. The cogs are stamped and embossed in black, I have found this makes colouring in much easier as the pen stays within the embossed lines very easily. I have used a variety of metallic pens to colour the cogs and alcohol markers to colour the boy.
     The main cog image is cut out with a Spellbinder label die and then inked with a shaving brush with the die still in place so I get the little white border. The background is the same stamp clear embossed on a white card before being inked with Distress ink, believe it or not it's the same blue on the image panel but as the card is different the colour looks different too.
     The boy is cut out and mounted on foam pads once the image panel is stuck on and the sentiment is cut with the smallest die of the same set, this is also mounted on foam pads. If this card was for an older child I would have used some metal cogs and brads but my concern is that a small child may hurt themselves so I have kept it all card just in case it should be chewed!!

Friday 8 November 2013

Salt 'n' Flake


     This is my second Christmas card this week, which is a good way of catching up on some weeks that I missed altogether. In the run up to Christmas life is becoming busy so I am very glad that I've been making seasonal cards all year.
     The layout is inspired by a sketch at 52 Christmas Card Throwdown, the 'homemade background' by The Glory Of Christmas Challenge and lots of bling for CraftyHazelnut's Christmas Challenge.
     The background has been made using Cosmic Shimmer misters, a plastic bag and rock salt. I began by spraying the thick white card with the inks to spread them around, this gives a lovely effect in itself but I then sprinkled it with rock salt while it was still very wet. The salt absorbs the liquid around it causing the little blotches and rings of colour, this process should not be accelerated with a heat gun, it is much more effective when left to air dry slowly.
     The snowflake is a Tim Holt Rosette Die cut in glitter paper, I have reinforced the back by using surgical tape, this stops the perforations splitting when you fold but still allows a clean fold. There are two blue ribbons across the card stuck down with red line double sided tape as it's a bit stronger than ordinary DST. The greeting is a Tattered Banner from another Tim Holtz Die, edged with blue ink and decorated with a silver peel off greeting.
     I would like to enter this card in the following challenges:
The Glory Of Christmas - Homemade Background

Wednesday 6 November 2013

The Male Room Remembers


     This fortnights challenge at The Male Room is Remembrance. We would like to see your creations following this theme whether they are cards or scrapbook pages, take a look at the DT inspiration and come and join in.
     I have had this set of stamps by Hobby Art for over a year now and I felt they would be perfect for this theme. My family has always been very interested in WWII aircraft, some of them being involved in manufacture during the war. These three aircraft are a Lancaster Bomber, a Hurricane and a Spitfire, which make up the Battle Of Britain Memorial Flight.
     The fields were stamped in Memento Ink Gray Flannel and then coloured in with Graph It markers (very similar to Promarkers). The sky has been washed with a weak solution of Distress Ink Stormy Sky before stamping the aircraft in Archival Ink Jet Black. The image is mounted on blue card before being stuck on to a card blank covered with sky scrapbook paper. The quote is stamped in Archival Ink Cobalt blue.
   

Tuesday 5 November 2013

Framed Baubles


     This month's challenge at Technique Time Tuesday is to create a Faux Frame around your image. There is a great tutorial on the blog to show you just how do it so please pop over and watch it, you'll see all the lovely ideas the DT have come up with too.
     As we are approaching Christmas I chose to make a card using my Spellbinder Heirloom Ornament dies. I cut my bauble shape from the middle of my square piece of card, I wanted to make use of the bauble and the offcut.
     The bauble has been stamped, with the die still in place, using Perfect Medium Ink and then embossed, without the die, in Cosmic Shimmer Bright Gold. I then put the die back over the bauble and used Distress Ink Festive Berries to colour the whole bauble. When you take the die off again there will be a small even white frame around the whole shape.
     The next step was to clean the die thoroughly and put it onto the offcut square, I then inked this with Distress Ink Evergreen Bough and stamped a small tree branch in the same ink across the top. Again this gave me a small white frame around my bauble cut out.
     The square has been mounted over a layer of gold paper and the bauble has been mounted on thick foam pads to lift it up. When the card is at an angle you can see the gold behind the bauble, but viewed head on it just has a wider white frame.
     The small bauble has been coloured in the same way after stamping a small greeting in gold on to it. This has a thin foam pad on it. The gold ribbon bow on the bauble is stuck on with silicone glue. The white card blank looked a little too white so I have inked the edges with Evergreen Bough to soften it a little.
     Please give this technique a try, it's very simple but very effective. Come and join us at Technique Time Tuesday, you have until the end of the month to play along.
I would like to enter this card in the following challenges:
Heck Of A Challenge - In The Frame
CraftyHazelnut's Christmas Challenge - Bling It Up  (thanks Hazel)

Monday 28 October 2013

Family Remembered


     This week at House Of Cards it's the turn of Shabby and Vintage following our sketch.  For me this sketch looked like our Union Flag and almost into November that could only mean one thing, remembrance.
     I found this piece of backing paper in my stash, I think it's left over from all the jubilee things that were around last year, I have made it shabby by tearing the edges, using brown Distress Ink and curling the corner. I used the same ink to colour the edge of a white card blank.
     The photograph is, if memory serves me right, my Great-Grandfather. It has been cut out with an oval die, the brown mount has been hand cut around the outside of the die as the next size up was too big. I have used a poppy without its stem and swapped the button middle for a black Candi.
     It's a very simple card which I hope conveys my appreciation of the sacrifices made by others to provide the freedom I enjoy living here in Britain.
     Please pop over to House Of Cards to see the DT's interpretation of the sketch and join us with yours.

Friday 25 October 2013

Halloween Shaker Coffin.

      I think it's the combination of black and orange that has got me hooked on Halloween, after all it's not really something we do that much in the UK, but it is fun to create something quite different from the norm.
     This didn't start out the way it's ended up, it was always going to be a tag but when I found some Halloween confetti I got carried away with the whole shaker idea, then I found a glow-in-the-dark skeleton and the rest, as they say, is history.
     The tag has been coloured with Distress Inks in Scattered Straw, Wild Honey, Rusty Hinge and Aged Mahogany. Then stamped with a Tim Holtz image from his Rockstar set using Lava Black embossing powder from Creative Expressions, it's black with a hint of dark red.
      The coffin is cut from light brown card using a template from a treat box left over from last year, I had to make it a little bigger to fit my skeleton inside (still had to trim his toes back though!). Rather than fight with foam tape I chose to make a shallow box which will contain all the spiders and beads inside. Before folding the box up I used an Alterations die to cut the word 'Imagine' in the front, then I coloured it with Faded Corduroy ink and stamped it with a woodgrain stamp in Gathered Twigs. The back of the box is purple card to show off the skeleton and his crawling friend, I have added a few caviar beads to the confetti to help it keep moving when shaken.
     The tag is finished off with a few bats die cut with my friends die (thanks Avril), a cobweb from the same confetti pack and a skull from a necklace I found in my local charity shop. The orange ribbon has been stamped with Chocolate Baroque pumpkins and bats in Stazon. Thanks to the position of the skull the tag will actually stand up.
     I would like to say Hello and Thank you to all of you for the lovely comments you leave and a big Hi to my followers old and new.

I would like to enter this tag in the following challenges:
Make My Monday - Halloween
Try It On Tuesday - Halloween
Cards For Men - Halloween
Country View Challenges - Something Spooky
Our Creative Corner - Tag It, Halloween
Sparkles Monthly Challenges - Halloween / Colours

Tuesday 22 October 2013

Natures Autumn Glory

     Challenge number Seven at The Male Room is Nature and what could be better right now than all the glorious colours of Autumn, so put your thinking caps on and come up with a masculine card featuring Nature, we'd love you to join us.
      For this card I had a topper my Mum gave me that was just perfect for our theme but I couldn't find a backing paper I liked, so I made one.
 
      I collected some pretty leaves from around the garden, shrubs, creepers and weeds (got plenty of them!) and laid them all out on a piece of watercolour card, then I covered them with another piece of watercolour card and put the whole thing through my Bigshot. I have used both tabs one and two in my sandwich but you may need to experiment a little depending on your leaf thickness and your machine.
      I've been playing around with this technique and discovered that the underside of the leaves give a stronger colour when pressed than the top side so I put all my leaves the same way up, this will give one bold patterned card and one slightly muted. You will need to put the card, with leaves removed, and the leaves aside under a heavy book overnight to dry out, I would suggest a few sheets of kitchen paper top and bottom to help absorb the moisture.
     Once dried out you will have have some leaves to use as well as your patterned paper.
     I have used the leaf paper as my background with a few copper stamped leaves added to tie it in with the topper. The edge of the card is coloured with Forest Moss Distress Ink and the edges of the leaf paper have also been coloured with green ink.
     The easel is held up by another leaf shaped topper mounted on foam pads that just says 'Autumn Magic' so this card could be used for any occasion.
I would like to enter this card in the following challenges:
Heck Of A Challenge - Autumn Colours
Crafts 4 Eternity - Autumn Leaves
Chocolate, Coffee and Cards - Autumn NOT Halloween

Sparkling Christmas Steam

      I have managed to make this weeks Christmas card already which I'm rather pleased about, last week was not so good so I have some catching up to do.
     I saw this Stampendous stamp a few weeks ago and thought my Dad would love this. The colour scheme is inspired by Here Come The Boys and the Bling by 52 Christmas Card Throwdown.
     I began by stamping in Archival Coffee on cream card, then I tore the edges and distressed them with Brushed Corduroy. The oval image panel has been covered with Stix2 double sided sheet and then covered with Glamour Dust Crystal to give it a snowy sparkle.
     I tried to stay with the brown and cream colour scheme but the holly just didn't look right, a tiny splash of Christmas colour lifts the whole thing too. I have used pearlescent chocolate card for the mat and embossed the edge with a small folder that came free with a magazine, I sanded it slightly and then coloured it with gold ink. The cream Poinsettia was cut with a Marianne die, distressed with brown ink and touched up with a gold pen before putting a cream pearl in the middle. It is all mounted on a cream card. As there are several layers to the card and the flower I'm also going to try joining 4 Crafty Chicks this week.
     It really looks better 'in the card', the sparkle doesn't come out well on camera despite trying many different angles. I hope I have used enough 'Bling' to qualify for the challenge, sequins and pearls aren't really my thing but I'm alright with glitter!
I would like to enter this card in the following challenges:
Here Come The Boys - Christmas in Brown and Cream
4 Crafty Chicks - Multiple Layers
CraftyHazelnut's Christmas Challenge Extra - Anything Christmas

Thursday 10 October 2013

Nativity Sketch

     Christmas isn't that far away now so if you haven't made many cards yet have a look at some of the great challenges in blogland, there's lots of really good inspiration out there.
     My inspiration this week comes from three different sites. It started with a sketch, a nativity scene and the use of stars and stripes.
     I have used mainly blues which were in the nativity photo inspiration, beginning with a blue stripe backing paper on a white card. The star panels are white embossed card but as the stars looked a little dull I have used a silver glitter pen to colour them. Each panel in matted on to blue card, they seemed to disappear into the stripes without it.
     The main image is a Dufex sticker that's been in my Christmas stash for ages and was crying out to be used before it started to curl up. It's mounted on white and blue card then stuck on top of the star panels on foam pads to lift it.
     I have tried to use everything from stash as my storage space is bursting, call it my end of year resolution! Thank you for taking the time to drop in, I do appreciate it as I know how busy this time of year can get.
I would like to enter this card in the following challenges:
CraftyHazelnut's Christmas Challenge - Photo inspiration, Nativity
Holly Jolly Christmas Challenge - Stars and Stripes


Wednesday 9 October 2013

Let The Adventure Begin

      Today sees the launch of our 6th challenge over at The Male Room - Transport / Travel. We would like to see anything in this theme as long as it's masculine.
     With the travel theme I chose to make my card tag shaped. I was thinking of my niece when I made this, she's going to Africa on a voluntary aid holiday and it's her birthday soon. It's a masculine style card for an adventurous girl.
     I have used the Sizzix Tim Holtz tag cutter for this, making sure that my folded edge is within the cut line on the left. The card is from an old file folder I found in my drawer, I thought it was just the right colour.
     I have used a map stamp in the centre with a ship and a plane from the same set, it's a very old set from Royal Langnickel, stamped in Archival Ink Coffee. The words are from the same set but embossed in gold, only the numbers come from another set.
     After all the background stamping was done I edged the tag with Distress Ink Brushed Corduroy to age it a bit.
   
     The main image is a stamp from Molly Blooms made with Black Momento ink on strong card. It's then coloured with some of my new Graph It alcohol markers, I'm not too good with these yet so don't look too closely! Lucky for me Molly Blooms have a coloured image on the front of the pack to help you along.
     Inside I have used a stamp from Chocolate Baroque and embossed it in gold, with a little globe in coffee ink in the corner.
     To finish off my tag idea I've used a small length of garden twine from the greenhouse to go through the hole at the top.
     Please pop over to The Male Room and have a look at the DT creations, then come and join us with one of yours.

Friday 4 October 2013

Shabby and Vintage Autumn

      This week at House Of Cards we have a photo inspiration that's very Autumnal and as it's a 5th week it's any style goes as long as it meets the theme. Please pop over and have a look, there are still two days left to enter your card.
     This started with a white piece of card embossed with a Darice Fall Leaf folder. I then inked it with Distress Inks in Autumn colours followed by a smudge of gilding wax in Antique Green.
      The lace is sticky paper lace that I've had for ages, I think it came from Lakeland Plastics when they used to have craft items, wrapped around the mat layer as well.
     I found the photo on a CD from Joanna Sheen, I have coloured the flowers yellow with an alcohol marker. The frame is a Spellbinder die Floral Ovals cut in the same brown card as the mat layer.
     Paper flowers from Woodware finish off the card with another splash of Autumn colour. The flower centres have pearls coloured with alcohol markers.
     I've only just invested in a selection of alcohol markers but they are already proving their worth for colouring embellishments, I am yet to master the art of shading for colouring in stamped images.

I would like to enter this card in the following challenges:
Creative Moments - Anything goes/Autumn
4 Crafty Chicks - Fall/Autumn
Heck Of A Challenge - Autumn Colours

Tuesday 1 October 2013

Faux Cloisonne Flowers

     This month at Technique Time Tuesday we are using the Faux Cloisonne technique. If you would like to watch a tutorial then please pop over to our challenge site and watch Mynnette's excellent video.
     This technique is using glossy magazine picture or such like to mimic the intricate colourful enamel art form with a little help from embossing powder.
     Have you ever seen a picture in a magazine and thought the pattern in it might be useful, well this will show you one way to use it. There is an abundance of packaging and junk mail out there that could be recycled into something rather nice. I have chosen to use and old Christmas card back and a paint chart.
     I began with the paint chart and two small flower stamps. I wanted my flowers to be different shades of the same colour, not always easy with ink but this way I am guaranteed a match. I have used silver embossing powder which also helps hide any tiny writing on the coloured areas. They have all been cut out, shaped and had a tiny gem stuck in the middle.

     Next was the butterfly, stamped and embossed in silver again but this time I used the back of an old Christmas card I had received last year (a bought one, don't worry I didn't destroy anyone's hard work!). I cut him out and used some flower stamens as antenna. There are two small foam pads under his wings to keep them up.
     The cream card blank is stamped with Old Paper Distress ink using the Tim Holtz Flourish stamp. On top of that is a dark green die cut frame from Spellbinders, then a piece of card coloured with Cosmic Shimmer Misters, stamped with the same swirl in Archival Olive green and coloured in with an alcohol marker in green. I cut the Cosmic card out by tracing the inner shape of the die on the back and using scissors, it was much easier than trying to cut out the centre of the frame!
     I've had these paint charts on my desk for months just waiting for something to use them for, look out DIY shops I'm coming back for some more!

Something Spooky at Country View Crafts


      This months challenge at Country View Crafts is to make 'Something Spooky'.  I am so very happy to be one of their gust designers this month having won the August challenge. I felt I really had to come up with something special for Halloween.
     I found this paper mache house in a charity shop a few months ago, it was perfect for this challenge. It had been partly decorated already but nothing that couldn't be painted over. I started by painting it pale brown with acrylics, then gave it a white acrylic wash. It still didn't look quite right so I stamped in brown using a woodgrain clear stamp, because it wasn't mounted I was able to bend it gently to reach into the corners of the gables.
     The roof tiles are Sizzix Rosette strips cut in orange card then distressed with Brushed Corduroy and Forest Moss Distress inks. Each strip is stuck on individually, gluing along the top edge only so when all the tiles are on the roof the front edges can be lifted gently to create a more realistic look. The gables were a bit time consuming but so worth the effort. I have used Flowersoft to create a mossy look to my roof. There are die cut bats mounted on an acetate collar wrapped around the chimney so they can fly around the house. The outside lamp is by Tim Holtz Ideaology, it takes two small batteries. The battery pack is stuck inside the roof using Velcro tape so it can be taken off when I need to change it. There is also a battery tea light inside the house, this has been coloured black with an alcohol marker so it can't be seen through the windows. Inside has been painted black and has two die cut ghosts on the back wall that have been covered with glow in the dark glitter.
     On the wall outside is a Flowersoft wisteria, I know it's not in flower in October but the wall needed some decoration. The bushes are florist moss stuck on with PVA glue. The broom is made from twigs found in the garden bound together with black cotton, the sparkly cat is a foam shape from a child's art pack and the pumpkin is made from scrunched up orange tissue with 'bat' bodies for eyes and a 'bat' wing for his mouth.
      I've really enjoyed making this house. Halloween isn't something we celebrate very much here but I have to admit making 'spooky' things may change that a little. I'm still looking forward to Guy Fawkes night though, fireworks, sausages and a big bonfire!

Wednesday 25 September 2013

Faux Patina Designer Gift Bag


     This little gift bag is from a template by Papermania, I've included a fifty pence piece so you can gauge the finished size.
     This week at The Technique Twist the challenge is Faux Patina, there is a link to a tutorial which I found very helpful. I have opted for an old leather look rather than metal for my bag.
     I started with white card from which I cut the template. To emboss the sides I did one side at a time as my folder is only a 6x4 . I inked my folder with Old Paper Distress Ink on the embossing side of the folder before embossing my card. Once out of the folder I then Inked with Brushed Corduroy, Gathered Twigs and a dash of Aged Mahogany to get the various shades of brown.
     The shine comes from Cosmic Shimmer Gilding Wax Autumn Bronze which I rubbed on to the card with my finger. Let the wax dry off then buff it up to a nice shine. The tag is Grunge Paper with an eyelet through it, hung on some old gold ball chain. The clasp is a gold button stuck on with ultra sticky tape, I have used a foam pad underneath the flap to lift it up a little.
     I had a very messy time making this but it was fun, I shall definitely be making some more.
I would like to enter my bag in the following challenges:
The Technique Twist - Faux Patina
Anything Goes Challenge Blog - Out With The Girls

The Male Room flock


This time at The Male Room our challenge is animal, bird or fish. We would like to see anything masculine with this theme, card, scrapbook page or gift creation. Please pop over and take a look at the DT samples, they're all quite different so you may see something to spark your imagination, we'd love to see what you create.
This stamp is by Sheena Douglass, I bought it a while back but this is it's first outing, shame on me! It appealed to my sense of humour as my parents live in Wales and my friends surname is Ramsbottom, it was a 'must have' stamp for me.
This image has been stamped with Memento Tuxedo Black so that I could use my new markers to colour it. As you can probably tell I'm in need of practise with them so this was a nice easy start. I look at some of your gorgeous cards and wish I could get my colouring to look that good, I hope I shall improve with time.
I have coloured with greys and a little green, then outlined with a cool grey which looks more blue than grey but works well all the same. I found some green card that looked great as a mat but needed some texture, so it has been embossed with a Darice folder that looks like chicken wire.
Quite a basic card to make that could be used for any occasion. You have two weeks to make your creation so please come and join us at The Male Room.

Tuesday 24 September 2013

Technique Time Tuesday CASE

      This is a CASE card from Technique Time Tuesday's current challenge. I'm hostess this month with the Faux Silk technique, there is a video tutorial on TTT to show you how we've done it.
     I have chosen a card by a very talented lady named Kimbo to CASE. There are some really great cards entered this month but Kimbo's caught my eye because of the oriental theme and the fact that she had heat embossed tissue paper.
     I chose green tissue to emboss with bamboo leaves, then I crumpled it up and opened it out again. To my surprise non of the embossing cracked at all, maybe it's the Cosmic Shimmer powder that's the secret, I'll have to experiment further. Once opened out the tissue is stuck on to white card but not smoothed out completely, some of the wrinkles must stay to imitate silk.
     The image panel is stamped in Archival Olive Green on cream card, it's an old PSX stamp of my Mum's. Both image and background panels have been mounted on black before being put on a pale green water stamped card.
     The coin is a gift from a fellow DT member, thanks Karen, with a few Mizuhiki cords knotted through it. There is also a Mizuhiki knot at the bottom. Karen of Stamping In Pink has been campaigning to bring back the oriental style, I've been trying to help because I love it's simplicity and style. I think with the launch of some new oriental stamps by Sheena Douglass that we may be on to a winner!
     Please pop over to TTT and take a look at the DT cards and challenge entries, there is still one week left to join us.

Monday 23 September 2013

Shabby and Vintage at HOC

     Welcome to my DT contribution for month three at House Of Cards. Each month we have a theme but each week we have a different style within that theme. This week it's Shabby and Vintage with a gorgeous colour palette of lilacs, purples and a splash of coral.
     For my card I've chosen to omit the coral and stay with shades of mauve. The background is a white piece of card inked with a mixture of Distress Inks Seedless Preserve and Milled Lavender, then water stamped with a Hydrangea flower.
     The doily is cut from mauve card with an X-Cut die, inked over with Adirondack Eggplant ink and decorated with Cosmic Shimmer Pearl PVA in purple. The silhouette is also an X-Cut die and coloured with Eggplant to match the doily, card edge and leaves, it is mounted on foam pads over a cream circle because it looked too dark over just the doily.
     The flowers are Hydrangea paper flowers I got at a craft show a couple of years ago, coloured with the same distress inks as the background and then dabbed over with a little mauve mica powder. The gems have been coloured with an alcohol marker so they tone in as well.
     Please pop over to the challenge site and have a look at the lovely creations from the other girls on the DT, I'm sure you'll find something to inspire you to join us at House Of Cards.

Sunday 22 September 2013

Recycled Poinsettia


     This seasonal brooch has been made from drink cans. It's quite a good way of recycling something and turning it into a hand crafted gift for Christmas.
     To begin with cut open the drink can carefully, I would suggest wearing gardening gloves when you do this to protect your hands and use an old pair of scissors. At this stage the edges are sharp but once die cut they are rounded over slightly and much safer to handle.
     I have used a Sizzix Bigz die, Tattered poinsettia. These dies have a blade embedded in the foam so they are sharp enough to cut metal, unfortunately Spellbinders and similar rely on pressure on the ridge to cut and metal is just to thick.
     My flower has been coloured using Alcohol Inks but alcohol markers will also work well. The metal can be passed through an embossing folder to get texture on the petals but this time I have just used a nylon tool to score veins on them. I remembered I had a metal craft tool set in the cupboard so I have been making great use of that again, it has some really useful nylon tool heads as well as a selection of fancy pattern wheels.
     There are two large petal sets, one coloured with greens, one coloured with green and red, then one middle size petal set and one small both coloured with red only. The centre is coloured yellow as is the paper fastener that holds it all together. There are lots of really nice brads available that would look great as flower centres but paper fasteners work just as well and they can be coloured too.
     I have stitched a brooch back to a felt flower shape that has double sided sticky sheet on it, once the brooch back is on I have peeled off the sticky cover and placed it on the back of the brooch. This saves trying to glue the brooch back on ( I tried that and it didn't go well!) and it covers the brad back making it all look tidy.
     I hope you have a go at this, it's much easier than it looks and you have a valid reason to drink something fizzy now!
I would like to enter this brooch in the following challenges:
Try It On Tuesday - Make your own flowers
Our Creative Corner - Forgotten things

Friday 20 September 2013

Red, White and Kraft

      Here is this weeks Christmas card.
This one was inspired by the colour choice at 52 CCT and CraftyHazelnut's  request to 'cut it out'.
     I was recently lucky enough to find this Papermania 6x6 stamp in a sale bin for £1, now who could resist that!
     I chose to stamp and clear emboss on white card, then ink over with Distress Ink Festive Berries.
     I didn't want to put cut outs on top, that would be too easy, so I used some Sizzix Movers and Shapers to cut holes in my background instead.

      When I held this over my Kraft layer it looked a little dull, so I used some double sided sticky sheet under where my holes would be and covered them with Glamour Dust Crystal, this kept the Kraft look but added some sparkle.
     All that was left then was to cover the back of my die cut background with foam tape and stick it to my Kraft layer. I suppose you could say it's a bit of a back to front card but it was something I just had to try.
    

I would like to enter this card in the following challenges:
52 Christmas Card Throwdown - Red, White and Kraft

Sunday 15 September 2013

Christmas Box Snowman and Angel

     Last week I showed a Christmas Collection Box and promised further details of the snowman and angel, well here they are.
     The snowman is two small polystyrene balls stuck together with a cocktail stick spike between body and head. The balls were then covered with PVA glue and sprinkled with white flock.
     Once the flock was dry the tiny black gems were stuck on for his eyes and a really tiny nail art gem for his nose. His mouth is a series of small dots made with a permanent marker.
     His hat is made using the top from a lip balm stuck on to a small black card disc and coloured with a permanent marker. His scarf is a small length of blue fancy knitting yarn.
     He is stuck to a card base that has been covered with flock and clear glitter and he is backed by a small piece of snowflake scrapbook paper.
      The baubles are cut with the smallest Spellbinder bauble dies, four for each bauble. Each shape has been folded and stuck to the corresponding side of the next shape with black thread running down the middle. To get the baubles to hang properly I made a false ceiling with card and taped each thread securely to it before gluing it in place.
     The angel is made using two beads, two finding and a post. The dress is a flower trumpet and the head is a pink bead, the wings are one little finding and the tiny cap at the top is another.
     They have all been threaded on to the post, once threaded the end has been turned over to make a loop so it can be hung ( would make good seasonal earrings) or it can be bent over to look like a halo.
     This little box has been fun to make, if time allows I would like to make some more for Christmas to have dotted about the house as this one is now travelling the show circuit with J&C Creations.

Friday 13 September 2013

Blue Christmas

      It's a few weeks since I managed to get a Christmas card made, but now the routine is returning to near normal (not sure what normal is really) here is this weeks offering.
     It began with a sketch from 52 Christmas Card Throwdown and gathered a few other challenge pointers along the way.
     The bauble was the first thing I made because I wanted to try an experiment, part of it worked and part didn't, so I'm only showing you the bit that did! I stamped and embossed with Wow Clear Sparkle on to white card, then used a Brilliance Dewdrop pearl ink pad to colour over the embossing. The sparkle doesn't show well in the photo but it is an amazing powder for Christmas things.
     I have also used the same ink to colour the outer edge of a white card blank, it's much cheaper than buying pearl card and I get a perfect colour match to my bauble. The bauble shape is cut with a Spellbinder die, topped with a tiny bit of aluminium tape and hung on a silver thread.
     The panel the bauble is mounted on has been embossed with a folder called Snowflakes from Cuttlebug. The dark blue strip is cut from the same card as the mat layer then covered with a snowflake border peel off in white. To finish it off I have used some glitter foam letters in blue for a greeting.
     I would like to enter this card in the following challenges:
Here Come The Boys - Blue Christmas In September

Wednesday 11 September 2013

Challenge #4 at The Male Room


     Can you believe we are launching challenge number 4 at The Male Room?! This time we are looking for 'Sport or Hobbies'. Any hand crafted item with a masculine feel to it, card, scrapbook page or gift.
     This card has been made using a picture cut from a 12x12 scrapbook page from Dovecraft. The rosette is a die cut from a friend, I believe it's a Sizzix die, with a peel off sentiment coloured with a permanent marker pen. The number is die cut using a Sizzix alphabet - Round Table. Both the rosette and the number are mounted using foam pads.
     The small football at the bottom is a button with the shank cut off, this can be done quite easily with side cutters. There are lots of nice buttons available in haberdashery shops and if you can cut off the shank you can have lots of nice embellishments too.
     A simple card to make to show you don't have to be a stamper to join in with The Male Room, we really would like to see whatever you choose to make for our theme.