Tuesday 28 July 2020

Blue Noel


     This sample was made using the new Sam's Circles die set from John Next door released last Sunday. It has several options for the centre piece, I chose the townscape for this card.
      Using white card I die cut the star panel with the townscape in the centre, then I cut the NOEL in the space under the town. I also cut a flying Father Christmas in white card to add to the sky.
      I mounted the die cut panel on to some blue mirri card, I thought this looked like a night sky but with added bling. Once the main panel was mounted I turned my Father Christmas over and stuck him down so he flies up from the town.
      This panel was then mounted on foam tape over a white card blank, giving a little bit of depth, it could be posted but with the flowers it will probably end up being hand delivered.
      The flowers were made using white card and the solid Poinsettia from 2018 and a stamen die in pearl silver paper for the centres. I like to shape my flowers just a little, I think it makes them look a little more real.
      I have cut Lesley's Twigs in silver mirri card and a pine branch in pearl blue card, the foliage extends the floral decoration with too much fussiness and as John says the twigs allow you to get a base to work on for your arrangement.
      Everything is stuck together with 3D PVA as it's nice and strong, I know Craft Artist glue is very good but I am a loyal supporter of this super strong PVA from Stix2 as it's never failed me yet.

Materials List
JND183 - Sams Circles
JND187 - Lesleys Twigs
JNDCC017 - Poinsettia Die (solid shape)
JND115 - Cornflower   for the stamen centres
S57262 - 3D PVA Glue
Pinebranch and Noel from stash


I would like to enter this card in the following challenges:
Ike's World - S is for Show Us Christmas In July
The Holly and Ivy - Anything Christmas Goes
Die Cut Divas - Christmas In July
Merry Little Christmas - Anything Christmas Goes
Dream Valley - Christmas In July
The Paper Girls - Christmas In July
CraftyHazelnut's Christmas - Anything Christmas

Friday 24 July 2020

Pinstripe Poinsettia Tree


     A new Christmas tree for 2020 using the new Pinstripe Poinsettia die from John Next Door, this Pinstripe die fits perfectly with 2018's solid Poinsettia die.
      Using the solid die I cut several flower sets in gold pearl paper, then with the new Pinstripe die I cut the same number of sets in red card.
      For this project I only used the third and fourth size flowers from the set, the other sizes will be used for another project later. Each red layer was stuck on to a gold layer, after this I stuck one smaller flower on to one larger flower, making a total of nine flower sets.
      For the base of the flower ball I used a polystyrene ball which I coloured red with an alcohol marker. Each flower set is glued in place as well as having a long pin stuck through the centre in to the ball, this does mean it is not suitable for children.
       Like last years trees I chose to use a wooden cotton reel for the pot the tree would be planted in. The trunk is a small thick twig cut from the garden some months ago, there is a little paper wrapped round the twig that sits in the reel to keep it tight, as well as a little strong PVA to hold it in place.
      The soil is some brown flower granules stuck on with PVA and for the pot decoration I have cut some of the Poinsettia Leaves, but this time in dark green stuck over a pale green band of paper around the reel.
      The flower ball was then pushed on to the twig and glued in place. To finish, each flower had a small gold pearl gem stuck over the pin head

2019 Poinsettia Trees

Materials List
JND190 - Pinstripe Pionsettia Die
JND192 - Poinsettia Leaves
JNDCC017 - Poinsettia Die (solid shape)
Cotton Reel / Twig / Polystyrene ball
Card/Paper
S57262 - 3D PVA Glue


I would like to enter this project in the following challenges:
ABC Christmas - N is No Fuss/O is Over The Top   Over The Top
CraftyHazelnut's Christmas - Anything Christmas
The Holly & Ivy - Anything Christmas
Crimbo Crackers - Anything Christmas
Merry Little Christmas - Anything Christmas
Die Cut Divas - Christmas In July
Dies R Us - Christmas In July
Ike's World - S is Show Us Christmas In July
The Paper Girls - Christmas In July


Pinstripe Poinsettia Bauble


     This decoration was made with the two largest flower sets left over from making the Pinstripe Poinsettia Tree. The dies used are a combination of the new Pinstripe Poinsettia from John Next Door being released on Sunday and the solid Poinsettia die from 2018.
     When making the tree I only used the third and fourth size flowers, this uses the first and second largest flowers. I have stuck the smaller of the two petals on to the largest, added a nobly gem in the centre and then glued the two flower sets back to back.
      The acrylic baubles were from Aldi last year, they have a speckle of gold glitter in the plastic which adds to the festive sparkle. I put the twin flower set in the bauble, it fits quite snugly so it doesn't move about. I ran a small bead of 3D PVA around the edge of one half and closed it, the glue dries clear so it doesn't show.
      I had fun and games trying to tie two similar ribbon bows to go on the top, bows are not my thing so it was a challenge. The bauble comes with a hanging thread so all I had to do was use hot glue to fix the bows on top and it was done.
   

Materials List
JND190 - Pinstripe Pionsettia Die
JNDCC017 - Poinsettia Die (solid shape)
Plastic bauble
Card/Paper/Ribbon/Gems
Hot Glue - Stix2
S57262 - 3D PVA Glue


Saturday 18 July 2020

Craft Artist Autumn Pigment Petals


     This card is another of the samples made for John Next Door and his new Craft Artist Pigment Petal ink pads. I love using the media plates and these inks work well on them.
      Using the Autumn set of inks I inked up the media plate with a graduating colour change, then with a hard brayer smoothed it out across the plate. This was then stamped on to white card, it was paler than I wanted so I inked the plate again, brayered and stamped a second time.
      Using a stencil and the gorgeous new blending brushes, I inked the media plate through the stencil. Then with stencil removed I stamped the card again, this gave me a subtle pattern across my background. I didn't think that I needed any more brushes, sponges or pads for blending but these brushes are so very soft and this is what makes them a real must for stencils, I'm hooked.
      With all the work on the media plate finished I moved on to stamping a single flower, from an old Woodware set, in brown. I didn't add a greeting as I did't think it needed it.
      I added a dark brown mat layer to the image panel and started to look for a suitable coloured layer, nothing in the stash stood out so it was on to making one. Using some basic white card I cut the right size layer and then used the inks and a synthetic sponge to colour it. This is a better way to work really as it gives you a perfect colour match to your image.
      With all the layers added it was then onto a white card blank. To add that little point of interest, I die cut one of John's butterflies in the same brown card as the surround and stuck it near the edge of the oval.
      There is always a need for a few simple, blank cards in your stash and this is a great way to make them while experimenting with media plate techniques.


Materials List    Available from your local craft shop
CAT053 - Craft Artist Pigment Petal - Autumn
CAT013 - Craft Artist Blending Brushes 
JLGP004 - Media Plate set of 4
JNDAD008 - Small Butterflies
S57262 3D PVA Glue by Stix2


I would like to enter this card in the following challenges:
Colour Crazy Craft - Anything Colouring Goes
As You Like It - Summer or Autumn  Autumn for the gorgeous colours
Inkspirational - Painting or Colouring
Allsorts - Flowers All Over

Monday 13 July 2020

Craft Artist Pigment Petals


     Today sees the release of the new Craft Artist Pigment Ink Petal sets, there are five in total, this card was made using the Autumn set.
     This card began as a white A6 piece of card which was put in the Press To Impress stamp platform, then it was stamped with one of the recent Two Jays stamps in brown ink. I then stamped again onto some Stix2 masking sheet and cut it out to cover the first image.
     Once the main image was covered I inked up the round Media Plate and stamped it onto the card. One of the other new products is a set of amazing little brushes which I sued to blend the ink around the edges of the plate.
     I left this to dry for a few hours, checked it and decided to finish it off with the low heat setting on my heat gun. I wanted this to be completely dry because I was going to use mica powder and that will stick to anything damp or sticky. Using a stencil and Versamark I inked up the Media Plate, this way the mica should only be on the circle and the beauty of a stampplatform is if you missed a bit you can go back and do it again knowing it will be in the same place.
     I dusted the image with an anti-static bag, stamped the image and then dusted with pearl mica. I used a dry paintbrush to remove any stray mica before giving it a quick spray with cheap hairspray, it needs to be cheap because you don't really want added conditioner.
     After all this it was time to remove the mask, the image was completely clean, this masking sheet is sticky all over so it sits down perfectly covering everything, it can be reused several times too. The image looked rather pale so with a water brush I coloured in the rocks by stamping on my craft mat and using it as a palette.
     When it came to mats and layers I found some card colours that I liked but one of them wasn't big enough to use, thinking cap on....blend a few ink colours together on beige card to make the shade I needed.
     A small wording embossed in gold tucked up in the corner was all that was needed to finish this card off. When the light catches the mica the lighthouse really shines out across the sky.


Materials List    Available from your local craft shop
CTJJ133 - Lighthouse by Two Jays
CAT053 - Craft Artist Pigment Petal - Autumn
CAT013 - Craft Artist Blending Brushes 
JLGP004 - Media Plate set of 4
S57268 - Masking Sheet
S57262 3D PVA Glue by Stix2


I would like to enter this card in the following challenges:
Challenge Up Your Life - Vacation Mood
Craft Rocket -For Men/Boys
Creative Fingers - Anything Goes

Saturday 11 July 2020

Wedding Card / Table Decoration


     Using the Tag Card die set from John Next Door I made a wedding card that could be used as a table decoration. The first one I made was for a cafe table, you can find John's construction video based on that card over here.
     I cut two of the tag pages in white card, then using the dies from the Wedding Bells set I cut the doves, bells and Mr/Mrs panels. These cut outs were then backed with pink pearl card, I used a whole strip to do this to keep it neat.
     For the panels that would stick out once assembled I chose to decorate them with pink ink through a stencil, continuing the pattern to any panels that would be on the inside. When this card is on a table you can see the inside so it needs to be neat and tidy.
     I cut all of the little hearts in the panels in gold mirri card and stuck those in place, it adds a tiny bit of shine to lift the card.
     The name and date panels are cut in white card and decorated with the same pink ink and stencil as before. Each panel is edged with gold gilding wax to highlight it. Using a darker pink card I cut all the names and dates and stuck them on to the panels.
     With all decoration complete I then assembled the card, the folds are the opposite way if using as a journal type card, please watch the video for guidance, it's easier to watch than it is to following written instruction.
     The beauty of this card is it will fold flat for posting or transportation to a venue, it's simple to construct making mass production easy.
     We have all sorts of craft inspiration for you over at Not Just Cards so please pop over and take a look, then come and join us with your project.


Materials List    Available from your local craft shop
JND160 - Wedding Bells   (die inserts for Pop Box)
JND100 Tag Card Large
S57262 3D PVA Glue


I would like to enter this card in the following challenges:
Inspire, Create - Fancy Fold
Sparkles - Wedding
Love To Craft - Anything Goes
Creations In Pink - Anything Goes Mainly Pink
A Perfect Time To Craft - Anything Goes
Cardz 4 Galz - Wedding

Wednesday 8 July 2020

Snowglobe Recycling


     This month at Christmas Craft Creations our theme is Christmas characters, that could be Father Christmas, carol singers, a Nativity scene, snowmen and many more.
     Staying with my recycling theme I used a snow globe die set by John Next Door along with some of last years commercial cards. There are no progress photos because I got carried away making and forgot about the camera, it's all pretty simple though.
     I had a rummage through my card stash and found some turquoise card that was a close match to the colours in the pictures and as I had two of the same picture I made two cards, changing the colour of the base so they wouldn't be the same.
     The snowflake is a mix of several different sized ones from various sets layered up with a tiny gem in the middle. They have some shape to the base so may not be good for posting, but hand delivered will be just fine.


     We have a prize this month at Christmas Craft Creations so why not pop over and join us, you may be lucky, if not you will at least have one more Christmas card made. We also have a DT call so if you like what you see and wish to join us then please apply.
I would like to enter these cards in the following challenges:
ABC Christmas - N-no fuss/ O-over the top
CraftyHazelnut's Christmas - Anything Christmas
The Holly and Ivy - Anything Christmas
Merry Little Christmas - Anything Christmas    (Top Pick)
Fezziwigs Festive Frolics - Anything Christmas
Ike's World - Show Us Christmas

Wednesday 1 July 2020

I-Zink Birthday Flowers


      The base for this special birthday card was all things I-Zink, well almost all things, with a splash of John Nextdoor. You will find a product list at the end of this post including which colours were used.
   

      The leaves were made using pigment droppers on acetate. You need two pieces of acetate, drop the ink on one piece, then cover with the other piece and squish the colour between them, this is best done a sheet of paper towel as there may be some leakage along the sides. Pull the two pieces of acetate apart before the ink dries, this will give you two coloured sheets of acetate.
   

     Once completely dry place the acetate on some double sided sticky sheet ready for die cutting. There are many ways of attaching acetate but I have found this to be the best way for me, as the adhesive is all over the acetate there are no visible marks once it's stuck down.
      For this card I die cut one large, one medium and three small leaves from this A6 sheet.

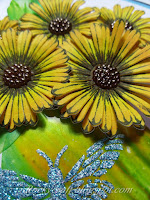
       For the flowers I used the Gerbera stamp and die set. I chose to colour the flowers before cutting them so that I wouldn't accidentally pull a petal off. Each flower is made up of three layers, all petals shaped before assembly.
      The little embellishments in the centre came from my random stash box so I can't tell you where they came from but they were the perfect colour.
      The Gerbera set produces six flowers each use so I made them all up, the ones that may not be used on the card would join the flower stash box for future use.
       I lay the flowers on the cut to size white card topper and moved things around until happy with the arrangement, then it was time to peel of the backing on the two larger leaves and stick them in place. At this point I took a picture so I would remember what went where.
      I took the flowers off and set them aside. Using a stencil and some I-Zink texture paste I put a butterfly on the largest leaf, while still wet I sprinkled it with a mix of teal and iridescent glitter and set it aside to dry.
   
     Once the paste was dry I put two mat layers on the topper card, one in teal to match the butterfly and the other in dark brown to match the flower centres, then I stuck it onto a 6.75 inch white card blank. This was all done now so that the flowers didn't get squashed.
     I needed to add a greeting but I wanted it to look like a plant label tucked in the posy. I have some wooden cutlery picked up on a recent outing, the handle of the fork was just the right size. The greeting is stamped in dark brown and the prongs cut off, to be kept for future use.


      The flowers were laid back on the card, using the picture as guidance, to work out where to put the label. I then removed the flowers and drew round the end of the label so I knew where to stick it. Once firmly in place I added the flowers and stuck them down, the last little leaf was tucked into place at the end. I have kept the number of leaves and flowers odd as I think it looks a little more natural.
      What do you do with a left over flower and a couple of leaves? Make a matching tag!
      Using a white tag I ran around the edge with a little foil in teal and dark brown and stuck the flower and one leaf on the bottom.
      A teal greeting cut from the same card as the mat layer made sure it all co-ordinates.
      The I-Zink droppers can be added to water to make a coloured spray, perfect for dyeing cotton ribbon, again keeping the colours the same.
      A special card and matching tag for a special birthday.

Materials used 
I-Zink pigment droppers - Cactus, Volubilis & Mango
I-Zink texture paste - Jasmine
I-Zink dye ink pads - Aurore, Miel & Cire
John Nextdoor stamp set - JND5001 Gerbera
John Nextdoor die set - JNDGD010 Gerbera


      I didn't mean to publish this today, it was one of my application projects for John Next Door's Angels. It was around this time last year that I began working on my first Hochanda release for the Angels, I'm happy to say I'm still with them and still loving every minute of it.