When I saw John Next Door's new Poinsettia Swirl die this is the first thing I thought of, trees. There are so many colour combinations you could do with these, they don't have to be for Christmas either.
To start with I cut three sets of solid flowers in gold paper, the beauty of John's flower & foliage dies is you can get four sets from one A4 sheet. Then I cut one set each in white, green and red using the swirl die.
These are hand drawn shapes so they are not perfectly symmetrical, just like real flowers, so you will have to turn them around until you find the perfect match. Once I had the perfect match I glued the flowers together using a good strong PVA, I get in too much of a mess spraying glue, plus I have to go to the greenhouse to do it. One tip that may be useful is once your flower is lined up glue the centre only, this will hold it in place while you go around the petals, there's nothing more frustrating than when it slips out of alignment!
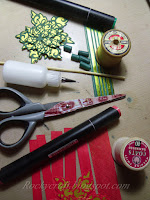
While the glue dried on the flowers I made my tree trunks. This consists of a wooden cotton reel, plastic would work but won't be as heavy and sturdy once built. For the trunk I used a bamboo skewer, this is held firmly in the cotton reel by wrapping approximately 7" of thin card around the skewer and gluing it inside the cotton reel. I did not cut the skewer to length until the tree was assembled just in case it was too short.
The visible trunk is then a series of paper beads, made with the same card as the swirls so they match. One bead followed by one flower all the way up the trunk, all made using a spare skewer as a master thus ensuring they fit the tree skewer.
Bead list: 3 x 1/2" wide and 4" long & 2 x 3/8" wide and 4" long
Each flower, except the smallest one, will need a small hole in the centre for threading, don't be tempted to use a hole punch for this as the hole may be too big, use a pokey tool and gently tease the flower over the skewer for a snug fit.
Begin with a large bead before the first petal, then use the remaining two larger beads in between the next petals, finishing with the two smaller beads toward the top of the tree.
I used a spot of PVA at each stage so the beads and flowers stayed firm and it all stuck to the skewer. Once the last bead was stuck in place I cut the skewer off flush with the top, the smallest flower was then stuck over the top to cap the tree. To finish off I stuck a small gold pearl on the top but a tiny star would look just as good, or even a mini fairy if you can find one.
I had some one inch strips of white and gold patterned paper left over from making stars, these were just the right width for wrapping the cotton reels. I coloured the papers with alcohol markers to get a match for the green and red trees and glued them in place. To make a perfect finish you could cover the bottom of the cotton reel with thick card or felt to hide the skewer and stop it marking a polished surface.
A small forest of trees on the mantle piece would look great or maybe use them as place markers on your Christmas Dinner table. If you make some of these I hope you enjoy it as much as I have, if you have any questions please comment and I will do my best to answer them.
Materials List
JND132 - Swirl Pionsettia Die
JNDCC017 - Poinsettia Die
Cotton Reel
Bamboo Skewer
Card/Paper
Stix2 3D PVA
I would like to enter these trees in the following challenges:
Winter Wonderland - Christmas Ornaments
CraftyHazelnut's Christmas - Anything Christmas/optional S
The 12 Months of Christmas - Anything Christmas/optional Kraft
Through The Craft Room Door - Anything Goes
The 12 Months of Christmas - Anything Christmas/optional Kraft
Through The Craft Room Door - Anything Goes


Hi these are stunning. They are just so clever. Thank you for joining us at Winter Wonderland Challenge Blog for the current challenge the theme is “Ornaments” and the sponsor is LeAnn’s World 101. Hugs Jackie (DT)
ReplyDeleteBrilliant idea, they look great xxx
ReplyDeleteLovely work. Thank you for joining the challenge at the 12 months of Christmas cards link up and Crafty Hazelnkut's Christmas challenge. Hope to see you again next time.
ReplyDeleteFantastic trees. They would make lovely table additions for the christmas table. Thank you for joining in at CHNC with Anything Goes Challenge and optional twist of something begininng with S. Apologies for the late comment.
ReplyDelete