Wednesday 30 August 2017

Back To School


     The new challenge at The Male Room is 'school colours',  it doesn't have to be school themed, just something masculine showing school colours.
     I have a digi in my stash that I thought would be just right for this challenge. With a few adjustments to the mortar board and gown, so I could add a splash of yellow, it would be just perfect.
     The image was printed out on white card, then I made my adjustments and cut a mask to cover him. Then I secondary stamped some pencils to make a background using a rubber stamp that was pre-loved when I got it and I've had it about six months.
     There was a slight halo around part of him where I didn't get the mask perfectly placed, but that was easily remedied by colouring a small border around the whole image with a very pale grey marker.
     When it came to the mat layers I wanted to have the same shade of yellow, so I used the same marker on a white card mat. You only see the edge so only the edge has to be coloured, I also made the black layer the same way. This method saves having stacks of coloured card, and we all know it's never the right shade, as well as making a perfect colour match possible every time.
     There is no greeting at present, that will be added when it gets used, I'm thinking it might make a great good luck card.
     Please pop over to The Male Room and have a look at all the DT inspiration, come and join us with your masculine creations.

I would like to enter this card in the following challenges:
Digi Choosday - Anything Goes   (W)
Retro Rubber - Back To School   (F)
Tuesday Throwdown - Masking   (W)
Always Fun - Back To School   (W)
Dream Valley - Use A Stamp or A Digi    (W)
Simon Says Stamp - Anything School Related   (W)
Use Your Stuff - Back To School/Work   (W)

Friday 25 August 2017

MHK Designs - Sassy Sayings


     This is the last of this months new releases from MHK Designs and a nice cheeky set it is too.
     I printed the image and sentiment on to white card, then made a mask for the image using the dining room window as a light box and a sticky note.
     I put a stencil over the card and used some Distress ink to colour through it. I rather like the pattern radiating from the image, it reminded me of some old advertising I had seen.
     The edges were darkened with the same ink to bring the eye to the centre image. I trimmed the card and stuck it on to a white card blank so it all sits very flat, just right for sending a short note to a friend.
    You can still pop over to MHK Designs blog to see all the DT inspiration for the whole month's new releases.


Sassy Sayings

Sunday 20 August 2017

MHK Designs - Pet Puns


     Set number four from MHK Designs is a really useful set for animal lovers, this could help with making those masculine cards that sometimes prove to be a challenge.
     I chose to use the fishbowl from Pet Puns as I had someone in mind as soon as I saw this set. It's been printed on white card and coloured with alcohol markers, then die cut with a faux stitch die.
     To bring out the orange of the fish I printed some backing paper from French Country to use as a mat layer.
     Once the layers were all finished and added to the card blank I used some Glossy Accents to make the fish bowl look like glass, it took a while to dry and buckled slightly, but that has settled down now it's completely dry.
     Don't forget there is a chance to win this set or the whole release, you need to go to MHK Designs blog to find out how, while you're there why not make a card for our challenge too.

Pet Puns
French Country


I would like to enter this card in the following challenges:
2 Crafty Critter Crazies - Anything featuring a Critter   (M)
Digi Choosday - Anything Goes   (F)
Polkadoodles Crafting - Anything Goes   (W)

Wednesday 16 August 2017

Drinks at The Male Room


     At The Male Room this fortnight we have a Drinks theme, so you can make anything drink related, as long as it's masculine.
     I have chosen to make a very quick and easy decoupage card with some toppers I was given. I have just cut the foreground out and then put it on foam pads  over the base layer, this means it's still thin enough for standard UK postage.
     The small mat layer is dark red textured paper which I thought went well with the red wine theme in the picture. Mounted on a cream card, white looked too bright and not in keeping with the vintage look.
     There is no greeting on the card as yet, that will be added when I decide what I will use it for.
    If you haven't already looked at the DT inspiration then please pop over and take a look, come and join us at The Male Room, this challenge runs for two weeks.


Tuesday 15 August 2017

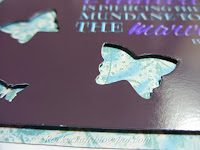
MHK Designs - Marvelous


     Our third new release at MHK Designs is a collection of marvelous sayings accompanied by a lovely flower, just the words alone make a great card.
     The colour of the saying has been changed in my photo package with a black background added before being printed on gloss photo paper.
     Using a small butterfly die I have cut random flutterings all over the gloss card and backed it with foam pads.
     The backing paper has been changed to turquoise and printed on thick paper. After sticking the background paper to a white card blank the gloss panel has been stuck on top, this allows the cut outs to show off the pattern underneath.
     A very simple card that's still thin enough for standard UK postage, ideal for a little note to cheer up a friend.
   
Marvelous
Damsel In Distress 


      Here is how to get this new set OR the entire release for FREE!  Here's what you'll need to do...  
             1.Comment on the MHKDesigns blog.
             2.Comment on each DT member's blog.
             3.Join our MHKDesigners and Friends Facebook group and comment there.

     Comments will be chosen randomly from all these places after the release is over, and the authors of those comments will be our winners!  So, the best way to win is to comment every day!  

Thursday 10 August 2017

MHK Designs - Light Of The World


     The second of our new releases at MHK Designs is Light of the World and this is my second project using it.
     Again I have chosen to use the lamp, I love its simplicity, perfect for a CAS card that's to the point.
     The lamp and words were assembled in a photo package and then printed on plain white card.
     I wanted to add colour coming from the lamp, so I held the printed image on my window and used it like a lightbox, tracing round the lamp on copy paper. With the copy paper cutout in place I used a stencil from my stash and yellow ink to create the rays of light coming from the lamp.
     A very simple card but a clear message and nice and flat for posting.
     Please pop over and have a look at all the DT projects on MHK Designs blog and while you're there have a look at how easy it is to win some of these lovely new digi sets.

Light of the World

I would like to enter this card in the following challenges:
Digi Choosday - Anything Goes   (F)
Retarte - Anything Goes   (F)
Use Your Stuff - Inspired By A Quote   (W)

Monday 7 August 2017

MHK Designs - Monthly Inspiration


    Light of the World will be the next new set released by MHK Designs this month, so I thought I'd show you something you could make with it.
     Using the plain lamp from this set I made a circle of them with my photo package, printed them and then cut them out. They have been coloured with alcohol markers and stretched with a ball tool to resemble petals on a flower.
     Using a background from Damsel In Distress with foliage helps make this look even more flower like, along with layering two lamp circles on foam pads. The centre was die cut and coloured before removing the die to get a white, even border, this is also mounted on foam pads.
     The lamp butterfly is two large lamps and two small, all lamp bases are overlapped to get the body. With the addition of a flower stamen for antennae the butterfly, once coloured and trimmed, is complete, there are foam pads under its wings.
     The DT inspiration for this set will be on our blog on Thursday, please pop in and see all the different projects made with it. There will also be details on how you could win this set and more.
 
Light of the World
Damsel In Distress


I would like to enter this card in the following challenges:
Stamping Sensations - Anything Goes
Little C's Creations - Yellow Flowers

Saturday 5 August 2017

MHK Designs - Christmas Frames


     Christmas Frames from MHK Designs are just that, Christmas Frames, this makes them ideal for shaker cards.
     I prefer to make shaker boxes, I think they look neater because you can't see the foam and nothing can escape.
     The Wintry Scene was printed on white card, the edges measured and scored ready for the box and the centre cut out. The greeting was printed on another sheet of card ready to back the shaker.
     An acetate sheet was put over the opening and then foam tape was put all around close to the opening, with a small piece in each corner for support.
 
     A mixture of snowflake sequins, shaved glitter and micro beads was added to the well created over the acetate before the backing was carefully lowered on top to seal the shaker aperture.
  Once the greeting backing was in place the sides were folder over to form the box. To make it all neat and tidy another backing was put on and a small stand to keep the card upright.
     Finishing touches were to colour the door and windows of the house and add a little sparkle to the snow.


Christmas Frames Part 1
Christmas Frames Part 2


     If you haven't come from MHK Designs blog then please pop over and take a look at all the DT inspiration, you also have the chance to win some of these new release sets, full details are on our blog.

I would like to enter this card in the following challenges:
Christmas Card Challenge - Anything Christmas/Option Photo Inspiration
Sparkles Christmas Challenge - Festive Sentiment
The 12 Months Of Christmas - Anything Christmas/Option Traditional Colours
A Snowflakes Promise - Anything Christmas
CraftyHazelnut's Christmas - Anything Christmas/Option 3 of Something
Crafty Friends - Christmas In July

Wednesday 2 August 2017

The Male Room's All At Sea


     The new challenge at The Male Room is Maps/Co-ordinates, after a few false starts here is my nautical contribution.
     
     Starting with a kraft card square the main images were stamped and embossed in white. Then the fun part, playing with Distress Oxide inks on my craft sheet, Walnut, Photo and Jeans provided the mixture I was looking for.
     Adding just a square of each colour to the craft mat, then a spritz with water gave enough ink for the kraft card to be dragged through, dipped in and dabbed with. I tried to get most of the blue around the ship and once dry the chalky look from these inks added even more interest.

      As the images were embossed they resisted the colour perfectly, all that was needed to finish off was to add a map. This was done using a dark brown Memento ink so it wouldn't react with any more Oxide I might add.
     The edges looked a little unfinished, so I used the same Oxides to go around with a blending sponge to frame the panel. I wanted to add a little interest to the corners but not add anything too prominent, so I dug out a favourite corner punch.
     The mat layer is an old gold pearl card, it adds a hint of gold with out too much bling, keeping the vintage nautical look. Mounted on a kraft card blank the whole cad remains vintage and understated.
     The Male Room challenge runs for two weeks, so after you've had a look at the DT inspiration please come and join us with your project.


Tuesday 1 August 2017

Blooming House Of Cards


     The House Of Cards challenge this month has a gorgeous photo prompt with pretty shades of lilac, mauve and purple.  Needing no excuse to break out the Brusho's, as soon as I saw the colours for this challenge the box was on my desk.
     The flowers have been stamped and embossed in white on watercolour card. Then the fun began, using a water brush I painted one petal and sprinkled purple Brusho on it, blew away the excess and moved on the the next petal.
     All petals were done one at a time to make sure the paint stayed just where I wanted it, the stems and leaves have been done the same way.
The flower centre were done last so that the petals were completely dry, these were done with grey.
     The thing I love about these paints is the way they show the component colours when not completely mixed or saturated, giving some great effects.
     All that was needed was a mat layer to compliment the image and then on to a white card blank. The greeting comes with the flowers in a Woodware set called Erica, this was embossed in silver and die cut before mounting on foam pads.
   
   
     Our challenge at the House Of Cards runs all month so please come and join us with your creations.

MHK Designs - August Challenge


     The new challenge at MHK Designs has a floral inspiration to it and some rather bold colours too. After searching through my images I fell upon a backing paper that I thought was just perfect.
     Colouring papers are very popular in the UK, with many books available but once I started looking at the backing papers in black and white I saw lots of possibilities. Damsel In Distress is a great set for this purpose, with several designs that can be printed and coloured, making it even more useful.
     I printed my paper out on a lighter setting so I got a more grey image than black, then I set about colouring with watercolour pencils. Once all the colouring was done I went back over the design with a white gel pen to add some highlights. The centre of the blue flower has some silver dimensional paint added to lift it slightly.
     Mounting the image panel on dark red paper, then on blue card helped to pick out the challenge colours and tie the whole thing together. The layered panel was then put on a white card blank with a dark red edged die cut greeting mounted on foam pads.

Damsel In Distress
   
     The beauty of digital papers is you can print custom sizes and manipulate the colours to suit if you play around in your photo package. If you don't have a photo package try changing some of the settings on your printer, just remember to reset to standard when finished.  


MHK Designs have some great new releases coming out this month so please pop over to the blog to see what the DT have done with them, you also have the opportunity to win some of them, all details will be on the MHK Designs blog.


Fizzy Jelly Fish


    Over at Altered Eclectics you can enter the challenge with mixed media, journaling and recycled projects, anything BUT a card or ATC. I like to recycle as much a s possible so when I saw how to do these I raided the recycle bin and set to work.
     The bottle should have a shaped bottom to make the head of the jellyfish more interesting. After a long study in my local supermarket I discovered that it's fizzy drink bottles that have the best shaped bottom.
     I found a video on You Tube for making these, here's the link. Cut the bottom off just above where it goes smooth for the label to sit, then cut the top off just below the shaping for the neck (this bit makes a good funnel).
      The bottom is gently smoothed off by holding it on a craft iron to melt it slightly, the heat makes the edges curl in a little.
     The centre of the bottle should be cut into a fringed collar, cut up to within an inch or so from the top all the way round the bottle, this will form the tentacles.
     To get then to curl hold them over a candle flame, they will bend in the heat, try not to hold them too close or they will get black soot marks on them. Once curled cut the solid ring at the top once to make a strip that can then be rolled up and secured either with hot glue or with strong clear tape.
     Once you have the tentacles rolled up you are ready to glue them into the head. Using hot glue stick the tentacle roll in the middle of the head with a large drop of glue and hold until it's set.
 
   
     To hang your jellyfish you can add fishing line to the top of the head with another spot of hot glue, if you use fishing line it can't be seen so easily so they look like they are swimming trough the air.
     Small ones can be added to a large clear container of water so the do actually swim around, you can find more detail on this in the video.
   
     Having made some clear jellyfish I wanted to make a neon green one, so back to the shop for some more research.  Mountain Dew comes in a lovely bright neon green bottle, not keen on the taste but it was necessary for my art!
     Now I look at fizzy drink bottles in every shop and garage I go to, you never know when you might find something different.
     Did you know that a collection of jellyfish is called a bloom, smack or swarm?

You can join our challenge at Altered Eclectics with your own recycled projects or mixed media, it's open all month, we'd love to see what you make.