Wednesday 15 January 2020

Dragonfly Slide With Brayer Bonus


     Another slide card using John Next Door's die set, this time with a little Media Plate magic too. The dragonfly media plate, stamp and die fit rather well on this card, along with a few tiny dragonflies from the Gerbera Daisy stamp set.
      To begin this card I cut the two panels required for the basic card. There is a video by John giving assembly instructions on YouTube, some of you have found it difficult to see the link on the last post so it is HERE. Once you watch John in action it all becomes clear, much clearer than my description would be.
      Before any assembly I decorated the card with Distress Inks, stencils and a pigment I-Zink white ink pad. Using the media plate I stamped the dragonfly on the front before cutting the window.
      The greeting that shows when the card is closed is embossed in silver and coloured with the same inks through the same stencil to maintain continuity. I have left the surprise greeting on a white background to give it more impact when the card is opened.
     There are a few tiny dragonflies dotted around the card both inside and out, again using the same ink colours
      I stamped in white pigment I-Zink on vellum and coloured the back with more pigment inks in colours as close to the Distress Inks as I could find. Pigment inks gave me a better coverage in stronger colour to show through the vellum.
     I die cut the dragonfly and then glued just the body to the card, directly over the media plate stamped version. It will sit flat for postage and I was careful to make sure it's tail didn't stick out past the edge of the card.


Now for the frugal bit, crafters never waste anything.


      When using a brayer you end up with some ink left on the roller and John always says 'don't waste it', so I did as he suggests and ran it off on a spare piece of card. This gave me a lovely mottled band of colour that I trimmed and mounted on silver mirri, then stuck it onto a small white card blank.
     The beauty of decorating my slide card before cutting the windows meant I had two decorated circles left over, perfect for this little card.
     A stamped and silver embossed greeting, mounted on silver miri and set off centre gives me a small card that could be used as a tag for the gift to go with the slide card, or just a neat little card for to tuck away in my stash until needed.


Materials List    Available from your local craft shop
JND099 Slide Card die set
JND150 Loving Sentiments stamp set
JND5001 Gerbera Daisy  stamp set
JLMP001 Dragonfly Media Plate
JND112A  Bold Dragonfly Stamp
JND109    Butterfly and Dragonfly die set
Hard Brayer
I-Zink pigment inks
Distress Inks
Stix2 3D PVA Glue
Silver Embossing Powder


I would like to enter these cards in the following challenges:
Addicted To Stamps - Make Your Mark
Crafty Card Makers - Anything Goes


Saturday 11 January 2020

Bee Slide Surprise


        A new challenge at Not Just Cards means a mechanical card made using John Next Door's new slide card die set. All my basic card pieces were cut and decorated before any assembly started.
     The die has two main pieces that make the front and the insert, the back is made using part of another front panel. John has a video on YouTube showing just how to put this card together.
      There is a little piece of flat metal in the set, this is your aperture positioning guide, it makes sure you can get the three windows required in the right place. For me it worked well in making sure the window was correctly placed from the tab end, but being a fussy guts I wanted my window in the middle of the card height wise, so I made my own tiny adjustment.
     This adjustment meant that when I cut the inside window I had to place one of the cut outs back in the hole, tape it down, then place the die over it and cut with it in place. If you use the guide as John recommends you won't need to do it this way.
     The picture inside was made up with some of John's flower stamps and a bee stamp from stash, coloured with watercolour pencils as alcohol markers would have shown through to the back.
     The decoration was done with Distress Ink Scattered Straw and a hexagon stencil.
     I stamped and coloured one set of flowers, then cut them out and worked them with a ball tool to give them shape. Each flower is two sets of petals stuck together, I have also used a few rose leaves to add foliage.
     The middle of each flower has some black Flowersoft stuck in it to add texture, plus it's a good way to use up what's been sitting in my stash for years.
     These were all stuck on with a good strong PVA so they won't fall off as the card gets moved back and forth.
   
     The sentiment on the slide was stamped in brown ink as black looked a little too harsh, and the gold embossed bee on acetate was stuck in between the top layers of the card using redline tape. I also found the mechanism worked much better if I stuck these two pieces of card together right up to the fold of the sliding part.


Materials List    Available from your local craft shop
JND099 Slide Card die set
JND150 Loving Sentiments stamp set
JNDGD010 Gerbera Flowers die plate
JND5001 Gerbera Daisy  stamp set
JND120 Rose Leaves die set
Distress Inks
Stix2 3D PVA Glue
Gold Embossing Powder
Versamark Ink
Heat Resistant Acetate


I would like to enter this card in the following challenges:
Alphabet Challenge - T is for Try Something Different
Creative Fingers - Anything Goes
Southern Girls - Anything Goes
Colour Throwdown - Brown, Yellow & Green

Friday 10 January 2020

January Sparkle


     Christmas At Sweet Stampin' this month is all about Sparkle, this really does sparkle but it's very hard to get a good photograph.
     It's made using a Sweet Poppy stencil and white paste on dark blue card. The stencil was taped down all the way around to prevent movement and paste in the wrong place.
     The paste was applied at the top and dragged down evenly to produce a near even covering, there are a few spots where it is not perfect but it's hand crafted and unique so that's alright with me.
     Once the stencil had been carefully removed I sprinkled the whole card with iridescent glitter and set it aside to dry overnight.
     Once dry I trimmed the card down and matted it on silver before putting it on a white card blank. The sparkle was good but it needed a little something more so I added a gem in the centre, this then made the corners look big and empty, so I added some tiny gems to balance it up.
     When working with stencils and paste I have found it easier to make a batch of card tops, that way there is only one lot of cleaning up with maximum output.
     I know it's only January but please come and join us at Christmas At Sweet Stampin', it will make the end of the year much easier if you have some cards already made.


I would like to enter this card in the following challenges:
Christmas Crafts All Year 'Round - Anything Christmas Goes
The 12 Month's of Christmas - Anything Christmas/optional Old Fashioned
CraftyHazelnut's Christmas - Anything Christmas/optional Recycle
The Holly and Ivy - Anything Christmas

Wednesday 8 January 2020

Butterfly Window


     Another card using John Next Door's new butterfly stamp and die, this time a way to get that media plate look without a plate.
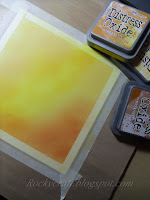
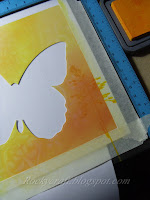
      This started with an 8x8 white card blank taped down to a craft sheet, the taped edge was to get an even white border around the whole card. Using Distress Oxides I coloured the card front from one corner to the other.
     Using a large corner stencil I used water to lift some of the ink and make a subtle pattern on the card. Then I lined up the die at a slight angle and taped it down ready to cut. I also stamped a couple of tiny butterflies around the hole.
      Having cut the shape I then placed a piece of white paper underneath so when I stamped the grasses on the front they wouldn't make a mark on the inside.
     With the card closed I put the butterfly shape back in the hole and stuck it to the inside back of the card, this way it would be in exactly the right place to show through the window when the card is shut. This is where you could use your media plate, if you have one, instead of using the die cut shape.
     Using heat resistant acetate I stamped the butterfly and embossed in gold. This was lined up to fit the window and stuck in place with redline tape. I had to cut a piece of white card a tiny bit smaller than the front, with a butterfly hole in it to go over the acetate on the inside to keep it tidy.
     All that remained was to stamp a greeting inside the card. When closed it sits perfectly flat so will go as standard postage.


Materials List    Available from your local craft shop
JND110A  Bold Butterfly Stamp
JND109    Butterfly and Dragonfly die set
Distress Oxide Inks
Stix2 3D PVA Glue
Gold Embossing Powder
Versamark Ink
Heat Resistant Acetate


I would like to enter this card in the following challenges:
Tuesday Throwdown - Something New
Paper Minutes - Embossing Powder
Always Fun - Something New
Simon Says Stamp Monday - Something New

Thursday 2 January 2020

Butterfly Media Magic


     This is made using the John Next Door's media plates along with the new stamps and dies. The media plates are an existing item and the new stamps and dies have been made to fit perfectly with them.
     Using Izink pigment inks I inked up the butterfly media plate and smoothed it out with a hard brayer. I have also used a spare piece of card to clean off the brayer, this will be used for another project.
     Using some of the same inks I have inked up some floral stamps and stamped them onto the media plate, then stamped that onto the card, this gives the illusion of flowers in the background.
     I have also used Versafine black and stamped some flowers on the card to look like they are growing in front of the butterfly shape.
   
     There are also a few small silhouette butterflies stamped in grey across the card.
     I trimmed the card ready to put on a black mat layer but before it was stuck down I made a small hole at the butterfly's head and stuck a flower stamen through, securing the stamen on the reverse of the card. This layer was then stuck onto the narrow black mat and then onto a wider coloured layer, before going onto an 8x8 scalloped card blank.
     The top butterfly is stamped in white ink onto vellum, the beauty of a stamp press is you can stamp more than once to build up the depth of ink, this one was stamped three times.
     Once dry the vellum was cut out with the butterfly die, each wing was folded along the join to the body and then the body was stuck down with a strong PVA glue.
     The back of the vellum was coloured with the same inks used on the media plate, so everything co-ordinates and with the body in place the stamens look like little antenna.
      A delicate vellum butterfly has a colourful shadow as it flies across the card. Media plates really are a great way to make backgrounds and with so many shapes available as well as a large rectangle the possibilities are endless.


Materials List    Available from your local craft shop
JLMP003  Butterfly Media Plate
JND110A  Bold Butterfly Stamp
JND109    Butterfly and Dragonfly die set
Hard Brayer
I-Zink pigment inks
Versafine Black Ink
Stix2 3D PVA Glue


I would like to enter this card in the following challenges:
Craft Rocket - Something New
Moving Along With The Times - All Things New
Little Red Wagon - Never Before Used Schtuff
Simon Says Stamp - Something New