Saturday 15 January 2022

Rainbow Frame


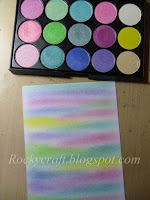
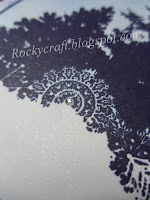
     This card was made using the cut out frame left over from the card in the last post. If you haven't seen it then this was white card that has been coloured with the new Mica Magic Spring set from John Next Door.
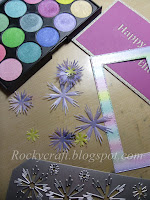
     Mica Magic doesn't just colour card, it will work on many different surfaces, including vellum. The flowers were cut in vellum using the Cornflower die set and the corresponding leaves. Both flowers and leaves were coloured with the mica, for a stronger colour work on the front and for a paler colour work on the back of the vellum.
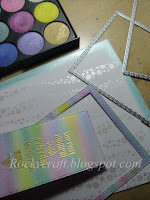
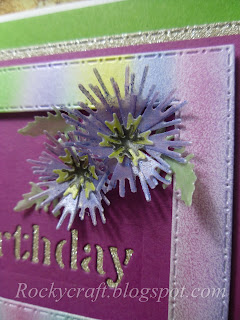
     To mount up on a white card blank I used some bright green card that was a close match to one of the mica colours. On top of this I used some pink Craft Artist glitter card covered with a die cut layer of a sort of squashed berry colour, again similar to one of the mica colours used. The berry and glitter layer was mounted on 1mm foam while the rainbow frame was mounted on 2mm foam tape over the berry card leaving a border showing.
     Once the frame was in place I was able to add the flowers and leaves to pop out from within the frame, filling in the open areas on the berry card.
     This card has used up some offcuts and a few new bits, it's a good way to make great use of what you've already got on your work bench from previous projects.


I would like to enter this card in the following challenges:
C.R.A.F.T. - #623 New
Watercooler Wednesday - #332 All Things Feminine 
Try It On Tuesday - In With The New
Cut It Up - #243 Anything Goes
Creative Fingers - #222 Anything Goes

Monday 10 January 2022

Rainbow Mica Magic


     If you haven't worked with mica before then give it a try, this is Mica Magic, it comes in cake form rather than powder but can be used in the same way. This mica has a binding agent in it already which makes it a little creamy in texture, but it will still dust onto a project just like a powder.
     
     This pallet is the new Spring set from John Next Door, a selection of gorgeous Spring colours.
     To begin this card I coloured an A6 piece of white card with the mica, just using my finger to paint it on in stripes. Once I'd covered the card I left it for a few minutes, then buffed it wish a soft cloth, this brings up the shine of the mica and because of the binding agent it doesn't rub off the card.
     With some of the rectangle dies I cut two frames and a panel from the rainbow card. For this card I only wanted the panel and the outer frame, I have used the inner frame for another project so nothing was wasted.
     To make the background I used a stencil on white card and the white pearl mica from the set, this gives some pattern but doesn't complicate the colours.
     The amazing thing about Mica Magic is you can stamp and emboss over it without having to use specialised ink, I used a Versamark ink pad and detail embossing powder.
     The card blank has been coloured blue around the edge, then the white patterned background was mounted on 1mm foam. The frame was mounted flush to the white background with the sentiment panel went on 2mm foam in the centre.
     I always loved working with mica powders but Mica Magic is so much easier to use as it's less messy, there is no dust floating around when you use it and you still get that great shine.


I would like to enter this card in the following challenges:
Dream Valley - #261 Anything New
Allsorts - #658 Anything Goes / option~New     Top 5
Stamping Sensations - Anything Stamped Goes / option~add a die
Let's Craft and Create - # 179 Anything Goes / option~New


Wednesday 5 January 2022

Winter Wonderland


     As we're still in Winter in the northern hemisphere the new challenge twist at The Paper Funday is Winter Landscapes. A Winter birthday or getting ahead for Christmas, this card could be either, a sentiment will be added later.
     It started as an A5 piece of white card, using a torn edge piece of paper as a mask I coloured the top two thirds with pale Distress Inks, Broken China and Faded Lilac.
     Working on an A5 piece gave me the advantage of choosing which bit I liked best when it came to placing the stamp. The image was stamped in Versafine Claire Medieval Blue, it's a really dark blue that looks almost black, a good way to get a dark image that's not too harsh. 
     Using a square die I cut the image panel out, then cut a white mat layer that was coloured with the Versafine ink so it would match the image. I gave the whole panel a spritz with a pearl mica spray before adding it to the blue mat layer.
     When put on a white card blank it looked a little plain, so I used some tiny finger stamps and added little snowflakes at random all around the edges that would show. The image panel is mounted on thin foam tape to give a tiny bit of lift.
     Once mounted and dry I added some tiny clear gems to the image, two on the snowflakes and one on the glint through the trees.
     Please come and join us at The Paper Funday, it is an anything goes challenge, I have chosen to use the twist but you don't have to.


I would like to enter this card in the following challenges:
Stamping Sensations - Anything Goes, option Add A Die
Sparkles Christmas - A Winter's Scene
Taylormade Cards 4 U - Anything goes, option Winter Vibes
Friendship - Winter Is Here
Pearly Sparkles - #69 January Blues