Sunday 29 March 2020

On The Bench


     John Next Door has a new die released today, a bench card, there are so many possibilities with this one. This card is just one of many samples made for the launch show, it's great when you get something that just sets off a whole bundle of ideas.
     This card has the main shape cut in orange card, the shelf, shelf bracket and front panel all cut in Kraft card. The front panel is then cut in half along the entire length, this lowers the shelf, you'll also need to trim the shelf one side when fitting.
     The main panel was coloured at random with Distress Ink Fired Brick before being stamped with Distress Oxide Tattered Rose. The front panel and the bench were stamped with brown ink using a woodgrain stamp.
      The little wooden plank for the shirts to hang from is a die cut from Tim Holtz (thanks Avril) also from Kraft card, this is mounted on foam pads to bring it out from the wall.
      Two die cut jumpers with the sleeves cut down make the shirts, with die cut white numbers added, a perfect way to put an age on the card if required. The tiny rosette is also die cut, again a Sizzix die, with white letters to personalise the card. Two little sets of boots were a bit more of a problem, neither I nor my local friends have a die to cut football boots, a trip to the internet and a free image of blue boots sorted that one.
      The greeting across the bench is die cut from dark brown card and stuck on with PVA. For a trophy I resorted to peel offs, I have a die but it's much too big for the card but the peel off was perfect. I just had to colour the base black with a Sharpie to make it look right.
      Here is the link to John's video showing basic assembly of the bridge card.


Materials List    Available from your local craft shop
JND083 - Bench (Bridge) Card die
Stamp Press
Distress Inks
Strong PVA Glue
Bits from stash and lovely craft buddies (before the lockdown)


I would like to enter this card in the following challenges:
Crafty Catz - Anything Goes/option use Kraft
Fab 'n' Funky - Masculine
Allsorts - Men and Boys
Send A Smile 4 Kids - Cards 4 Boys

Friday 27 March 2020

Leaf It Out


     Through all this chaos us crafters seem to be pulling together very well, an example to others I think. There are lots of Facebook Live videos, the craft channels are still broadcasting and lots of wonderful independent shops are hosting challenges or posting tutorials. The only thing I would like to see is a few more blog posts for those not on Facebook.
      This tag was made for a challenge set by a local craft shop, the theme this week was leaves. It's just a bit of fun and a nice way for us to stay in touch, but it's only on Facebook. For those of you out there that are not all over social media I would heartily recommend trying some of the blog challenges you can find listed on Paper Playful.
     This tag started as cream card, die cut with a Sizzix Bigz die. Using Distress Inks I coloured the tag with three shades of green and one brown. The droplets were stamped in Versafine black over the Distress Ink, then using a water brush I lifted the colour out of the droplets to lighten them.
      I ran the tag through a leaf vein embossing folder while still a little damp so I would get crisper creases. To get the gold across the veins I used gilding wax applied with the back of a blending foam square. Two things I learnt when doing this were the hard foam gives a great cover on raised areas only (thanks Dot) and if it does get on the card in the wrong place a glue eraser will get it off.
      The foliage was die cut from dark green card to go with the tatty white daisy, the centre of which was made using Flowersoft. I was going to put three daisies on but that didn't look right as the tag is quite short.
      Each tiny droplet has a white highlight spot added with a gel pen, I thought it looked alright at that point but still a bit flat, lightbulb moment, then I added Glossy Accents to each drop and now they look like real raindrops. The raindrops on a leaf is something I have had floating around in my head for ages, the first one didn't look too good so that's been filed for resurrection at a later date, throw nothing away unless it's a total disaster. To finish off I coloured a length of cotton ribbon with the same Distress Inks, dried it with a heat gun and added it to the top of the tag.

Time to Bash The Stash.

Materials List    Mostly available from your local craft shop
Sizzix Bigz die 38-0946   (very old)
Distress Inks - Sage, Olive, Moss, Corduroy.
Stamp - Water Effects 1 Designs By Ryn
Stamp Press
Versafine Onyx Black
JND118 - Tatty Daisy die
Creative Expressions - Evergreen Branches
Flowersoft - yellow   (also very old)
Strong PVA Glue
Embossing folder - Leaf Vein 8x8 Crafters Companion
Glossy Accents
Pebeo Gilding Wax - Empire Gold


I would like to enter this tag in the following challenges:
Stamping Sensations - Spring Florals
Use Your Stuff - Spring
Creative Fingers - Anything Goes
Southern Girls - Anything Goes

Saturday 21 March 2020

Two Jays Floral Posy


      Another sample made with a new Two Jays stamp, this one is called Camomile. These new flowers from Two Jays are taken from some old block prints, so when they were drawn they were accurate, a lot has changed in a hundred or so years.
     This was inked up in several different colours of Izink pigment inks, I was trying to get a softer image than using black or even dark grey. Stamped on to watercolour card, before the ink dried I covered it with clear embossing powder and heated.
      As the image was stamped on card with texture when I cut it out and edged it with Mica Magic it gave a mottled effect.
      Using the same inks I dabbed a little of each on my craft mat, then spritzed with water and dabbed a piece of watercolour card through it to make my background. This was cut into a square but with notched corners made with a punch.
      For the card blank I used the inks again to add colour at random around the edge. Using the same inks for all the colouring in various methods makes for a co-ordinated card.
      Mounting the image circle on silver mirri gave the shinning lift that was needed, then mounted on foam pads it had a bit of dimension and with the addition of some tiny gems it had a little sparkle too.


Materials List    Available from your local craft shop
CTJJ121 - Camomile - Two Jays clear stamp
Pigment Inks
Clear Embossing Powder
Stamp Press
Circle Dies
Tiny Gems
Strong PVA Glue
Watercolour Card & Silver Mirri Card


I would like to enter this card in the following challenges:
Colour Crazy Craft - Anything Colouring Goes
Daring Cardmakers - Floral Focus
Craft Rocket - Flowers

Sunday 15 March 2020

Media Plate Meets Two Jays


      This is one of the samples made for John Next Door using Two Jays new stamps, this stamp is called Flax. The new stamps are taken from vintage wood blocks so the flowers are as they used to be many years ago, some look very different now.
      I have to confess I have a small stack of media plate backgrounds already made, it's easy to make a few extra when everything is set up. The colours on this one seemed just right for the image when stamped in black.
      I trimmed the image panel and used a corner punch to add a little detail, this was also done to the black mat layer. The corners looked a little empty and knowing that if I stamped the corner detail three would be perfect but the last one would not, I resorted to using peel offs. Only having this style in silver meant I needed to get creative with my Sharpie pens, there is still a hint of silver visible but I think that adds to the classic style that started with the image.
      The centre of the flower has a small dazzler style embellishment, again coloured black with a Sharpie, alcohol ink markers work well on gems and peel offs but a Sharpie seems to be just a tad more solid in colour. Mounted on a 7x5 white card blank finished it off, I didn't add a greeting on the outside as I feel it is fine as it is.


Materials List    Available from your local craft shop
JLGP006 Media Plate - Oval
CTJJ123 Flax - Two Jays clear stamp
Pigment Inks
Versafine Black
Stamp Press
Hard Brayer


I would like to enter this card in the following challenges:
A Gem Of A Challenge - Anything Goes
Southern Girls - Anything Goes
The Paper Funday - Anything Goes/ optional St.Patricks Day


Wednesday 11 March 2020

Computer Reboot


     Making masculine cards can be a challenge but this stamp has it covered, it's not a new stamp but it's one I keep coming back to, when teamed with paper piecing it can be tailored for almost any theme.
      These two cards were made for a couple of young men celebrating their birthdays on the 29th of February. They are both keen gamers so I printed off some suitable papers containing computer code and circuit boards.
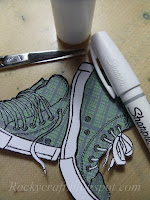
      For each card one set of boots was stamped and embossed on the patterned paper and another set on white card. I cut out the white card boots and then cut out selected parts of the patterned boots. To get the darker areas on the boots I used a grey alcohol marker but for the laces I used a white Sharpie pen.
      The word 'Urban' comes from another old Woodware set, stamped, embossed and coloured with alcohol markers. Then the backing paper was matted on to black card, before going on to a Kraft card blank.
      To tailor each card to the young man receiving it I stamped the little heal guard detail differently, one has ties to Canada so I used the tiny Woodware leaf that comes with the boots for his card and the star for the other.
      Inside the kraft card is a die cut shape to match the heal guad detail with Happy Birthday stamped on it. They may be very similar but they are certainly not the same.
      If you're looking for more ideas then please pop over to Not Just Cards where you'll find lots more inspiration.


I would like to enter these cards in the following challenges:
     Di's Digi Designs - Show Some Green
Send a Smile For Kids - Cards 4 Boys    Top 3
Double D - It's All About The Green
The Male Room - Team Colours
Do-Al (l) Creative - Male Birthday

Believe In A CAS Christmas


     This month's challenge at Christmas at Sweet Stampin' is CAS, clean and simple means lots of white space and a very simple decoration. This card was inspired by one I saw some time ago made by Karen Dunbrook, I loved it so much I decided to try it myself.
     I die cut a rectangular window in some inexpensive card for a stencil, then I cut a small circle but this time using Masking Sheet from Stix2, it's got a gentle adhesive on the back so it won't move or lift up.
     Using Distress Inks in two shades of blue I coloured the rectangle to shade from light at the top to dark at the bottom. Before removing the stencil I stamped, in black, two pine trees by Lavinia Stamps.
     After removing the stencil I stamped Father Christmas and the wording in the same black ink, I had to stamp Father Christmas a couple of times to get a good image, thank goodness for a stamp press. The word is a little distressed but I think it's alright, I may have to find another one that is a little crisper for next time.
     That's all there was to it, nice and simple, perfect for last minute makes when we get into December. If you come and join us at Christmas At Sweet Stampin' each month you won't have a December panic, as you'll be part way done already.


I would like to enter this card in the following challenges:
ABC Christmas - E, F, G    F is for freebie
Winter Wonderland - Blue Christmas
The 12 Month's Of Christmas - Anything Christmas/option Ice Ice Baby
Merry Little Christmas - Anything Christmas
CraftyHazelnut's Christmas - Anything Christmas/option Vintage

Sunday 1 March 2020

Blossom Heart


     With several anniversaries this month I made another card using the heart shaped Media Plate from John Next Door. This time I used John's idea with the Blossom flowers, it came out better then I expected.
     Using my stamp press I loaded it with a piece of white card, covered the card with the acetate grid sheet (to keep the card clean) and positioned the media plate on top and closed the lid to pick up the media plate. I then positioned the die cut flowers across where the heart shape would print.
      Using two shades of red pigment Izink I inked up the media plate and used a brayer to blend them on the plate. I closed the stamp press and printed the heart over the flowers, then opened it up, removed the flowers and without re-inking closed the stamp press and stamped again to get more definition around the flowers.
     I used the ink pads and a finger dauber to go around the edge of the media plate and stamped it again, this adds an edge to the shape and gives the appearance of dimension.
     I also added a tiny butterfly shadow using a stencil made from a die cut, Versamark and pearl mica powder.
     To get a matching mat layer I used the red inks to colour around the edge of a white mat. Once dry I layered up the heart panel on the mat and then onto the white card blank.
     I added the die cut flowers to the heart panel and stuck a tiny gem in each flower, red on the white flowers and white on the red ones. All that was left to add was a tiny black die cut butterfly and stamp in black the words 'Love is...'.
     I like this technique, John said it was easy and he's right, it also adds something a little different to using a media plate.


Materials List    Available from your local craft shop
JLGP006 Media Plate - Heart
JND113 Blossom Die
JND0013 Everyday Sentiments
Pigment Inks
Versafine Black
Versamark
Pearl Mica Powder
Stamp Press

I would like to enter this card in the following challenges:
Creative Knockouts - Dis Cuts/Punches
A Perfect Time To Craft - Anything Goes
Creations In Pink - Anything Goes In Mainly Pink
     Die Cut Divas - Anything With A Die Cut