Showing posts with label Halloween. Show all posts

Wednesday, 4 October 2023

Cats and Bats


     Another month, another project for The Paper Funday. This is an Anything Goes papercraft challenge with an optional twist, for October the twist is use yellow, orange and green. 
     This card is a CASE of a card by Shelly Matteson, her card is a bit more orangey than mine but in my defence I was using up some gorgeous papers I inherited from my mum.
     The background paper already had a sun/moon type look to it so I cut a moon in vellum and stuck it over the lightest area of the background.
     The colourise pumpkins were cut from some Clarity papers mum had in her stash, I chose a greeny purple one to fit the twist. The leaves come from another sheet of Clarity paper that had amazing Autumn colours on it. Shaped leaves give a bit more texture and depth to the overall picture with bats and cats in black card being set off by a black mat layer. To make the whole thing a little more magical I mounted the picture on some pearlescent orange card. 
      I won't be giving this one away for two reasons, one being I really like it and the second is we don't tend to celebrate Halloween even though the colour are amazing. It will grace the walls of my work area until next year at least.
     Please come and join us at The Paper Funday, it doesn't have to be Halloween and it doesn't have to be a card, as long as it's made with paper or card that's fine with us.


I would like to enter this project in the following challenges:
Two Old Bats Halloween - Anything Halloween
Inspiration Station - #54 Halloween colours
Get Creative - #126 Purple, green black and orange
Unicorn - #92 Autumn/Halloween

Wednesday, 6 October 2021

Dead Gorgeous Kitty


      And now for something completely different, this month's project for The Paper Funday is all about almost Halloween. I say almost because it's not something we really celebrate here, but I do have a friend that loves all things black, purple and fantasy so this is for her.
      
      To make the coloured hexagon I used a stencil from Crafts Too that fits in my stamp platform and a few Distress Oxide inks.
      I cut a small circle in Stix2 masking sheet for a moon and placed it within the hexagon before starting to ink the shape. I started with the palest colour around the moon, working out with darkening shades of purple, I used a touch of grey at the bottom to add a bit more depth to the shape.
      
       Once the stencil was removed I stamped a tree branch by Lavina Stamps in Versafine black coming in from the side. I searched my stash for a tiny bat stamp but couldn't find one, something to go on the wish list.
      The cat skeleton is an old die by Sheena Douglass cut in black card twice, I then stuck both cats together to make him a bit thicker.
      When I put it onto a black card blank it looked a bit too crisp around the edges so before sticking it down I went all the way around with a Memento grey inkpad, then I touched a little grey ink onto the moon and that was that.
      The Paper Funday is an anything goes challenge but we do have an optional twist, this month it's Halloween or Purple, please come and join us with your spooky makes.


I would like to enter this card in the following challenges:
Crafting Happiness - #116 October colours Purple, Black
Crafty Calendar - Halloween
Just Us Girls - #604 Halloween
The Paper Players - PP561 Spooky

Wednesday, 25 October 2017

Dark figures in The Male Room


   We have a new challenge at The Male Room and four new DT members to bring you even more inspiration. My card has a Halloween style but as us Brits don't really celebrate this festival I've tweaked it slightly.
   
     Recently I attended a workshop using the mini mixed media plates by John Nextdoor, Margaret showed us some basic techniques and lots of great effects. I came away full of inspiration and covered in ink!
     This circle is the result of building up layers of colour with a gorgeous effect made using bubble wrap. As it's all done on a stamp press it was easy to keep over stamping the same area, safe in the knowledge it would always be in the same place.
     The cat and mouse are Lavinia stamps, stamped twice in Versafine Black. Being able to stamp the cat twice meant I got a great coverage over the coloured circle, it's barely visible through him.
     Not having much use for a pure Halloween card I chose to stamp it with a Happy Birthday greeting by Woodware. This month there are several family birthdays so this is already on it's way.
     Please pop over and see the inspiration we have for you at The Male Room, including our four new team members.


I would like to enter this card in the following challenges:
Deep Ocean - Halloween   (F)
Show Us Your Pussies-Cats Only - Meow-loween   (M)
Try It On Tuesday - Circles   (F)

Sunday, 1 October 2017

Things That Go Bump In The House Of Cards


     The new challenge at the House Of Cards is inspired by Halloween, subject or colours, it's up to you. Here in the UK we don't celebrate Halloween as much as our friends in the US so the option to use the colours allows us to make something more Autumnal.
     Having said that I did choose to make a Halloween card. I have a die that cuts the pumpkin face and had seen a CAS card made using it so I thought I'd try it myself.
     The face is cut into the front of a square black card, then an orange glitter card pumpkin was die cut and stuck to the inside of the card.


     I tried the pumpkin attached to the back of the cut out face but it didn't look as good as having the face as a window to the pumpkin.
     The only other thing to add was a 'Boo' on the outside. The letters are die cut from glow-in-the-dark safety tape, so when the lights go out that's all you see, it was very difficult to photograph so please excuse the poor quality.
   
To join us at House Of Cards it doesn't have to be Halloween, just use the colours shown in the prompt, we'd love to see your projects.


House Of Cards - October

I would like to enter this card in the following challenges:
DL Art, Thankful Thursday - Halloween   (W)
CAS on Friday - Dies   (F)

Wednesday, 12 October 2016

Spooky Manor at The Male Room


     For the new challenge at The Male Room we have a Halloween theme and as we are not just cards I thought I'd make a spooky manor to go in the games room.
     I have used the Sizzix Tim Holt Village Dwelling die to make the basic house and then the Village Manor die to add all the extras which include the tower, fence, porch and window frames.
     The basic house was cut from Kraft card and then stamped with a woodgrain stamp in white and then brown, so was the porch and the tower it's a large Stampin'Up stamp called Hardwood, that I've had for over a year and use regularly.
     I saw a great tip on You Tube about cutting the roof open where the tower sits so the tea light can shine through to all the windows, so that's what I did. The roof is decorated using the Village Rooftops die which has several different styles, this one was cut in dark grey and then speckled with white paint to age it.
     The windows have acetate covered with white tissue stuck on the inside, this way you can't see the tea light, just the lovely glow.
     On the display version there are tall chimneys but I didn't like the look when they went on so I took them off again. On all the dwellings I've seen so far the doors are folded out, all the outer doors on my house open inwards so this house does too.
     For more of a Halloween feel I have added a small pumpkin made from orange flower petals folded up and a bare tree that my friend gave me last year. Having made this house I really want to make a whole village now, ready for Christmas.
 
     You can come and join us at The Male Room with any masculine Halloween project you've made right up until the evening of 25th October.


I would like to enter spooky manor in the following challenges:
Tuesday Throwdown - Halloween
Country View Challenge - All Things Spooky
Paper Creator - Anything Spooky
Retro Rubber - Halloween (had the stamp over a year, got it 2015 I think)


Monday, 10 October 2016

MHK Designs Halloween Lanterns


     If you're looking for something simple to make for Halloween here's an idea for you. All you need for this is a battery tea light, some double sided tape, a pair of scissors and MHK Designs Trick or Treat paper set.    
     The papers were printed on to thin card, to find out how much you need wrap it around the tea light and allow an overlap for sticking together. Fold your card in half so the fold runs around the light, then cut at regular intervals to around an inch from the edge.
     Put double sided tape around your tea light and along one side of your paper. Wrap the paper around the light and stick, then stick the edges together to form a cylinder, squash down slightly to open up the slits.
     Add a small strip of card for the handle at the top and the side decoration. These little pumpkins are die cut after printing images from Flight By Night and Spooky, you don't have to have a die cut machine as you could draw around a cookie cutter and cut out.
     This would be a great project to make with young children ready for Halloween and with battery tea lights it's perfectly safe too.

Trick Or Treat

Flight By Night
Spooky


      All of these digi sets can be found in the MHK Designs Etsy shop along with a whole lot more, so please pop over and have a look. If you would like to win some digi sets then please come and join in with our blog challenge, you might be one of our lucky winners.


I would like to enter these lanterns in the following challenges:
The Paper Players - Colour Challenge
Decorate To Celebrate - Anything Goes


Monday, 12 September 2016

MHK Designs Treat Box


     Welcome to my MHK Designs inspiration post for this month, with Halloween next month I thought I would make some treat boxes. We don't have many callers for Halloween, it's not such a big event here in the UK, but when we do they expect a little something sweet.
     To begin with I printed the orange spider paper from the Trick Or Treat paper set on thin card, making it much paler than standard so I don't use up all my ink making enough for all.
     One A4 sheet produced three boxes using a Tonic treat box die, the edges have been coloured using Distress Ink Carved Pumpkin and before sticking the box together there is a length of string at the top of each box so it can be hung in a tree.


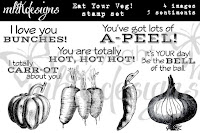
     The pumpkin comes from the Eat Your Veg stamp set, I didn't have a pumpkin image so I made one by adding a face to the pepper and shortening the stem.
     I used a photo package but this could be done just as well with as black pen and a pair of scissors.
     Each pumpkin is coloured with the same Distress Ink as the box, then cut out and mounted on foam pads. I have a small tree at the front of my house, which has leaves now but not by the end of October, so they will all be hung up ready for the Halloween callers. If it's wet then they will be hung on some small tree branches put in a pot on the front step under cover.


Eat Your Veg
Trick Or Treat
     We have a challenge running on the MHK Designs blog where you could win a stamp set just by playing along, yo don't need to use one of our designs but it would be great if you did.


Friday, 19 August 2016

MHK Designs - Halloween Party


     For our fourth new release at MHK Designs we have a Halloween set for you. I love making projects for this holiday as I get to use black, orange and purple a lot more than usual, I think black is very under-rated neutral.
     The tag is die cut from thick black card then overlaid with a torn strip of backing paper from Trick or Treat. There are two silver cobwebs and a white ghost added to the tag, these are from a Halloween confetti pack that's been in my stash for a while.
     The image panel is coloured with Graph-It markers and stuck over the paper strip at an angle. The greeting has been printed and then die cut, coloured before removing the die gives it that perfect white edge, it's mounted on foam pads. The final touch was to add some ribbon to the tag, a mix of orange and black organza.


Halloween Party
Trick or Treat


I would like to enter this tag in the following challenges:
Wonderful Wednesday - Anything Goes
Not Just Cards - Anything Goes

Monday, 19 October 2015

Spooky Treats


     With Halloween fast approaching MHK Designs have released some great digital stamp sets and backing papers to help you create something spooky.

    The images have been reduced to fit within the smallest Spellbinder Pumpkin die in the set. Each one has been coloured with Distress Ink before being removed from the die so it has a little white border.  That's the beauty of digital stamps, you can make them whatever size you need.
     All the images came from Spooky and Flight by Night stamp sets.
      The little boxes are self closing so little fingers shouldn't get hurt trying to get the treats out. The instructions for these can be found here on You Tube.
     These boxes are made from one sheet of A4 thin card, printed using a backing paper from the Trick or Treat set. Four boxes from one sheet will each hold approximately three wrapped sweets, so it all works out at a reasonable price.
      Each die cut pumpkin shape is stuck on to the box with a sticky foam pad in the centre, so as the box is popped open the pumpkin doesn't bend.

     There is a Facebook page for MHK Designs which will show you all the amazing designs available, not just Halloween. You can showcase your own creations on the page and chat to the designer too.


I would like to enter these little boxes in the following challenges:
Robyns Fetish - More than two pumpkins (each box has 1 front & 1 back)
Crafty Calendar - Halloween


Monday, 12 October 2015

Magical Hot Glue


     We may not celebrate Halloween very much in this country but I couldn't pass up the chance to play with dark and creepy bits and bobs, it makes a change from butterflies and flowers.

      This is an idea I saw on Pinterest and thought it was so quick and easy but so effective, having all the bits in my stash already made it even more appealing.
     I could only find two chopsticks in the cupboard otherwise I would have made more. I had a skull bead and a small white tigers head that came off a broken toy, a hot glue gun and some beads.
      The heads were stuck on first using the hot glue, then for the skull wand I just trailed a string of glue around the chopstick and ended it with a series of loops around the stick.
     The tigers head was stuck on first then a band of hot glue that was quickly covered with micro beads in red and gold.I let this start to set then added another band of glue which I rolled in seed beads, once the glue started to set I gently pushed the beads into the glue, be careful when you do this as it's very hot and will burn you.The rest of the stick was covered in hot glue with a band in the centre and another bead band at the bottom of the handle.
     I left the wands standing in a jam jar to set hard, the glue goes cloudy again once it's set. Once set firm I painted the wand handles with acrylic paint. The skull wand was painted with brown acrylic, once dry it was coloured with bronze gilding wax on the flat areas and gold wax on the rope like strand. The finishing touch for this wand was to add tiny gems to the eye sockets.
     The tiger wand was painted white, I left the micro beads as they were but painted the seed beads. The centre band has gold gilding wax on it but the two smooth areas either side have pearl wax on them. The seed beads have been painted with a thin layer of PVA glue and then dusted with iridescent glitter making this wand a little more feminine.


     If you wish to make these wands with children they should be supervised at all times as this glue is very hot and can burn, maybe you could add the glue for them and let them decorate the cold wand.
     There are so many things you can do with hot glue that my Stix2 Anything glue gun is no longer put away but sits proudly on it's very own chopping board on the edge of my desk just waiting for the next project.

I would like to enter these wands in the following challenges:
Eclectic Ellapu - Halloween / Dark / Horror
That Craft Place - Halloween
Through The Purple Haze - Halloween / Magical

Wednesday, 15 October 2014

Treat-In-A-Box


     This time at The Male Room we are looking for Halloween creations. I know it's not such a big celebration in this country but it's a great opportunity to use black and orange to make something creepy. We accept any papercraft creation as long as it fits our theme so please come and join us, we'd love to see what you've made.
     These little boxes are made from one A4 sheet of card, folded and glued together.  The orange one is decorated with black die cuts by Sizzix.  The black one is also decorated with some Sizzix dies as well as Memory Box bats, they have all been cut in Glow-In-The-Dark tape which I found in a shop in Norwich. The tape is 2cm wide so where I needed more width I stuck it on to thin card and then cut. After a short time in bright light they glow beautifully and it lasts for some time.
      Please come and join us at The Male Room, anything Halloween for a male, young or old.


    I would like to enter my treat boxes in the following challenges:
Creative Card Crew - Black Cardstock
PDE Linky Party - Halloween
Cut It Up - Halloween, anything but a card
Not Just Cards - Anything Goes
Delicious Darkness - Halloween
Art With Heart - Trick or Treat


Friday, 25 October 2013

Halloween Shaker Coffin.

      I think it's the combination of black and orange that has got me hooked on Halloween, after all it's not really something we do that much in the UK, but it is fun to create something quite different from the norm.
     This didn't start out the way it's ended up, it was always going to be a tag but when I found some Halloween confetti I got carried away with the whole shaker idea, then I found a glow-in-the-dark skeleton and the rest, as they say, is history.
     The tag has been coloured with Distress Inks in Scattered Straw, Wild Honey, Rusty Hinge and Aged Mahogany. Then stamped with a Tim Holtz image from his Rockstar set using Lava Black embossing powder from Creative Expressions, it's black with a hint of dark red.
      The coffin is cut from light brown card using a template from a treat box left over from last year, I had to make it a little bigger to fit my skeleton inside (still had to trim his toes back though!). Rather than fight with foam tape I chose to make a shallow box which will contain all the spiders and beads inside. Before folding the box up I used an Alterations die to cut the word 'Imagine' in the front, then I coloured it with Faded Corduroy ink and stamped it with a woodgrain stamp in Gathered Twigs. The back of the box is purple card to show off the skeleton and his crawling friend, I have added a few caviar beads to the confetti to help it keep moving when shaken.
     The tag is finished off with a few bats die cut with my friends die (thanks Avril), a cobweb from the same confetti pack and a skull from a necklace I found in my local charity shop. The orange ribbon has been stamped with Chocolate Baroque pumpkins and bats in Stazon. Thanks to the position of the skull the tag will actually stand up.
     I would like to say Hello and Thank you to all of you for the lovely comments you leave and a big Hi to my followers old and new.

I would like to enter this tag in the following challenges:
Make My Monday - Halloween
Try It On Tuesday - Halloween
Cards For Men - Halloween
Country View Challenges - Something Spooky
Our Creative Corner - Tag It, Halloween
Sparkles Monthly Challenges - Halloween / Colours

Tuesday, 1 October 2013

Something Spooky at Country View Crafts


      This months challenge at Country View Crafts is to make 'Something Spooky'.  I am so very happy to be one of their gust designers this month having won the August challenge. I felt I really had to come up with something special for Halloween.
     I found this paper mache house in a charity shop a few months ago, it was perfect for this challenge. It had been partly decorated already but nothing that couldn't be painted over. I started by painting it pale brown with acrylics, then gave it a white acrylic wash. It still didn't look quite right so I stamped in brown using a woodgrain clear stamp, because it wasn't mounted I was able to bend it gently to reach into the corners of the gables.
     The roof tiles are Sizzix Rosette strips cut in orange card then distressed with Brushed Corduroy and Forest Moss Distress inks. Each strip is stuck on individually, gluing along the top edge only so when all the tiles are on the roof the front edges can be lifted gently to create a more realistic look. The gables were a bit time consuming but so worth the effort. I have used Flowersoft to create a mossy look to my roof. There are die cut bats mounted on an acetate collar wrapped around the chimney so they can fly around the house. The outside lamp is by Tim Holtz Ideaology, it takes two small batteries. The battery pack is stuck inside the roof using Velcro tape so it can be taken off when I need to change it. There is also a battery tea light inside the house, this has been coloured black with an alcohol marker so it can't be seen through the windows. Inside has been painted black and has two die cut ghosts on the back wall that have been covered with glow in the dark glitter.
     On the wall outside is a Flowersoft wisteria, I know it's not in flower in October but the wall needed some decoration. The bushes are florist moss stuck on with PVA glue. The broom is made from twigs found in the garden bound together with black cotton, the sparkly cat is a foam shape from a child's art pack and the pumpkin is made from scrunched up orange tissue with 'bat' bodies for eyes and a 'bat' wing for his mouth.
      I've really enjoyed making this house. Halloween isn't something we celebrate very much here but I have to admit making 'spooky' things may change that a little. I'm still looking forward to Guy Fawkes night though, fireworks, sausages and a big bonfire!