Wednesday, 11 March 2020

Computer Reboot


     Making masculine cards can be a challenge but this stamp has it covered, it's not a new stamp but it's one I keep coming back to, when teamed with paper piecing it can be tailored for almost any theme.
      These two cards were made for a couple of young men celebrating their birthdays on the 29th of February. They are both keen gamers so I printed off some suitable papers containing computer code and circuit boards.
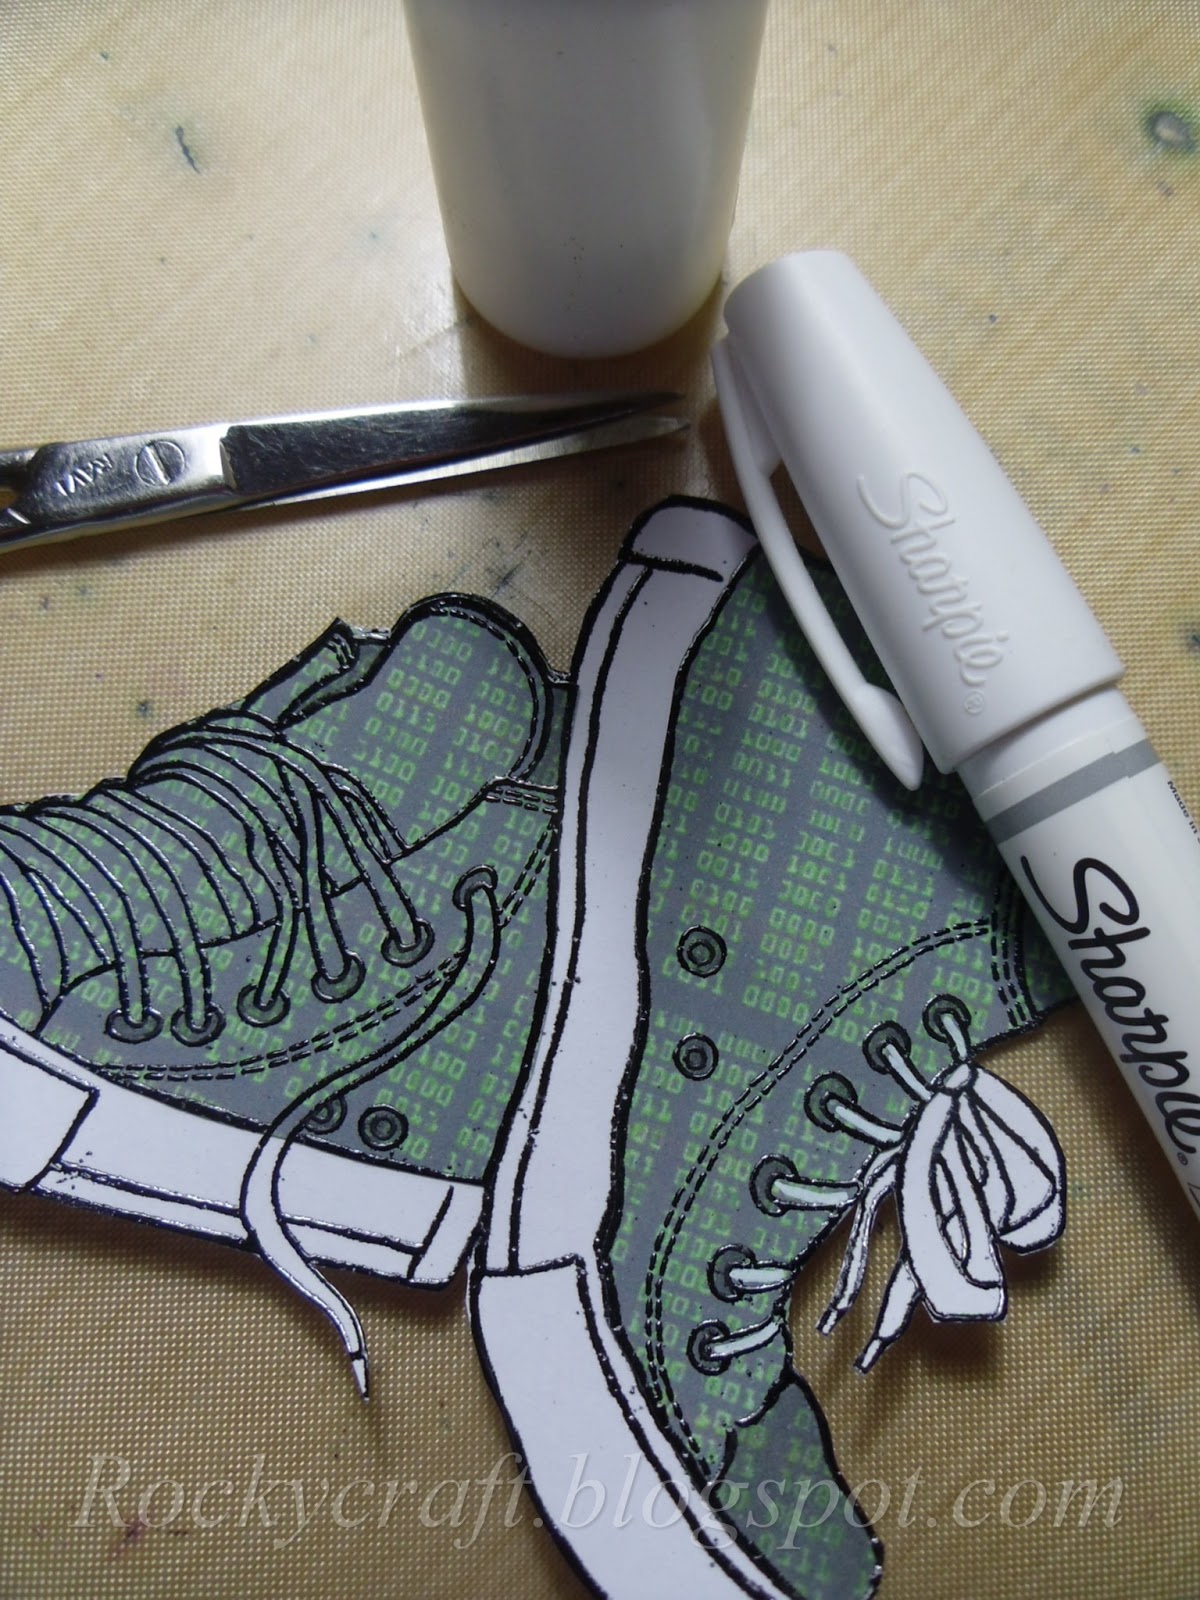
      For each card one set of boots was stamped and embossed on the patterned paper and another set on white card. I cut out the white card boots and then cut out selected parts of the patterned boots. To get the darker areas on the boots I used a grey alcohol marker but for the laces I used a white Sharpie pen.
      The word 'Urban' comes from another old Woodware set, stamped, embossed and coloured with alcohol markers. Then the backing paper was matted on to black card, before going on to a Kraft card blank.
      To tailor each card to the young man receiving it I stamped the little heal guard detail differently, one has ties to Canada so I used the tiny Woodware leaf that comes with the boots for his card and the star for the other.
      Inside the kraft card is a die cut shape to match the heal guad detail with Happy Birthday stamped on it. They may be very similar but they are certainly not the same.
      If you're looking for more ideas then please pop over to Not Just Cards where you'll find lots more inspiration.


I would like to enter these cards in the following challenges:
     Di's Digi Designs - Show Some Green
Send a Smile For Kids - Cards 4 Boys    Top 3
Double D - It's All About The Green
The Male Room - Team Colours
Do-Al (l) Creative - Male Birthday

Believe In A CAS Christmas


     This month's challenge at Christmas at Sweet Stampin' is CAS, clean and simple means lots of white space and a very simple decoration. This card was inspired by one I saw some time ago made by Karen Dunbrook, I loved it so much I decided to try it myself.
     I die cut a rectangular window in some inexpensive card for a stencil, then I cut a small circle but this time using Masking Sheet from Stix2, it's got a gentle adhesive on the back so it won't move or lift up.
     Using Distress Inks in two shades of blue I coloured the rectangle to shade from light at the top to dark at the bottom. Before removing the stencil I stamped, in black, two pine trees by Lavinia Stamps.
     After removing the stencil I stamped Father Christmas and the wording in the same black ink, I had to stamp Father Christmas a couple of times to get a good image, thank goodness for a stamp press. The word is a little distressed but I think it's alright, I may have to find another one that is a little crisper for next time.
     That's all there was to it, nice and simple, perfect for last minute makes when we get into December. If you come and join us at Christmas At Sweet Stampin' each month you won't have a December panic, as you'll be part way done already.


I would like to enter this card in the following challenges:
ABC Christmas - E, F, G    F is for freebie
Winter Wonderland - Blue Christmas
The 12 Month's Of Christmas - Anything Christmas/option Ice Ice Baby
Merry Little Christmas - Anything Christmas
CraftyHazelnut's Christmas - Anything Christmas/option Vintage

Sunday, 1 March 2020

Blossom Heart


     With several anniversaries this month I made another card using the heart shaped Media Plate from John Next Door. This time I used John's idea with the Blossom flowers, it came out better then I expected.
     Using my stamp press I loaded it with a piece of white card, covered the card with the acetate grid sheet (to keep the card clean) and positioned the media plate on top and closed the lid to pick up the media plate. I then positioned the die cut flowers across where the heart shape would print.
      Using two shades of red pigment Izink I inked up the media plate and used a brayer to blend them on the plate. I closed the stamp press and printed the heart over the flowers, then opened it up, removed the flowers and without re-inking closed the stamp press and stamped again to get more definition around the flowers.
     I used the ink pads and a finger dauber to go around the edge of the media plate and stamped it again, this adds an edge to the shape and gives the appearance of dimension.
     I also added a tiny butterfly shadow using a stencil made from a die cut, Versamark and pearl mica powder.
     To get a matching mat layer I used the red inks to colour around the edge of a white mat. Once dry I layered up the heart panel on the mat and then onto the white card blank.
     I added the die cut flowers to the heart panel and stuck a tiny gem in each flower, red on the white flowers and white on the red ones. All that was left to add was a tiny black die cut butterfly and stamp in black the words 'Love is...'.
     I like this technique, John said it was easy and he's right, it also adds something a little different to using a media plate.


Materials List    Available from your local craft shop
JLGP006 Media Plate - Heart
JND113 Blossom Die
JND0013 Everyday Sentiments
Pigment Inks
Versafine Black
Versamark
Pearl Mica Powder
Stamp Press

I would like to enter this card in the following challenges:
Creative Knockouts - Dis Cuts/Punches
A Perfect Time To Craft - Anything Goes
Creations In Pink - Anything Goes In Mainly Pink
     Die Cut Divas - Anything With A Die Cut

Monday, 17 February 2020

In Memory Of Bill blog hop


     This card was made to help a crafter I've never met know that I am thinking of her after the loss of her brother to esophageal cancer, this vile disease also took my Dad a few years ago. Periwinkle is the colour for esophageal cancer awareness so all the cards made for this blog hop will probably be blue.
     I have used two blue Distress Oxides on a splatter stamp from Inkylicious, this splatter is the smaller of the two available. I decided to stamp this straight onto the card blank rather than mat and layer, another good reason to invest in a stamp press.
     The ink was spritzed with a little mica filled water and stamped onto the card, then left to dry. Once dry I stamped a tree, a couple of birds and a small greeting with Versafine Medieval Blue, I had to stamp the tree a couple of times to make sure it was an even coverage. Very simple but heartfelt.


Dad doing what he loved most - driving a steam engine.


     Our blog hop is a show of support to a fellow crafter in need, I do hope you will follow the links all the way through. Welcome to those arriving from Mynn Kitchen, your next stop will be Em Fairley.

Full Hop List

Here

Wednesday, 12 February 2020

Peace Is Not Just For Christmas


     I know Christmas is a long way off but in non-traditional colours this card could be used for another occasion. Christmas At Sweet Stampin' this month is all about 'Words' and you'll find some great inspiration on their blog.
     This stamp is a Woodware design from 2015, I have to say it's one of my favourites. I decided to use almost everything from stash, I have a bit (haha!) so I'm setting about making good use of it.
     I wanted to use some mica paints so I had to emboss the image as it holds the paint within it's lines perfectly. Using my stamp press I stamped in dark blue Versafine, the problem was I was using watercolour card which is very absorbent. The answer came to me while peeling potatoes.... stamp in blue, then wipe the stamp and stamp with Versamark, nice and sticky and ready for embossing powder, you've got to love a stamp press.
     Using a mix of Koi watercolour pens and the mica paints I set about colouring my image in shades of purple. There are some small words with this stamp but I chose not to use them this time, that meant the image would fit a large DL card blank.
     With a purple pearl card mat layer underneath it looked alright but something wasn't quite right, I then used a lilac Distress Ink to go around the edges of the image panel before I stuck it down, it knocks back the harsh edge that didn't seem right.
     With the addition of a few tiny sequin type stars dotted around it was complete. Don't tell anyone but the stars were to hide a small splodge I made by accident, turns out they look pretty good.
     I made a blue one as well, if I make two cards each month I will be well on the way to having a small stash ready for Christmas. he shine doesn't come out very well on the pictures but the mica paints really do catch the light.


I would like to enter these cards in the following challenges:
The 12 Months Of Christmas - Anything Chrsitmas/Winter Blues
52 Christmas Card Throwdown - Shades Of Blue
CraftyHazelnut's Christmas - Anything Christmas/Cute
The Holly and Ivy - Anything Christmas
Merry Little Christmas - Anything Christmas

Tuesday, 11 February 2020

Love is....


     .....not just for Valentine's, this would make a good anniversary card too. Not Just Cards have a new challenge starting today, I'm sure you'll find some inspiration over there if you haven't already looked.
     I don't have run through pictures for this one as I got carried away and forgot all about the camera! It started with a heart shaped Media Plate, three shades of red/pink inks and a hard brayer. Starting with the palest ink at the top I inked up the heart with all three shades and then used the brayer to blend them on the plate. Stamping the plate onto white card left me with a gorgeous pinky shape, I then used a stencil on the plate and inked the middle tone ink through it, removed the stencil (actually forgot to do this once!) and stamped the image over the pinky heart.
     To get the gorgeous shine I thoroughly dried the heart shape, cleaned off the plate a little and then used the same stencil, but in a different position, with Versamark. Again removing the stencil, stamping the image onto the card but this time dusted the heart with pearl mica powder.
     The two birds stamp is from stash, I can't remember where it came from, stamped in Versafine black. Using a stamp press makes life so much easier when stamping silhouettes as you can stamp the image a couple of times to get a really solid image.
     The little sentiment is one of John Next Door's stamps, again in black and tucked away in the corner. There is a thin black mat layer to set off the black on the image panel, followed by another thin layer, this time in pearl pink.
     The photo below shows how the card looks when the light doesn't catch the mica shine, the pattern still shows but muted.


Materials List    Available from your local craft shop
JLGP006 Medai Plate - Heart
JND0013 Everyday Sentiments
Pigment Inks
Versafine Black
Versamark
Pearl Mica Powder
Stamp Press


I would like to enter this card in the following challenges:
Allsorts - Add A Heart
Sweet Stampin' - All You Need Is Love
Always Fun - Love/Valentines
Crafty Cardmakers - Love Is All You Need
Dream Valley - Love
Make My Monday - I Heart You


Wednesday, 15 January 2020

Dragonfly Slide With Brayer Bonus


     Another slide card using John Next Door's die set, this time with a little Media Plate magic too. The dragonfly media plate, stamp and die fit rather well on this card, along with a few tiny dragonflies from the Gerbera Daisy stamp set.
      To begin this card I cut the two panels required for the basic card. There is a video by John giving assembly instructions on YouTube, some of you have found it difficult to see the link on the last post so it is HERE. Once you watch John in action it all becomes clear, much clearer than my description would be.
      Before any assembly I decorated the card with Distress Inks, stencils and a pigment I-Zink white ink pad. Using the media plate I stamped the dragonfly on the front before cutting the window.
      The greeting that shows when the card is closed is embossed in silver and coloured with the same inks through the same stencil to maintain continuity. I have left the surprise greeting on a white background to give it more impact when the card is opened.
     There are a few tiny dragonflies dotted around the card both inside and out, again using the same ink colours
      I stamped in white pigment I-Zink on vellum and coloured the back with more pigment inks in colours as close to the Distress Inks as I could find. Pigment inks gave me a better coverage in stronger colour to show through the vellum.
     I die cut the dragonfly and then glued just the body to the card, directly over the media plate stamped version. It will sit flat for postage and I was careful to make sure it's tail didn't stick out past the edge of the card.


Now for the frugal bit, crafters never waste anything.


      When using a brayer you end up with some ink left on the roller and John always says 'don't waste it', so I did as he suggests and ran it off on a spare piece of card. This gave me a lovely mottled band of colour that I trimmed and mounted on silver mirri, then stuck it onto a small white card blank.
     The beauty of decorating my slide card before cutting the windows meant I had two decorated circles left over, perfect for this little card.
     A stamped and silver embossed greeting, mounted on silver miri and set off centre gives me a small card that could be used as a tag for the gift to go with the slide card, or just a neat little card for to tuck away in my stash until needed.


Materials List    Available from your local craft shop
JND099 Slide Card die set
JND150 Loving Sentiments stamp set
JND5001 Gerbera Daisy  stamp set
JLMP001 Dragonfly Media Plate
JND112A  Bold Dragonfly Stamp
JND109    Butterfly and Dragonfly die set
Hard Brayer
I-Zink pigment inks
Distress Inks
Stix2 3D PVA Glue
Silver Embossing Powder


I would like to enter these cards in the following challenges:
Addicted To Stamps - Make Your Mark
Crafty Card Makers - Anything Goes