Thursday, 17 September 2020

Porthole Blues


     When the new layer die sets arrived the first thing I thought of for the circle was a porthole. This set is the 5", it has two cutting dies and an embossing die for each shape, circle , square and rectangle.

     The first time I used the embossing circle die I had a bit too much pressure and ended up cutting holes instead of embossing them, I have kept that bit for another project. With a tiny shim adjustment the next one came out just right.
     I cut the outer circle in plain white card and stamped the Two Jays sailing ship on it in grey ink, I coloured it in and also ran a dark blue alcohol marker around the outside edge, this shows as a mat layer under the mirri ring.
     
     To give the backing card a little more interest I used a linen card blank, inked up with some Mica Magic in shades of blue.
     The complete circular panel was stuck flat on to the card with a couple of die cut nautical shapes from my Mum's stash added to opposing corners, the gull has tiny foam pads so he's flying high.
     I didn't add a greeting on the outside, I think it would have become cluttered with anything else added.


Materials List
JND180 - Layering Dies 5"
CTJJ131 - Ship At Sea stamp
CAT008 - Mica Magic Brights
S57262 - 3D PVA Glue


I would like to enter this card in the following challenges:
The Male Room - #142 Travel
Dies R Us - One For The Boys    Top 3
International Art & Soul - Tic Tac Toe  emboss/die/image

Friday, 11 September 2020

Heartfelt Thanks


      A new challenge starts today over at Not Just Cards. I have used a brand new stamp and embossing folder set from John Next Door.

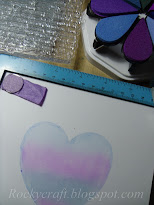
     I love the media plates so I decided to use the heart on this card. I used some of the new I-zink Pigment Petals on the media plate and a hard brayer to smooth the ink.
     The stamp that comes with the folder is designed to be 'backwards', this is so that when you stamp inside the folder and then emboss the writing will come out the right way round. This backwards writing makes it perfect to use on a media plate too, so that's what I did. In darkish blue ink I stamped the media plate so the writing would only be within the heart.
     
     I then used the folder to emboss the large words across the heart, with a small stamp from stash that just seemed perfect for this, I'm sorry but I have no idea what brand it is.   
     To get a mat layer that co-ordinated with the soft colours on the heart I decided to use a piece of white card and the same inks to make my own. No matter how many sheets of coloured card I have, I never seem to have the perfect shade.
      There are lots of inspirational projects over on Not Just Cards so please pop over and take a look, why not join us with your project, we'd love to see what you've made.

Materials List
PCD303 - Embossing Folder with Clear stamp - Thank You
CAT054 - Pigment Ink Petal - Winter Colours
JLGP006 - Media Plate - Heart
S57410 - Finger Daubers
S57262 - 3D PVA Glue


I would like to enter this card in the following challenges:
Aud Sentiments - Anything Goes with A Sentiment
DL Art Thankful Thursday - #267 Thankful
Lemon Shortbread - #128 Anything Goes
Tuesday Throwdown - Anything Goes
Dream Valley - #232 Embossing Wet or Dry

Wednesday, 9 September 2020

Snow Happy


     This month at Christmas Craft Creations we are looking for shaped cards. I did try a different shape but it all went horribly wrong, so here's another snowglobe. 
     As before I cut a white card blank and stuck all the globe elements on to it, including a full circle of blue card to hide the fold on the white card and make the circle of the globe complete. The die used for the snowglobe is by John Next Door. It isn't just for Christmas cards, a crafting friend has made some very nice birthday cards with photographs, it's also perfect for popping a unicorn or a castle inside.
      As we are now closing in on Christmas rather quickly being able to make some quick and easy recycled cards is very handy. Please pop over to Christmas Craft Creations and show us what you can make.


I would like to enter this card in the following challenges:
ABC Christmas - S - Snowy
Christmas Crafts All Year Round - 2 Things Beginning With S   Top pick
Winter Wonderland - Snowmen and Snow     Top 3
CraftyHazelnut's Christmas - Anything Christmas
Merry Little Christmas - Anything Christmas

Friday, 28 August 2020

Crystal Forest


     This project was the first one I made with the new Jane's Tree die set from John Next Door, I loved the idea of having a 3D tree. I have used a few of his other die sets to make the complete project, all part numbers are listed below.
      Using a strong white card I cut two of Jane's Tree and two of each of the larger deer from Four Seasons, plus two base pieces from the Large Lantern die set.
      I cut down the centre of one tree to the middle and up the other tree to the middle, then I slotted them together. They were then stuck onto the completed base card, glued and covered with clear glitter.
      To make the deer stand up I stuck each pair together at the top and inserted an acetate bracket between their feet.
      There is also a small pine tree from Finlay's Trees and two sets of flowers from the Four Season's set, all of these have been left as plain card - no glitter.
       The Large Lantern is cut from snowfall acetate and assembled with redline tape. Once all the plants and animals were stuck to the card base I slid it inside the lantern, stuck it down and tied the top shut with a small length of string.
      To decorate the top and hide the string I made a big bow using wire edged silver ribbon and die cut some of Lesley's Twigs, a piece of ivy and a couple of Pinstripe Poinsettia.
      These were all stuck on with hot glue, the large flower at the front and the small one at the back.   
      To finish off around the outside I die cut some icicles in plain white card and stuck them upside down, all the way around the base to look like snow covered grass.
      I did toy with the idea of adding a small light in the top, but didn't have much time to puzzle over how to fit it or how to switch it on and off, so I'll have to try that on another one sometime.
      I think this would make a nice table centre, if you have inquisitive little fingers around it's quite safe as it's all inside the acetate case and if it is dropped it won't shatter.
      Jane's Tree die set, plus a few others, will be on Hochanda on Sunday, so keep a look out for the Crystal Forest.

Materials List
JND195 - Jane's Tree die set  : centre tree
JNDCC019 - Large Lantern
JND190 - Pinstripe Pionsettia Die
JNDCC017 - Poinsettia Die (solid shape)
JND187 Twig die set
JND124 Ivy Corner die
JND196 Finleys Trees : small tree 
JND194 - Four Seasons : deer & shrubs
CTGFP-10 Monochrome Glitter Card : white
CAT002 - Glue Glaze pen
S57085 - Ultra Clear Tape : Redline tape
S57262 - 3D PVA Glue


I would like to enter this project in the following challenges:
Merry Little Christmas - Anything Christmas
As You Like It - Favourite way to add ribbon & why.....a bow to hide something
Crimbo Crackers - Anything Christmas #214
The Holly & Ivy - Anything Christmas     Top 5
Classic Design - Anything Goes
Worldwide Open Design Team - Anything Goes for a DT  (Lockwood Angel)

Tuesday, 25 August 2020

Trees and Stars


     Next Sunday will see the release of the third Christmas collection from John Next Door. This card is made with the Jane's Tree die set.
     I cut three trees in dark green card, making sure it was green on both sides. It is possible to score down the middle of these die cuts if you are careful, the tree is not symmetrical so you will need to fold them so the animals match on the sides to be glued together.
     After slowly folding and gluing the trees I cut the frame into a piece of the new Waterfall gold glitter card, it needed something subtle to fill the open spaces at the top either side of the tree so I used a star die. To make the stars stand out I put a piece of gold mirri card behind the Waterfall card.
     To bring a little more green into the picture I used a mat layer in the same card onto a white card blank. For the greeting, which also comes in the die set, I used a shaped die and backed it with a little more green card before mounting it on foam pads.
     A  nice easy card with dimension, the only bit to take time was the tree folding, but done slowly it works very well. The Waterfall card is gorgeous and comes in a mixed pack of gold and silver, it has a softer effect than the usual glitter card or plain mirri card.


Materials List
JND195 - Jane's Tree die set
CTGFP-09 Waterfall Glitter Card
LKK-A441 - Moss Linen Card
CAT002 - Glue Glaze pen
S57262 - 3D PVA Glue


I would like to enter this card in the following challenges:
ABC Christmas - P..Pine Trees  (sort of)
The 12 Months Of Christmas - Shimmer and Shine
CraftyHazelnut's Christmas - Anything Christmas 
The Holly and Ivy Christmas - #77 Anything Christmas

Thursday, 20 August 2020

Pink Poinsettia Cracker


     The cracker die used to make this is last years Faceted Cracker from John Next Door but the glitter card, the twig die and the poinsettia overlay are new this year.
     I forgot to take any construction pictures but it's really very easy to put together as long as you use redline tape, especially if using glitter or mirri card.
     This glitter card is a new shade for this year adding to the non shed range from Craft Artist, it's called Gold Blush and has an 'old rose' kind of tone to it. It matches very well with Shell Pink linen card also from Crafts Too. For this project it is teamed up with Mouse Grey linen card and a rose gold mirri card I found in my local craft shop.
     The cracker is cut from the glitter card and assembled, it's tied up with silver organza ribbon. For the poinsettia I have cut the base petals in Graphite glitter card with the new Pinstripe Poinsettia die overlay in shell pink. I had to use Glue Glaze to get the card to stick to the glitter card, it's a very strong glue.
     The twigs are cut from rose gold mirri and the ivy leaves are cut from Mouse Grey linen card with a hint of silver gilding polish around the edges. The centre of the flower is a bobbly gem from my stash, no idea where or when I got it. All the foliage and flower are stuck on to the cracker with hot glue.


Materials List
JND139 Faceted Cracker die
JND190 - Pinstripe Pionsettia Die
JNDCC017 - Poinsettia Die (solid shape)
JND187 Twig die set
JND124 Ivy Corner die
CTGFP-07 Blush Glitter Card
CTGFP-10 Monochrome Glitter Card
LKK-A450 - Shell Pink Linen Card
LKK-A451 - Mouse Grey Linen Card
CAT002 - Glue Glaze pen
S57262 - 3D PVA Glue


I would like to enter this cracker in the following challenges:
Jingle Belles - Use Cardstock-no patterned paper......I hope glitter card is allowed
CraftyHazelnut's Christmas - Anything Christmas
Fezziwigs Festive Frolics - Wrap It Up .....a cracker to hold a small gift
Crimbo Crackers - #213 Anything Christmas

Wednesday, 12 August 2020

Deep In the Woods


     The theme this month at Christmas Craft Creations is Animals, any animal you wish in a Christmas setting. I love deer so I have used a new die set from John Next Door called Four Seasons, it doesn't have to be a Christmas card as this set has tree trunks and separate foliage so the choice is yours.
     I have also used the little woodland scene from Sam's Circles at the back of this box card because it completed the herd of deer.
     I cut each layer of the set in shades of blue, beginning with the lightest at the front, with a white box to hold the layers. I used the last layer to help me line up the woodland circle.
 
     I started by gluing a light blue circle of card behind the woodland circle, this came from the off cut on the first layer. This layer was then stuck on to a white layer for the back of the box.
     Each layer had two strips of foam tape on each side making it a 6mm gap between layers. This I did carefully and slowly to make sure I got it right.....that tape is very sticky, so no room for error.
   
     The front cover of the box had a rectangular aperture cut in it, with sides wide enough to fold round the thick sides and reach onto the back.
     I wanted to put the stag on the front opening so I had to cut him with a tab across the bottom, then I could stick him inside the opening to keep it neat and tidy. If you want to miss part of a die you can move it around so one of the cutting plates is not covering the die, that's what I did with the stag.
     When the box card was all stuck together I could see the white tape at the top, I didn't like that so using some alcohol markers I coloured the foam in different shades of blue to make them blend in with the card.
     It needed some decoration on the frame but not much, eventually I settled for a little bit of the mini ivy, a holly sprig and some of Lesley's Twigs all in white.


Materials List
JND183 - Sams Circles
JND187 - Lesleys Twigs
JND 194 - Four Seasons     
JND135 - Holly die
JND129 - Mini Ivy
S57262 - 3D PVA Glue


I would like to enter this card in the following challenges:
Merry Little Christmas - Anything Christmas
2 Crafty Critter Crazies - Feature A Critter    Top 5
Lemon Shortbread - Anything Goes #126
Crafty Animals - Anything Goes Including An Animal
Love To Craft - Anything Goes