Showing posts with label CraftyHazelnut's Patterned Paper. Show all posts

Thursday, 1 June 2017

Beachcomber


     Welcome to another challenge at CraftyHazelnut's Patterned Paper Challenge, sadly this will be my last project for the DT. I would like to thank Hazel and all the DT for being such a joy to work with.
     For this card I have used some paper from MHK Designs and a sentiment stamped and embossed in dark blue from Inkadinkado, die cut with an unknown brand die and all edged with Distress Ink.
     To finish off I die cut a bucket and spade in dark blue card and stuck those flush to the backing card.
     CHNPPC runs all month and all you need to do is use patterned paper on your project so please pop over and join in.

     There are several challenge projects going live on my blog today, all with a seaside theme, so if you get time please pop back and see what else I managed to come up with.

I would like to enter this card in the following challenges:
Die-Cuttin Divas - Anything Goes #319   (W)
Cardz 4 Guyz - Favourite Colour Combo  Blue & White   (F)

Monday, 1 May 2017

Pop Up Brusho Flowers


     This card was made using a pop up die from Stampendous. It usually stands up portrait style but I wanted to try it landscape, it still work, especially with flowers and doesn't try to close. With the addition of patterned paper for the background it fits perfectly for our challenge at CraftyHazelnut's Patterned Paper Challenge.
   
      I have several tubs of Brusho and wanted to try the White embossing technique I had seen on Pinterest.
     The image was stamped with Versamark and them embossed with white powder on watercolour card. Brusho were sprinkled over the card and a gentle spritz of water added to make the colour flow. As the images were going to be die cut it didn't matter about over run colour, just that the colours looked good on the images. Once dry all flowers and leaves were die cut ready for assembly.
     The patterned card was cut to size and then using the pop up die the creases and tabs were cut. After cutting it was trimmed to fit an A6 landscape fold card blank, sticking the pop up mechanism inside with care not to stick the tabs down.
     Each flower was added to the tabs to build the bouquet and the leaves were added to the background on foam pads. The addition of one flower to the other side of the card just left the space for a die cut greeting.
     A matted patterned layer on the front with another flower finished the card off, it all folds quite flat so it will post if required.
    Remember CraftyHazelnut's Patterned Paper Challenge runs all month and just requires the use of patterned paper on your project.


I would like to enter this card in the following challenges:
A Gem Of A Challenge - Embossing Wet or Dry
Allsorts - Embossing
Creative Fingers - Anything Goes

Saturday, 1 April 2017

Sparkly Flowers


     This card was made a little while ago, it's been sitting waiting for the right recipient and that lovely lady has got it now so it's safe to share with CraftyHazelnut's Patterned Paper Challenge.
     The card is huge, 8 inches square, not a size I would normally use but as it's not been posted it's not a problem and it does give a nice big area to decorate.
     The patterned paper panels are from a Woodware paper pack, with co-ordinating strips and banners. Mat layers are cut from black card with added faux stitching using a white pen.
     The flowers are stamped, embossed and coloured with gel Glaze pens, sprinkled with clear glitter when wet, then cut out when dry, the leaves are just coloured.
     With the addition of ribbon, Candi and buttons the front is complete, which leaves the inside to decorate. Just stamping a greeting inside seemed rather sparse when compared to the front so I have die cut a large flower from white card, coloured the edges with Distress ink, added a greeting and stuck the flower flush to the card. There is still plenty of room to write a message and now the inside looks a little more appealing.
     CrafytHazelnut's Patterned Paper Challenge runs all month and the only requirement is the use of patterned paper so come along and join us with your creations.


I would like to enter this card in the following challenges:
That's Crafty - Foliage and Flowers
Crafty Gals Corner - Anything Goes


Wednesday, 1 March 2017

Pop Up Puddy Tats


     CraftyHazelnut's Patterned Paper Challenge sprang to mind as soon as I saw these great new stamps and dies from Stampendous.
     The patterned paper is die cut with two of the pop up tab dies before any decoration or assembly begins. I admit that most of the colouring and die cutting was done for me, so all I had to do was put it together but when faced with such an amazing choice of coloured cats and flowers it wasn't easy!
     The large cat is stuck on the smallest tab, while his friend is stuck to the larger, along with a flower. The large flower is stuck on foam pads and the butterfly only has his body stuck down, leaving his wings free to lift. Finally the whole patterned piece is then stuck on to the inside of the card blank.
     The outside of the card is decorated with die cut cats and sentiment, all cut from satin, silver mirri card. My favourite is the little cat sitting on the sentiment, my cat often sits like this, just waiting to tap your leg with his paw to ask for a fuss.
     CraftyHazelnut's Patterned Paper Challenge is for anything as long as you use patterned papers, so come and join in with your creations.


I would like to enter this card in the following challenges:
The Crazy Challenge - We Love Animals


Wednesday, 1 February 2017

Scrappy Birds


     Do you have lots of small patterned paper scraps stashed away just in case?  These tags were made for CraftyHazelnut's Patterned Paper Challenge using some of my 'big enough to be useful' stash.
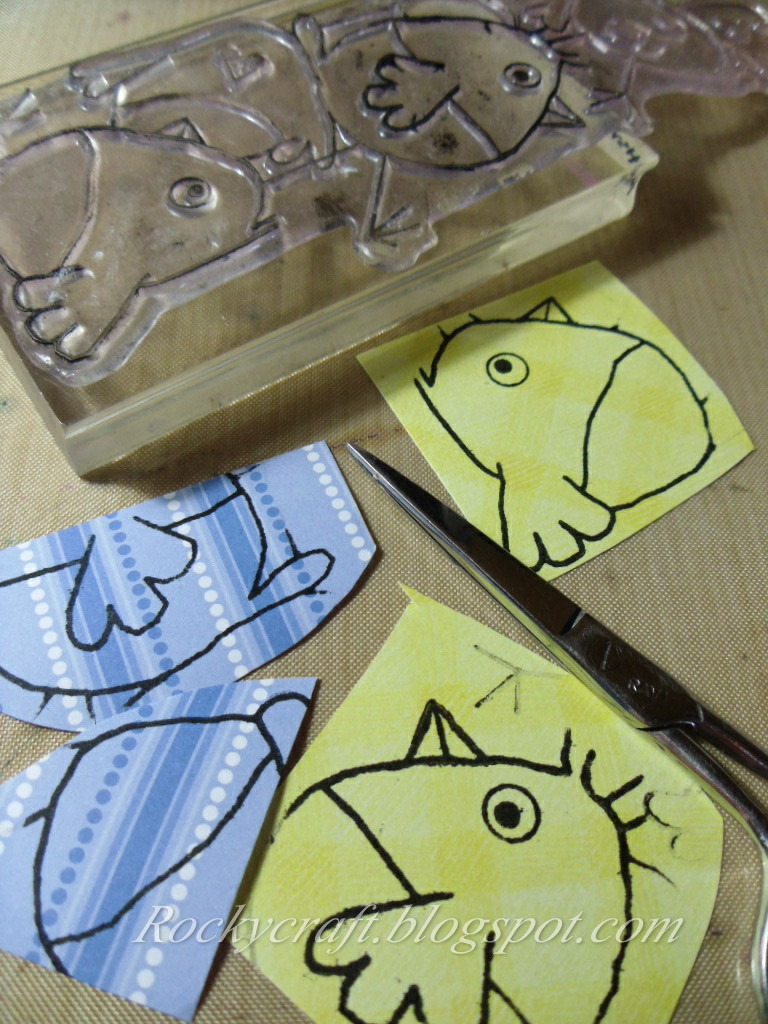
     Using my Birdy Tower Woodware stamp I used black Versafine to stamp out all the birdy pieces.  You can either stamp on the tag to get the legs or draw them in afterwards like I did.
     Each tag has a Distress Ink coloured edge to tone it in with the birds to be stuck on them. These birds are great Robins at Christmas but make fun images for use all year round, not quite crazy birds but still cute.  
     I cut around each piece carefully and then stuck them on the card with PVA glue once the Distress was dry.
     The legs are drawn in with a black micron pen and any little gaps in the black outlines touched up.
     The beaks have gold foil added by using the Stix2 two way glue pen. When blue it sticks paper together permanently, but when allowed to go clear it becomes a tacky repositionable glue which takes foil perfectly, it's acid free too.
     With the addition of woggle eyes and a stamped greeting, which comes with the birdy tower, the tags are almost complete. It just remains for ribbon to be added, this is white organza coloured with an alcohol marker.

     Please come over and join us at CraftyHazelnut's Patterned Paper Challenge with your creations, it's always anything goes as long as you use patterned paper.


I would like to enter these tags in the following challenges:
The Paper Girls - Patterned Paper
Send A Smile 4 Kids - Anything Goes

Sunday, 1 January 2017

A Glass of Light Wine


     Happy New Year and welcome to the first of today's new challenges. This is for CraftyHazelnut's Patterned Paper Challenge, anything goes as long as you use patterned paper.
      This gorgeous paper is from Chocolate Baroque, it's been in my stash for years so I took a deep breath and used it to make a lamp shade.
     I have a book with templates inside but I'm sure you could find some on line somewhere. I cut the shade from the semi-gloss patterned paper, it's a heavy weight paper so it bends easily but is firm enough to hold the shape well.
     I used my pricking tool on all of the leaves to make tiny holes that the light will shine through, I didn't want to add anything to the gorgeous paper but felt it needed a little something.
     All that was left after making the holes was to use red-line double sided tape to stick the shade together, I had to trim the edges slightly to tidy them up.
     I put an LED tea light in a wine glass and popped the shade on top. It's quite a nice way to add a little glow to your dinner table and if you make your other table decorations to match it can look rather smart.
     CraftyHazelnut's Patterned Paper Challenge is a month long challenge that is just what it says....anything made with patterned paper, so come and join us, we would love to see your projects.


I would like to enter this in the following challenges:
4 Crafty Chicks - Anything Goes
Brown Sugar - Anything Goes

Thursday, 1 December 2016

Mizuhiki Reindeer


     Welcome to a new challenge for CraftyHazelnut's Patterned Paper Challenge, it just had to be a Christmas card today didn't it. Our challenege is for anything made with patterned paper so you don't have to make a card to join in, it could be a gift bag, box or decoration.
     This red nosed reindeer is made from Mizuhiki cord, which is Japanese paper cord, it's thin so easily knotted as long as you don't get a kink in it. This is a traditional knot with a twist, the ends are curled to form antlers and the bottom loop is opened up to form his face. With the addition of a small red pompom and a couple of woggly eyes he is complete.
     He is mounted on a matt gold layer with corner detail over e red layer before going on to a holly print backing paper. The holly print is on another layer of matt gold before going on a green card blank. The greeting is a small peel off on red card mounted on foam pads.
     Come and join us with your patterned paper creations, the challenge runs all month and we'd love to see what you make.
     Here's a little note about Mizuhiki cord....
Mizuhiki plays an important role in Japanese culture as a symbol of affection, warmth, and togetherness. Made from washi, or Japanese paper, Mizuhiki is a colorful twine that is tied in knots to decorate gifts.


I would like to enter this card in the following challenges:
Christmas Card Challenge - Anything Goes
The Crafty Addicts - Anything Goes (optional Christmas paper)

Tuesday, 1 November 2016

Paper Baubles


     Welcome to my project for CraftyHazelnut's Patterned Paper Challenge for this month. As the challenge name says it's anything made with patterned paper, cards, layouts, decorations or gift boxes, it's up to you what you would like to create.
     I have had these paper strips for a long time so it was time to use some of them, they're all 12inches long but only 1.5inches wide. They're single sided so I stuck two together with PVA glue, one green and one red.
     Once dry I cut one 4", 2x 4.5" and 2x5" long. The shortest strip is the centre piece with one 4.5" and one 5" stuck on either side of it. Attach some ribbon for hanging in between the centre and one of the 4.5" strips.
     Once the top is secure the bottom can be stuck, by matching up the bottom of each strip the longer strips are forced to curve. I had a large gap in the centre so I filled that with scrolls of the same strip glued to the centre strip.
     To decorate the bauble I wanted to add some gem stars but the only ones I had left were pink, alcohol pens work beautifully on gems so that's what I did to get my yellow stars.
     Decoration has been kept simple with two stars on each side, one top and one bottom, but ribbons, tassells or bells could be added to this simple shape.
    This is a great decoration to make with children as no machinery or sharp tools need to be used, they often come up with some amazing creations as they're not held back by how they think it should look. Being paper it's also a safe decoration to have near the bottom of the tree where little fingers can reach them.

     If you keep all of one colour strip facing one way as the bauble turns it will 'change colour'. You could make giant decorations to hang in large hallways or public buildings and once Christmas has finished they can be recycled.
     Come over and join us at CraftyHazelnut's Patterned Paper Challenge with your creations, you have a month to bring your creations over to show us.


I would like to enter this decoration in the following challenges:
Crafty Friends - Anything Goes
Allsorts 387 - Let's Make A Start On Christmas

Saturday, 1 October 2016

Christmas Collage


     Now we are into October 'Tis The Season to get those Christmas cards made, although I expect many of you already have a stash of finished ones.  This card is for CraftyHazelnut's Patterned Paper Challenge, a monthly challenge to help you use up your stash of patterned papers, anything goes as long as you use patterned papers.
    The stamp on this card is called Christmas Collage by Woodware, it's stamped on white card and embossed in gold, the card is then coloured with pale green ink. The small deer in the circle is stamped and embossed again and cut out, the centre is coloured and then it is mounted on foam pads over the deer on the main card.
     The holly surround is punched from dark green card and stuck to the back of the image panel. This image panel is then mounted on some polka dot paper from a 6x6 assortment pad. Mounted on gold mirri and then on to green card sets this off and lifts the gold embossing.
     With the addition of some gold Candi and a punched stamped greeting the card is finished. It will fit through standard post even though the deer is raised as the foam pads are only 2mm thick.
     You have a whole month to join us at CraftyHazelnut's Patterned Paper Challenge with anything containing patterned papers.


I would like to enter this card in the following challenges:

Thursday, 1 September 2016

Disco Butterfly


     The first of the month sees a new challenge start at CraftyHazelnut's Patterned Paper Challenge, we are an anything goes challenge as long as you have used patterned paper.
     This piece of paper has been in my stash for years, it's one of those left over pages from a selection pack that just sits waiting to be used.
     As I wanted to use my butterfly stamp I thought there should be a pop of colour somewhere on the paper so I got out the Brusho's and had a play. Working with water on paper is not the best idea but it didn't buckle too much and with some careful drying and pressing it lies flat again.
     The butterfly is stamped and embossed with Disco Black to give it a bit of zing, all that was left was to add a yellow mat layer to make the Brusho stand out and there we have it, another simple card using up some of that stash.
     Come and join us at CraftyHazelnut's Patterned Paper Challenge, it's anything goes with patterned paper so it doesn't have to be a card, it could be a scrap layout, gift box, decoration, anything with patterned paper.


I would like to enter this card in the following challenges:
Deep Ocean Challenges - Things With Wings

Monday, 1 August 2016

Shop 'Til You Drop


      At CraftyHazelnut's Patterned Paper Challenge we try and help you use some of that stash of gorgeous papers. This project was for my niece who just loves clothes shopping.
     The image is from The Stamping Chef and the papers have been in my stash so long I can't remember where they came from.
     The image is coloured with markers and die cut with a Spellbinder, then inked with Distress ink before taking the die off.
     The edge of a white card blank has been coloured pink before being covered with the patterned paper. Mounting the image panel on foam pads gives it a little dimension but not too much to get stuck in the mail.
     So have a look through all that gorgeous paper you have tucked away, be brave and use some of it, then show us your creation at CraftyHazelnut's Patterned Paper Challenge.


Friday, 1 July 2016

Easy Origami Box


        Good morning and welcome to my first project for CraftyHazelnut's Patterned Paper Challenge, I'm thrilled to have been asked to join the creative design team. This challenge is fabulous, you can enter anything you've made as long as you use patterned paper, so dig out those papers and come and join us.

     I like to use my papers for all sorts of projects, not just cards. This box is very easy to make, here's a link to a very good video tutorial.
     The only tip I could add to this great video is rather than fold the square in half, corner to corner to find the centre, mark it lightly with a pencil, then your finished box won't have any creases across the lid or base to spoil the end result.

     I have put a card insert inside both lid and base to make it a little neater. The lid has been stamped with cherry blossom and the base with a greeting, both have been coloured around the edges with Distress ink.
     This would be a nice way of hiding a personal message inside for the recipient. If you have several sheets of the same paper you could make the card, tag and gift box to match.
     The acetate butterfly on top is a digi stamp coloured with alcohol markers. You can find a post about where to get the digi's and how to make them here.
      When you've had time to go through your stash of papers and make your project, come and join us at CraftyHazelnut's Patterned Paper Challenge, we would love to see your creations.


I would like to enter this gift box in the following challenges:
Crafty Girls Creations - Anything Goes
Seize The Birthday - Birds, Bees or Butterflies
Decorate To Celebrate - Anything Goes
Try It On Tuesday - I Believe I Can Fly