Sunday, 16 January 2011

Quick pearlescent card


This little fellow is for a friends birthday. I don't usually do a lot with pink but this just seemed to be right.
The image is stamped with Archival Ink Coffee and clear embossed. The mouse and cake are coloured with watercolour pencils, the icing and candle are painted with Cosmic Shimmer watercolour paints.
I wanted to mat and layer the picture so I used Spellbinders Nesties but every pink card I tried wasn't quite right, until..... I played around with Brilliance Pearlescent Orchid ink pad! It's almost a perfect match for the 'Rose Hue' used for the icing. I only had to ink up the edge of the card because the middle is covered, no point in wasting ink! It dried well and has a perfect sheen to it. I'm now working my way through all my inks and matching them to the paints where I can, no more expensive pearl card required!
The edges of the main picture have been lightly inked with Distress Ink Spun Sugar whilst leaving the nestie on the card, giving the tiny white edge. The background has been stamped with a swirl in both Spun Sugar and Pearlescent Orchid.
If you have some pearlescent ink pads give it a try, if you don't you might like to get some. Brilliance are available in Dew Drop size which are not to expensive for a try out, good luck playing.

Friday, 5 November 2010

Glossy Inspiration

This was inspired by Pam and Viv at Ally Pally (thanks ladies). It's using three colours of Distress inks on glossy paper to get a graduted colour change. I'm not very good with a brayer so something like this is a way for me to achieve a similar look.
I used the waste from a die cut butterfly to create the mask to work with. I'm going to play with other shapes too, but this one really did screem to be used. The foliage is from 'Wild Meadow', an Elusive Images stamp plate that I was given recently. When stamping the foliage I masked off the butterfly for some of it to try and give some kind of dimension to the picture.
I shall be trying out some christmas shapes to see what I can come up with, if it works well I'll post them next week.

Wednesday, 13 October 2010

Winter Wonderland Sparkle

This is an easel card made using the 'Winter Wonderland' stamp plate by Sam Poole and Spellbinder Nestabilities Mega Curved Rectangles.


The trees are stamped and embossed with Cosmic Shimmer Black Sparkle on white card, matted onto black card, then matted onto white card that has been edged with Cosmic Shimmer Aurora Crystal Sparkle embossing powder. I found this was better than glitter as it does not shed, it was also easier to mat than using glitter card.


The base card was cut using the largest die in the set, making sure to keep the top fold below the cutting edge (or you'll have two lovely black rectangles). The glittery white layer was also cut with the large die so that they match up perfectly.
The top layer of the base card needs to be folded in half (mountain fold) to make it stand up. When fixing the white layer to the base card make sure you only glue it on the lower half of the folded area or your card will not stand up. A greeting fixed with foam pads to the inner base will give your card something to stand against when open. Don't worry about it being black inside, there's a white area on the back of the stand up that you can write on.
You can make easel cards with most of the nestabilities, they look professional, cost less than mass produced shop bought cards and you get the fun of making them too!
I've got a few more christmas cards to show you over the next couple of weeks but for now it's back to the samples for the Suffolk Papercraft Show at the end of the month.

Tuesday, 28 September 2010

Lone Stag


This topper is very quick and easy to create but looks great. All I used was Distress Ink Chipped Sapphire, the stag from the 'Winter Wonderland' stamp plate by Sam Poole, Cosmic Shimmer embossing powder 'Aurora Crystal Sparkle' and a tiny spritz of Cosmic Shimmer mica powder 'Pearlescent' from the 'Metalics' set, Oh and a torn piece of paper.
The card is inked from the top working down. Tear a piece of paper to make your hill mask. Lay this paper mask about 1/4 of the way down the card and using cut and dry foam gently ink up your sky. Move the paper mask down a little changing the angle slightly and begin inking up your hills, this time use less ink and less pressure to achieve the paler layer. Repeat this for the next layer again applying even less ink and even less pressure, now you have a graduated background.
Spritz the card lightly with water and dab off, this will give you a snowfall effect. It doesn't show up very well in this picture but I then spritzed the card with a tiny spray of the pearlescent mica made from the powder set using the little bottle in the pack.
A tip for making up your powders into sprays - don't follow the instructions on the bottle as this will use up most of your powder, ignore the little arrows and only mix up 1/2 a teaspoon of powder with enough water to reach the lower arrow. It lasts ages and you can always make more if you need it.
The stag is stamped in Chipped Sapphire and then embossed with Aurora Crystal Sparkle and that's all there is to it. This card looks good in other colours too, like Dusty Concorde. Depending on how you mat and layer the topper you could get several different looks to your cards using the same picture, great for a few last minute extras.

Wednesday, 15 September 2010

Blooming Fuchsia

This card was made using the 'Fuchsia' stamp plate from Creative Expressions and a gorgeous sheet of fuchsia coloured metal from Walnut Hollow. I was lucky enough to find a sheet of mirri board the same colour as the metal which really helped frame it.
The metal was coloured with alcohol inks, Purple Twilight, Raspberry and Pesto. I stamped the swirl in black Archival ink on the front of the metal and very gentley traced over it, then I turned it over and traced the lines a bit harder on the back to get the raised swirls on the front.
The flowers were stamped on the back of the metal and worked with the texture tool to produce a raised image on the front. I felt black lines on the swirls made it a stronger looking branch, no black lines on the flowers a softer image.
To stop all your hard work being squashed pack the back of the raised areas with filler, I use 'Sand Less Filler' from B&Q (500ml pot will last you months). It dries very quickly and is so smooth you really do sand less! No idea what it's like on a wall...it's for crafting!!!
To remove the colour on the flowers I used Blending solution. The coloured metals from WH are coated aluminium (except copper and brass) so the top colour can be sanded off or wiped off with the blending solution. I felt this made the flowers stand out more.
Well it's onto christmas designs now so I'll post one I'm working on at the moment when it's finished. Happy crafting!


Sunday, 22 August 2010

Sample Board


This is the sample board I made to take to Jarrolds on saturday, I would like to say thankyou to Lisa, Amanda and the other ladies at the store for being so welcoming.
The board shows many of the different coloured metals Walnut Hollow make, as well as several patterns from their 'Design Sheets' (firm plastic moulds to push the metal into) and patterns made using the 'Roller Points' from the beginners kit. I also used Spellbinders Impressabilities and Dies as well as a selection of stamps from Creative Expressions.
In the following few weeks I will post some of the cards made using WH metal and show you how to preserve you hard work from being squashed! The metal is a very tactile medium and everyone was drawn to touch the artwork.
I've enjoyed using the metal and now plan to make my dad's birthday card with it, after all if he doesn't like it at least it has scrap value!!!

Monday, 16 August 2010


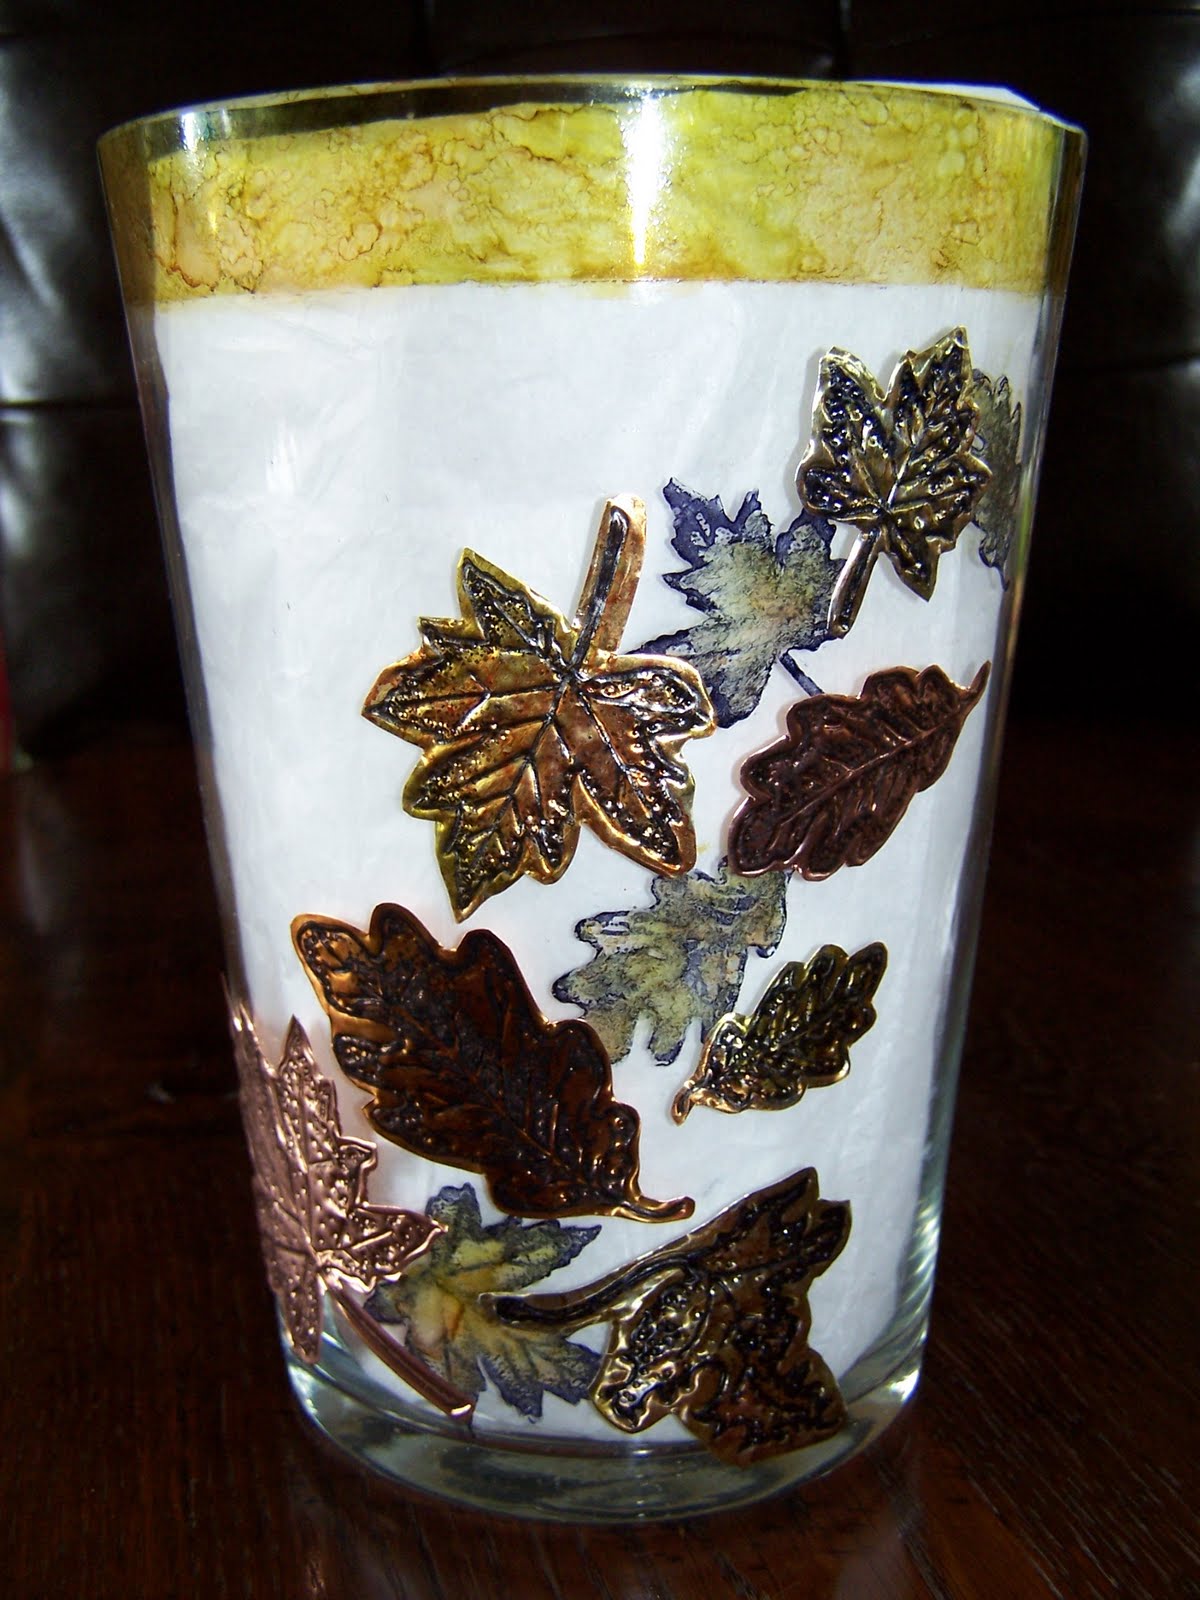
This is the next project working with Walnut Hollow. It started life as a plain clear glass vase (again found in a charity shop).I've lined the vase with tissue paper so you can see the design more clearly.
I used alcohol inks to colour an inch deep rim around the top, then using the same inks I coloured three sheets of metal. Then I stamped leaves from 'Autumn Foliage' by Creative Expressions in Ranger black Archival Ink on the decorated metal sheets. These were left overnight to dry before working the design from the front. They were cut out, leaving a small border around the outside, using the W.H. metal scissors (don't mess up your other scissors, these are made for metal!)
I also stamped some leaves directly onto the vase, it was tricky stamping on a curve but if you cup the stamp in the palm of your hand it will work just fine. Stamp the same leaves onto a post it type note and cut out the leaf leaving a lovely leaf shape whole as your mask. Then with the alcohol inks colour the stamped leaves through the mask, it will blur the black slightly but I think it lookes OK and by the time the metal leaves are on the vase nobody will be looking at them that closely anyway.
The last step is then to stick the metal leaves onto the vase with W.H. double sided tape (VERY sticky stuff) and there you have it, one autumn vase. This would have to be gently hand washed but it should last quite well and with a few chrysanthemums in it will look great on your table.