Showing posts with label wreath. Show all posts

Wednesday, 11 December 2019

Seasons Greetings


     Not Just Cards challenge blog is for all things crafty, so this month I made a wreath for the door.
     The base for this was a polystyrene ring, which I then covered with hessian ribbon, to secure the ends I used hot glue.
     There is a wire loop on the back which gives me somewhere to tie the wreath to the door.
     The pine fronds are from an old artificial tree that I use as an outside decoration. The pine cones were collected on one of many walks around parkland, all I had to do was use the hot glue gun to secure it all and add in a few wired berries.
     The bow is wire edged ribbon, again stuck on with hot glue. A rather simple but effective seasonal make. Please pop over to Not Just Cards and see what other inspiration we have.


I would like to enter this project in the following challenges:
The Holly and Ivy - Anything Christmas
International Art & Soul - Anything BUT A Card

Thursday, 3 October 2019

Cornflower Wreath


     A wreath isn't just for Christmas and with these gorgeous cornflowers and a couple of poppies it's perfect for Autumn. All the flowers and foliage are die cut with John Next Door dies, you can find a full list at the end.

     I  cut two rings out of a cereal packet and stuck them together, print side in, but I wanted something more substantial to hang up.
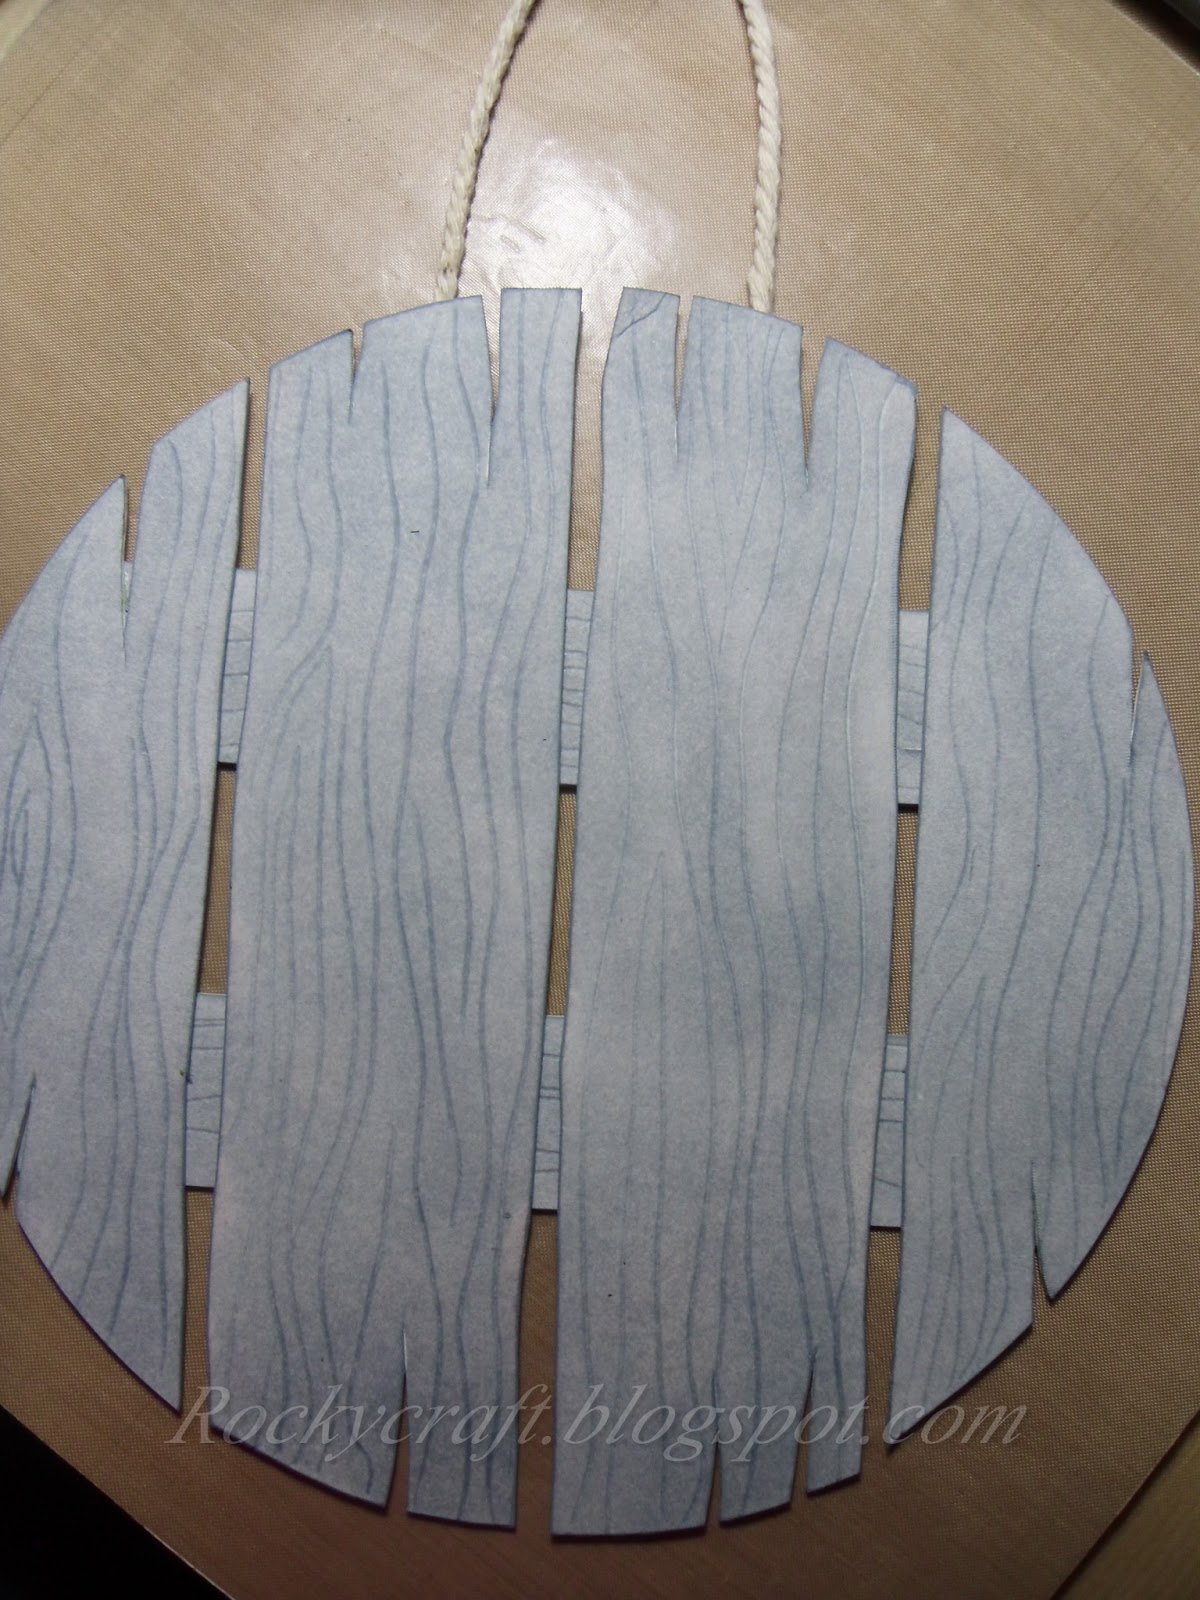
     I cut my plaque from mount board using an MDF one I found in the bottom of my stash box.
     It was coloured with Distress Ink Weathered Wood, scored to give a grain effect and then coloured again with the same ink.
    A small length of cord was added to the back to make hanging easy.
   
     The cardboard ring was coloured green with an alcohol marker, then I set about cutting out lots and lots of foliage in various shades of green using thin card.
     All of the foliage was also coloured with Distress Inks to give it shading before working it all with a ball tool.

     I started working my way around the ring adding foliage as I went, working in one direction only and making sure not to make it look symmetrical.
     The Elderflower leaves become a cross between flower and foliage if you colour the tips of the fronds, a bit like Gypsophelia.
     Once all the foliage was stuck down, and there was a lot of it, I left the wreath to dry off completely while I die cut the flowers.
     The Cornflowers are cut in three different shades of blue card, two of them are pearl card. I also cut some extra centres in thin black card to add that extra oomph to them. The poppies are stamped in red on red card, then die cut and coloured around the edge with black ink to tone them down a bit.
     I placed flowers around the ring before I stuck anything down, just to see if it looked alright. Spending a few minutes doing this was well worth it as I moved them around a few times before I was happy. I made sure they weren't uniform in size and position and with such pretty foliage a few gaps looked just fine. The last thing was to stick the ring to the plaque, again making sure the flower positions looked random and off line.
     With a big die cut Thank You in the centre it would make a very nice remembrance wreath, though sadly being card it's not weather proof.


Materials List    Available from your local craft shop
JND115 - Cornflower Die     (Cornflower Stamp JND116 - not used on this project)
JND053 - Blousy Poppy Die
JND054 - Blousy Poppy Stamp
JNDAD016 - Elderflower Dies
JNDAD015 - Rose Leaves Die set
JNDAD002 - Starflower Leaves Die
JND129 - Mini Ivy Leaves Dies
Stix2 3D PVA Glue


I would like to enter this project in the following challenges:
World Wide Open DT - Anything Goes   (JND Design Team for Hochanda)
Classic Design Team Open - Anything Goes   (JND Design Team for Hochanda)
Crafts Galore Encore - Anything Goes
Crafting By Designs - Anything Goes

Thursday, 15 December 2016

Driving Round In Circles


     Ever wondered what to do with that old road atlas? This year it's being put to use on my front door. I'm not a fan of SatNav, I prefer a good old fashioned map, so when I bought a new road atlas for my car I wondered what I could do with the old one, as an avid crafter I hate to throw anything away.
      I removed each page and trimmed the rough edge, then cut each page into three strips vertically. Using a bamboo skewer I rolled each strip into a straw, I made lots of straws!
     Starting with four straws I followed a great You Tube video and began to plait around a strong card tube from a roll of food bags, I found the aerosol can (as used in the video) a bit too big. If you need to take a break then just pin the straws in place with a clothes peg, that way you don't loose your place or unravel.
     I kept going until it was long enough to bend gently into a full circle and finished off as per the video, then using my trusty hot glue gun I fixed the ends together.
     I didn't want to spray my wreath with paint, I like the map look, it fits perfectly with my families love of vehicles.
     I hunted around for some hessian ribbon and found this one at the local florist, it has wired edges making it easy to shape.
     The leaves are die cut and embossed silver mirri card and the three baubles are shatterproof, all fixed on to the wreath with hot glue from Stix2. I couldn't find any royal blue baubles so I used nail varnish to paint a silver one.
     It is fixed to my front door by threading lacing cord through the wreath and then through some tiewrap blocks stuck to the door. We have a porch so the wreath won't get wet, it's quite strong and surprisingly heavy for paper but then it is nearly a whole atlas. After Christmas it may get put away with the rest of the decorations or it may be recycled.


I would like to enter my wreath in the following challenges:
Holly Jolly - Christmas Card or Anything Christmas
Paperminutes - Christmas Decoration
Mixed Media World - Winter Wonderland
Country View - Christmas
Sparkles Christmas - Anything But A Card
Rhedd's Creative Spirit - Anything Goes
Tuesday Throwdown - Anything Goes
Eclectic Ellapu - Anything Christmas


Sunday, 1 November 2015

Magazine Wreath


     This wreath is made using a magazine so it has lots of colour in it, for a more subtle decoration try using an old book or sheet music. The middle can be decorated with fir cones rather than baubles for a fully recycled look.
     Each page has been rolled into a cone, this wreath has approximately 46 cones made from half of an A5 page. The overall size will vary depending on your page size.
     The first layer of cones was stuck to a cardboard circle using hot glue, the following layer was also stuck down using hot glue and placing each cone in the gap between the first ones. The centre layer has less cones as it's a smaller circle, you could continue with shorter cones and less of them until the middle is full, or you could stick baubles or cones in the centre.
     The baubles could be old ones that no longer have their hangers or bargain finds from local charity shops. This time of year they are selling lots of pre-loved decorations at great prices so you can recycle and help charities too.
     On the back of the card circle I have stuck a string loop firmly covered by another card circle so it's neat and tidy. After Christmas I can remove the baubles and save them for next year, then recycle the paper and card keeping storage to a minimum.
     Pop over to Altered Eclectics for a look at some of the other recycling ideas, there are some great gift ideas using household items. Come and join us with your creations, we would love to see them.


I would like to enter this wreath in the following challenges:
Sparkles Christmas Challenge - Christmas Decorations
4 Crafty Chicks - Anything Goes
Allsorts - Christmas
Crazy 4 Challenges - Christmas
Winter Wonderland - Christmas

Tuesday, 24 July 2012

Holly Wreath

 This weeks challenge over at 52 Christmas Card Throwdown is to use a wreath on your card. Also over on J and C Creations challenge blog the theme is anything goes using Sizzix dies so this card joins them together nicely.
The holly leaves have been cut from cream card stamped with a music score. There were four different colours used, Archival Coffee, Distress Brushed Corduroy, Distress Forest Moss and Distress Iced Spruce. I cut 30 leaves from the Sizzix Festive Greenery die as it has four different holly leaves on it. All the leaves were then edged with Distress Forest Moss.
The wreath was built by gluing each leaf to another, I used a round shape as a template to help me keep a decent shape, it's not as easy as you think to make a good circle!
Having glued the wreath together I then stuck red gems on as berries and put a red bow at the top.

The numbers are cut from sticky sided card using Sizzix alphabet Round Table. Peel off the top layer and sprinkle with gold glitter, I found that the glitter was shedding a little so I sprayed it with hair lacquer to fix it.
The numbers are mounted on foam pads and fixed in the middle of the wreath.
The backing paper is from Chocolate Baroque CD Rom Seasons Greetings printed in draft so that it's paler and doesn't overpower the wreath. The holly paper is matted on to red mirri card and mounted on to what used to be a white card blank, the edges have been coloured with Distress Forest Moss to get a nice dark green as the white didn't look good. In the corners of the holly paper are small gold peel off corners, I've used peel offs because I can usually get two or three corners to emboss well but the fourth never seems to work.
It was fun making a Christmas card in such hot weather, after all it was too hot to be outside wasn't it?!